177
7
Settings
4
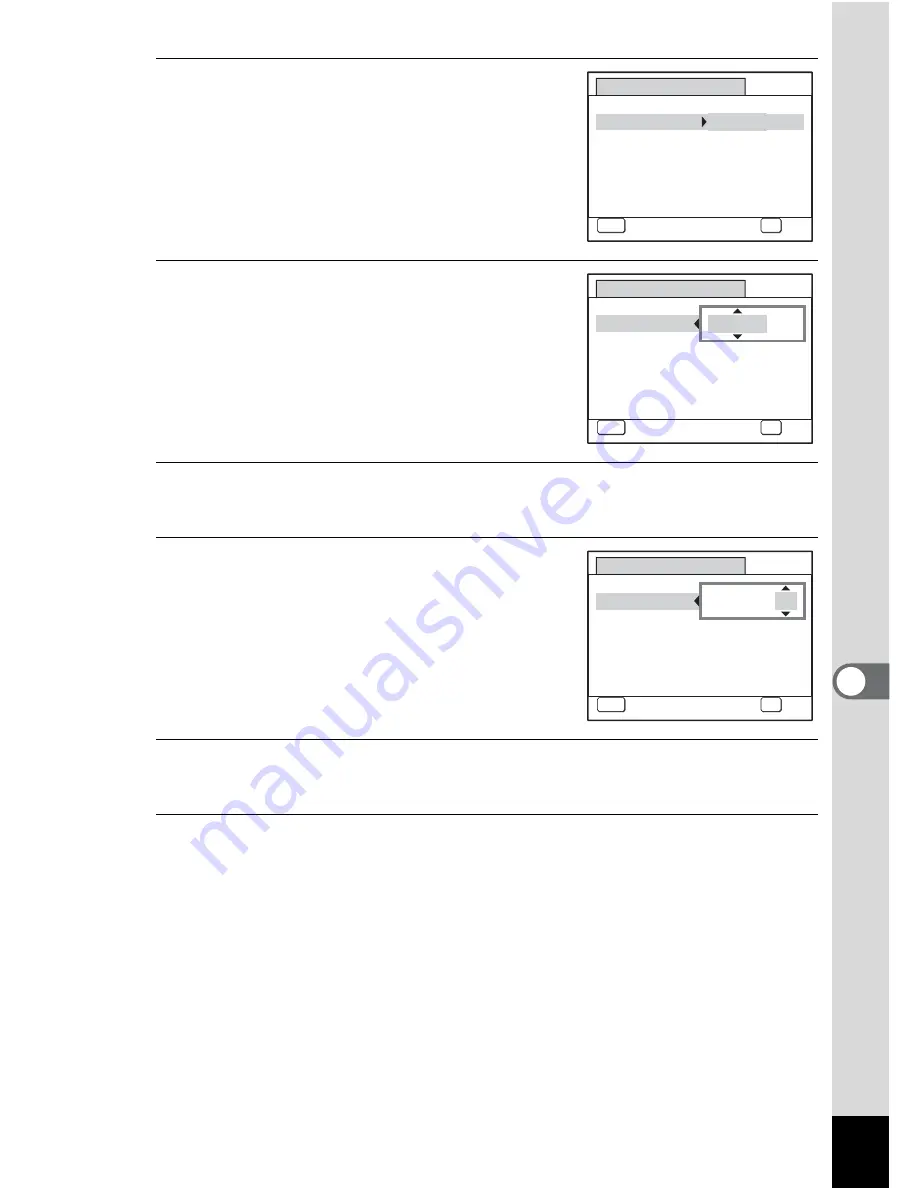
Press the four-way controller (
5
).
The frame moves to [mm/dd/yy].
Depending on the initial setting or previous
setting, [dd/mm/yy] or [yy/mm/dd] may be
displayed.
5
Use the four-way controller (
23
)
to choose the date and time
display style.
Choose from [mm/dd/yy], [dd/mm/yy] or
[yy/mm/dd].
6
Press the four-way controller (
5
).
The frame moves to [24h].
7
Use the four-way controller (
23
)
to select [24h] (24-hour display) or
[12h] (12-hour display).
8
Press the four-way controller (
5
).
The frame returns to [Date Style].
9
Press the four-way controller (
3
).
The frame moves to [Date].
D a t e A d j u s t
MENU
C a n c e l
D a t e S t y l e
mm dd yy
D a t e
0 1 / 0 1 / 2 0 0 8
Ti m e
0 : 0 0
OK
O K
/
/
24h
D a t e A d j u s t
MENU
C a n c e l
D a t e S t y l e
mm dd yy
D a t e
0 1 / 0 1 / 2 0 0 8
Ti m e
0 : 0 0
OK
O K
/
/
24h
D a t e A d j u s t
MENU
C a n c e l
D a t e S t y l e
mm dd yy
D a t e
0 1 / 0 1 / 2 0 0 8
Ti m e
0 : 0 0
OK
O K
/
/
24h
Summary of Contents for OPTIO L60
Page 47: ...2 Common Operations Understanding the Button Functions 46 Setting the Camera Functions 51...
Page 175: ...7 Settings Camera Settings 174...
Page 217: ...Memo...
Page 222: ...Memo...
Page 223: ...Memo...


