88
Running Sequence
■
Tour Sequence
The following functions are available only if a Tour
Sequence has been previously established through the
Administration Console. As described on the setup, any of
the tours can be assigned to any of the monitors.
1. Select the desired monitor.
Refer to the Monitor Selection.
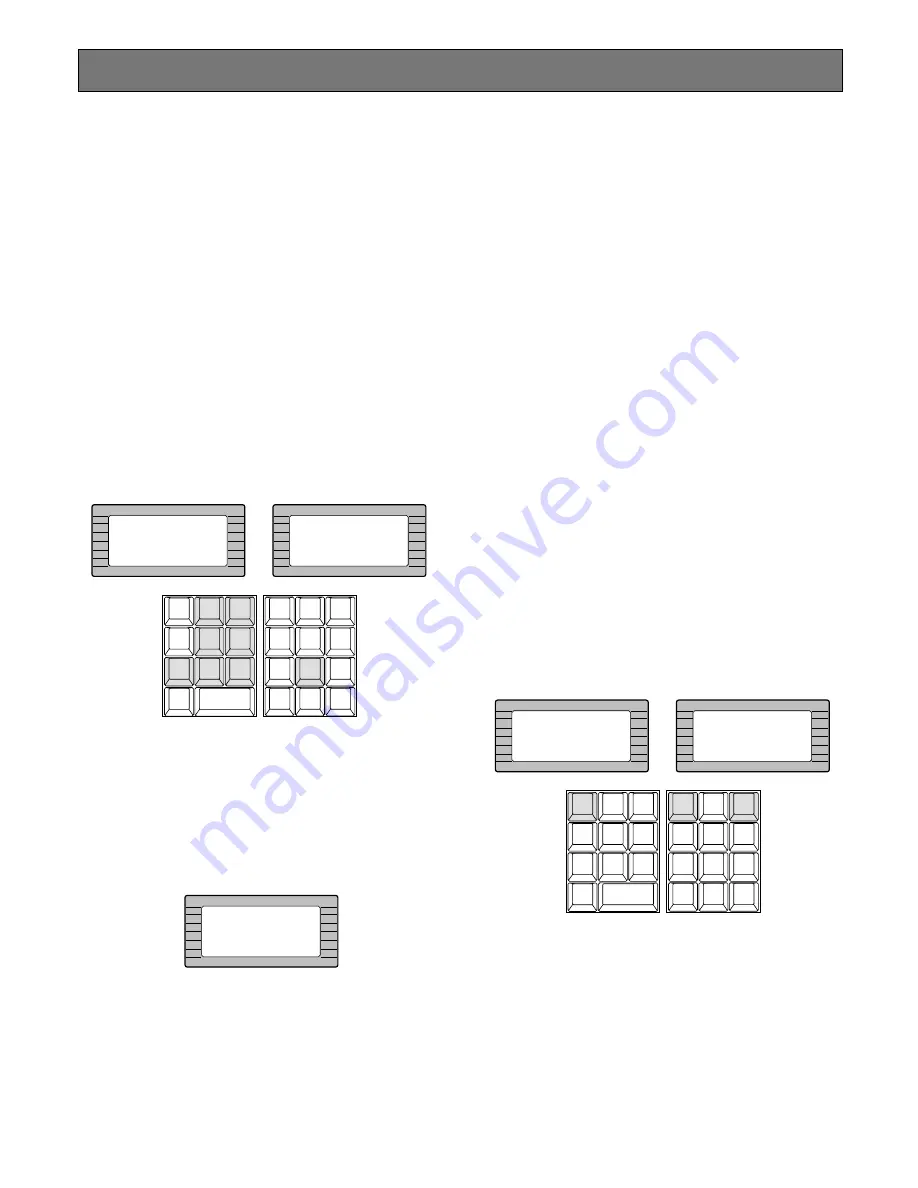
2. Select the desired Tour Sequence Number by pressing
the numeric keys.
3. Pressing the
[FWD RUN]
key while holding down the
[TOUR SEQ]
key will run the tour sequence in forward
direction on the active monitor, or pressing the
[REV
RUN]
key while holding down the
[TOUR SEQ]
key will
run the tour sequence in reverse direction on the active
monitor.
The selected Tour Sequence Number (T8) with “R” sign
(indicate running status) is displayed on the active
monitor.
Note:
By the factory default setting, pressing the
[TOUR SEQ]
key after numeric input will run the
selected Tour Sequence forward.
4. Press the
[PAUSE]
key to pause a Tour Sequence that
is being run on the active monitor.
The “P” sign (indicating the pause status) is displayed
at the Tour Sequence Number on the active monitor.
5. Press the
[FWD RUN]
key to restart a Tour Sequence
forward from the next step that was previously paused
by pressing the PAUSE key.
6. Press the
[REV RUN]
key to restart a Tour Sequence
backward from the next step that was previously
paused by pressing the PAUSE key.
7. Press the
[NEXT]
key to move the sequence one frame
to the next step (in forward or reverse run direction)
from the step that was previously paused by pressing
the PAUSE key.
8. Press the
[PREV]
key to move the sequence one frame
to the previous step (in forward or reverse run direc-
tion) from the step that was previously paused by
pressing the PAUSE key.
9. To return to Spot monitoring, press the
[STOP]
key to
end a Tour Sequence that is being run on the active
monitor.
■
Call Group Preset
The following function is available only if a Group Preset
has been previously established through the Administration
Console.
1. As described earlier, a Group Preset determines which
monitor is to be assigned to which camera. Therefore,
selecting a monitor is not required.
2. Select a desired Group Preset Number by pressing the
Numeric keys.
3. Press the
[GROUP PRESET]
key to activate a selected
Group Preset function.
The selected preset position of the cameras is dis-
played on the assigned monitors at a time.
INFORMATION
Entry:8
INFORMATION
Seq 8 Fwd Run
CAM ID
VLD S
T&D
ALM S
GEN
SYS S
(ALARM)
0
8
7
MSTATUS
VLD H
ALL
ALM H
BLK
5
9
6
4
2
3
1
SHIFT
CLEAR
(ESC)
EXIT
GROUP
PRESET
PREV
S-CTL ID
OPE ID
NEXT
GROUP
SEQ
PAUSE
STOP
TOUR
SEQ
R E V
RU N
F W D
RU N
OSD
VER
MONITOR
LOCK
OSD SERVICE
INFORMATION
Seq 8 Pause
INFORMATION
Entry:13
INFORMATION
Group Preset 13
CAM ID
VLD S
T&D
ALM S
GEN
SYS S
(ALARM)
0
8
7
MSTATUS
VLD H
ALL
ALM H
BLK
5
9
6
4
2
3
1
SHIFT
CLEAR
(ESC)
EXIT
GROUP
PRESET
PREV
S-CTL ID
OPE ID
NEXT
GROUP
SEQ
PAUSE
STOP
TOUR
SEQ
R E V
RU N
F W D
RU N
OSD
VER
MONITOR
LOCK
OSD SERVICE


