background image

18

Wiring

Chapter 2-2

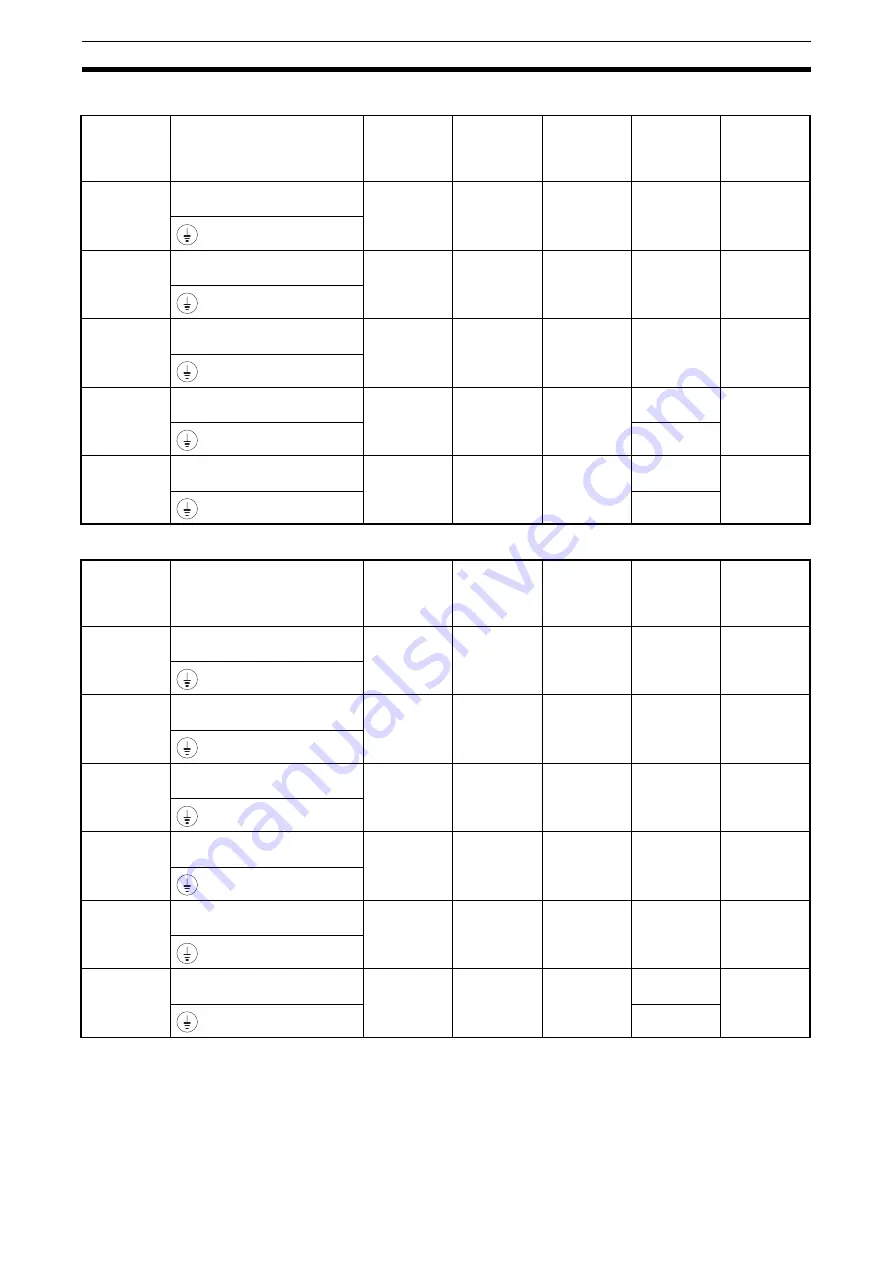
Single-phase 200-V AC Model

3-phase 400-V AC Model

Model 

CIMR-J7AZ-

Terminal symbol

Terminal 

screw

Terminal 

torque 

(N

m)

Wire size 

(mm

2

)

Re-

commended 

wire size 

(mm

2

)

Circuit 

breaker 

capacity 

(A)

B0P1

R/L1, S/L2, T/L3, –, +1, +2,
U/T1, V/T2, W/T3

M3.5

0.8 to 1.0

0.75 to 2

2

5

B0P2

R/L1, S/L2, T/L3, –, +1, +2,
U/T1, V/T2, W/T3

M3.5

0.8 to 1.0

0.75 to 2

2

5

B0P4

R/L1, S/L2, T/L3, –, +1, +2,
U/T1, V/T2, W/T3

M3.5

0.8 to 1.0

0.75 to 2

2

10

B0P7

R/L1, S/L2, T/L3, –, +1, +2,
U/T1, V/T2, W/T3

M3.5

0.8 to 1.0

2 to 5.5

3.5

20

2

B1P5

R/L1, S/L2, T/L3, –, +1, +2,
U/T1, V/T2, W/T3

M3.5

0.8 to 1.0

2 to 5.5

5.5

20

2

Model 

CIMR-J7AZ-

Terminal symbol

Terminal 

screw

Terminal 

torque 

(N

m)

Wire size 

(mm

2

)

Re-

commended 

wire size 

(mm

2

)

Circuit 

breaker 

capacity 

(A)

40P2

R/L1, S/L2, T/L3, –, +1, +2,
U/T1, V/T2, W/T3

M3.5

0.8 to 1.0

2 to 5.5

2

5

40P4

R/L1, S/L2, T/L3, –, +1, +2,
U/T1, V/T2, W/T3

M3.5

0.8 to 1.0

2 to 5.5

2

5

40P7

R/L1, S/L2, T/L3, –, +1, +2,
U/T1, V/T2, W/T3

M3.5

0.8 to 1.0

2 to 5.5

2

5

41P5

R/L1, S/L2, T/L3, –, +1, +2,
U/T1, V/T2, W/T3

M3.5

0.8 to 1.0

2 to 5.5

2

10

42P2

R/L1, S/L2, T/L3, –, +1, +2,
U/T1, V/T2, W/T3

M4

1.2 to 5.5

2 to 5.5

2

10

44P0

R/L1, S/L2, T/L3, –, +1, +2,
U/T1, V/T2, W/T3

M4

1.2 to 1.5

2 to 5.5

2

20

3.5

Summary of Contents for J7 series

Page 1: ...EN 01 OMRON YASKAWA MOTION CONTROL B V Wegalaan 65 2132 JD Hoofddorp The Netherlands phone 31 0 23 568 74 00 fax 31 0 23 568 74 88 www omronyaskawa com Note Specifications subject to change without n...

Page 2: ...elations with other products You should assume that anything not described in this manual is not possible 2 Although care has been given in documenting the product please contact your OMRON representa...

Page 3: ...amage Indicates a potentially hazardous situation which if not avoided may result in minor or moderate injury or property damage OMRON YASKAWA Product References All OMRON YASKAWA products are capital...

Page 4: ...ing places Doing so may result in electrical shock fire or damage to the product Locations subject to direct sunlight Locations subject to temperatures or humidity outside the range specified in the s...

Page 5: ...firming that the power supply has been turned OFF Not doing so may result in electrical shock Wiring must be performed by authorized personnel Not doing so may result in electrical shock or fire Be su...

Page 6: ...set to be continued in the processing selection function after momentary power interruption is reset Doing so may result in injury Provide a separate emergency stop switch because the STOP Key on the...

Page 7: ...oing so may result in electrical shock or injury Do not attempt to take the Unit apart or repair Doing either of these may result in electrical shock or injury Carefully handle the Inverter because it...

Page 8: ...that the delivered product is the VARISPEED J7 Inverter that you ordered Should you find any problems with the product immediately contact your nearest local sales representative Checking the Nameplat...

Page 9: ...Run Describes the method for controlling a motor through the frequency adjuster on the front of the Inverter This can be used for trial operation of the system Chapter 5 Basic Operation Describes basi...

Page 10: ...ns that apply to the combination of products in the customer s application or use of the products At the customer s request OMRON YASKAWA will provide applicable third party certification documents id...

Page 11: ...rm actual specifications of purchased products DIMENSIONS AND WEIGHTS Dimensions and weights are nominal and are not to be used for manufacturing purposes even when tolerances are shown PERFORMANCE DA...

Page 12: ...XII...

Page 13: ...1 5 3 Setting the Local Remote Mode 53 5 4 Selecting the Operation Command 54 5 5 Setting the Frequency Reference 55 5 6 Setting the Acceleration Deceleration Time 60 5 7 Selecting the Reverse Rotatio...

Page 14: ...7 7 Register Number Allocations in Detail 111 7 8 Communications Error Codes 115 7 9 Self diagnostic Test 116 CHAPTER 8 Communications 117 8 1 Protective and Diagnostic Functions 118 8 2 Troubleshooti...

Page 15: ...1 CHAPTER 1 Overview 1 1 Function 2 1 2 Nomenclature 3...

Page 16: ...ance The cooling fan is easily replaceable The life of the cooling fan can be prolonged by turning on the cooling fan only when the Inverter is in operation Suppression of Harmonics Connects to DC rea...

Page 17: ...splay Increment key Increase constant no or data Switch functions among function display LEDs Decrement key Decrease constant no or data Enter key Enter data when setting constants After selecting con...

Page 18: ...lectable while this indicator is lit Note This status of this indicator can be only monitored while the Inverter is in operation Any RUN command input is ignored while this indicator is lit PRGM indic...

Page 19: ...1 2 Installations Conditions 8 2 2 Wiring 10 2 2 1 Removing and Mounting the Covers 11 2 2 2 Terminal Block 12 2 2 3 Standard Connections 16 2 2 4 Wiring around the Main Circuit 17 2 2 5 Wiring Contro...

Page 20: ...J7AZB0P4 0 1 to 0 4 kW Single phase 200 V AC Input D 8 5 5 6 56 68 118 128 D1 t Rated voltage Model CIMR J7AZ Dimensions mm Weight kg D D1 t 3 phase 200 V AC 20P1 70 10 3 Approx 0 5 20P2 70 10 3 Appr...

Page 21: ...2 to 2 2 kW 3 phase 400 V AC Input Rated voltage Model CIMR J7AZ Dimensions mm Weight kg D D1 3 phase 200 V AC 21P5 129 64 Approx 1 3 22P5 154 64 Approx 1 5 Single phase 200 V AC B0P7 129 64 Approx 1...

Page 22: ...ng so may result in injury Be sure to install the product in the correct direction and provide specified clearances between the Inverter and control panel or with other devices Not doing so may result...

Page 23: ...ture Control To enhance operation reliability the Inverter should be installed in an environment free from extreme temperature changes If the Inverter is installed in an enclosed environment such as a...

Page 24: ...take other safety measures against short circuiting in external wiring Not doing so may result in fire Confirm that the rated input voltage of the Inverter is the same as the AC power supply voltage A...

Page 25: ...s with a screwdriver Press the left and right sides of the front cover in the arrow 1 directions and lift the bottom of the cover in the arrow 2 direction to remove the front cover as shown in the fol...

Page 26: ...Circuit Terminals CIMR J7AZ20P1 to CIMR J7AZ20P7 CIMR J7AZB0P1 to CIMR J7AZB0P4 CIMR J7AZ21P5 to CIMR J7AZ24P0 CIMR J7AZB0P7 to CIMR J7AZB4P0 CIMR J7AZ40P2 to CIMR J7AZ44P0 Main Circuit Input Terminal...

Page 27: ...0 V AC CIMR J7AZ4_ 3 phase 380 to 460 V AC V T2 W T3 1 Connection terminals 1 and 2 DC reactor connection terminals 1 and DC power supply input terminals Connect the DC reactor for suppressing harmoni...

Page 28: ...C 10 S2 Multi function input 1 S2 Set by parameter n36 Reverse Stop S3 Multi function input 2 S3 Set by parameter n37 Fault reset S4 Multi function input 3 S4 Set by parameter n38 External fault Norma...

Page 29: ...current input can be selected Parameter settings are required together with the selection of the frequency reference input method 24 V DC 10 S1 to 5 S1 to 5 NPN PNP S1 to 5 GND SW7 0 1 3 3k 24V 360 S...

Page 30: ...ntact output NO NC Common Analog monitor output Analog monitor output common Forward Stop Multi function input 1 S2 Multi function input 2 S3 Multi function input 3 S4 Multi function input 4 S5 Sequen...

Page 31: ...rew Screw tightening torque N m Wire size mm2 Re commended wire size mm2 Molded case circuit breaker capacity A 20P1 R L1 S L2 T L3 1 2 U T1 V T2 W T3 M3 5 0 8 to 1 0 0 75 to 2 2 5 20P2 R L1 S L2 T L3...

Page 32: ...M3 5 0 8 to 1 0 2 to 5 5 3 5 20 2 B1P5 R L1 S L2 T L3 1 2 U T1 V T2 W T3 M3 5 0 8 to 1 0 2 to 5 5 5 5 20 2 Model CIMR J7AZ Terminal symbol Terminal screw Terminal torque N m Wire size mm2 Re commende...

Page 33: ...ardous to humans and excludes high frequencyleakage current For the special purpose breaker for Inverters choose a ground fault interrupter with a sensitivity amperage of at least 10 mA per Inverter W...

Page 34: ...sorber Always use a surge absorber or diode for the inductive loads near the Inverter These inductive loadsinclude magnetic contactors electromagnetic relays solenoid valves solenoid and magnetic brak...

Page 35: ...r parts to burn Do not Use an Electromagnetic Switch of Magnetic Contactor Do not connect an electromagnetic switch of magnetic contactor to the output circuit If a load is connected to the Inverter d...

Page 36: ...tor in the Inverter s output section To prevent this from occurring use a cable of no more than 100 meters between the Inverter and the motor If the cable must be longer than 100 meters take measures...

Page 37: ...ng machines or power tools Always use a ground wire that complies with technical standards on electrical equipment and minimize the length of the ground wire Leakage current flows through the Inverter...

Page 38: ...al power supply Second harmonic 120 100 Hz Third harmonic 180 150 Hz Problems Caused by Harmonics Generation The waveform of the commercial power supply will be distorted if the commercial power suppl...

Page 39: ...rectifiers and smoothing the pulsating one side voltage with capacitors Such AC current however contains harmonics Inverter The Inverter as well as normal electric machines has an input current contai...

Page 40: ...ternal circuitry of the Inverter in operation otherwise an electric shock or burn injury may occur Wiring Method With DC Reactor With DC and AC Reactors Reactor Effects Harmonics are effectively suppr...

Page 41: ...ase of connection Note Make sure that the wire size is 0 5 mm2 when using the following solderless terminal Terminal screw size Tightening torque N m Wire Wire size Recommended wire size Cable M3 0 5...

Page 42: ...ered 3 The end of each wire connected to the control circuit terminals must be stripped for approximately 5 5 mm 4 Connect the shield wire to the ground terminal of the CIMR J7AZ Do not connect the sh...

Page 43: ...Control Circuit Terminals Note I O signals can be connected to a single shielded cable MCCBs Noise Filter 3 phase 200 V AC Single phase 200 V AC 3 phase 400 V AC Clamp core Forward Stop Sequence input...

Page 44: ...etween the Inverter and the motor does not exceed 20 cm Furthermore connect a clamp core Clamp Filter close to the output terminals of the Inverter Wiring a Control Cable Be sure to connect a cable wi...

Page 45: ...table to the Inverter for protecting the Inverter from damage that may result from short circuiting Use one MCCB per Inverter Select a suitable MCCB from the following table With 400 V Inverters it is...

Page 46: ...In that case however take some appropriate measures so that the MCCB will protect all the Inverters from the occurrence of any single short circuit The frequency reference power supply FS of the Inve...

Page 47: ...33 CHAPTER 3 Preparing for Operation and Monitoring 3 1 Nomenclature 34 3 2 Outline of Operation 35...

Page 48: ...ectable while this indicator is lit Note Note This status of this indicator can be only monitored while the Inverter is in operation Any RUN command input is ignored while this indicator is lit PRGM i...

Page 49: ...FREF Frequency Reference Monitors and sets the frequency reference FOUT Output Frequency Monitors the output frequency Note This indicator will be lit by turning the Inverter on again if the Inverter...

Page 50: ...p speed operation 3 The frequency reference can be changed even during operation Example of Multi function Display Key sequence Indicator Explanation Display example Power ON Note If the FREF indicato...

Page 51: ...er U05 DC bus voltage V Monitors the DC voltage of the internal main circuit of the Inverter U06 Input terminal status Shows the ON OFF status of inputs U07 Output terminal status Shows the ON OFF sta...

Page 52: ...and then press the Mode Key to display an item that has a green indicator FREF to MNTR Then input the RUN command again Key sequence Indicator Explanation Display example Press the Mode Key repeatedl...

Page 53: ...d first turn the RUN command OFF and then press the Mode Key to display an item that has a green indicator FREF to MNTR Then input the RUN command again Key sequence Indicator Explanation Display exam...

Page 54: ...40 Outline of Operation Chapter 3 2...

Page 55: ...e for Test Run 43 4 2 Operation Example 45 4 2 1 Power Connection 45 4 2 2 Check the Display Status 45 4 2 3 Initializing Parameters 46 4 2 4 Setting the Rated Motor Current 46 4 2 5 No load Operation...

Page 56: ...continued in the processing selection function after momentary power interruption is reset Doing so may result in injury Provide a separate emergency stop switch because the STOP Key on the Operator...

Page 57: ...nnected to the mechanical system Having conducted the above checks connect the power supply 4 Check the Display Status Check to be sure that there are no faults in the Inverter If the display at the t...

Page 58: ...peration Operation that uses PID control or other functions Refer to page 6 1 For operation within standard parameters refer to Chapter 5 Basic Operation Refer to Chapter 5 Basic Operation and Chapter...

Page 59: ...et the motor to no load status i e not connected to the mechanical system Connecting the Power Supply After conducting the above checks connect the power supply 4 2 2 Check the Display Status If the d...

Page 60: ...tor Display example Explanation Power ON v Press the Mode Key repeatedly until the PRGM indicator is lit Press the Enter Key The data of n01 will be displayed Use the Increment or Decrement Key to set...

Page 61: ...the motor in the no load state in the forward or reverse direction press the STOP RESET Key The motor will stop Key sequence Indicator Display example Explanation Press the Mode Key to turn on the FRE...

Page 62: ...perator In case a fault occurs during operation make sure the Stop Key on the Digital Operator is easily accessible Use the Digital Operator in the same way as no load operation First set the frequenc...

Page 63: ...y Reference 55 5 5 2 Upper and Lower Frequency Reference Limits 56 5 5 3 Adjusting the Analog Input 56 5 5 4 Setting Frequency References through Key Sequences 57 5 6 Setting the Acceleration Decelera...

Page 64: ...lues Set Value Setting the Rated Motor Current n32 Set the rated motor current n32 in order to prevent the motor from burning due to overloading Check the rated current on the motor nameplate and set...

Page 65: ...see note 1 Default setting 60 0 n10 Maximum Voltage VMAX Changes during operation No Setting range 1 to 255 V see note 2 Unit of setting 1 V Default setting 200 see note 2 n11 Maximum Voltage Frequenc...

Page 66: ...speed range by 1 V provided that no overload OL1 or OL2 is detected If an overload is detected decrease the set values or consider the use of an Inverter model with a higher capacity The required tor...

Page 67: ...e mode selection will be possible only with multi function input and not with the Digital Operator The Inverter always goes into remote mode when the power is turned ON Therefore to operate immediatel...

Page 68: ...to use the STOP RESET Key of the Digital Operator to stop the Inverter in remote mode The STOP RESET Key is always enabled in local mode regardless of the setting in n02 Set Values n02 Operation Comma...

Page 69: ...speed operation The set values in n22 through n28 for frequency references 2 through 8 are enabled Selecting the Frequency Reference n07 in Local Mode Select the input method of frequency references...

Page 70: ...frequency of maximum analog input 10 V or 20 mA in n41 as percentage based on the maximum frequency as 100 Set the frequency of minimum analog input 0 V 0 mA or 4 mA in n42 as percentage based on the...

Page 71: ...ough 3 and frequency references 1 through 8 n21 Frequency Reference 1 Changes during operation Yes Setting range 0 0 to max frequency Unit of setting 0 01 Hz see note 1 Default setting 6 0 n22 Frequen...

Page 72: ...n inching frequency command Parameter n29 is selectable by turning on the multi function input set with the inching frequency command The inching frequency command takes precedence over the multi step...

Page 73: ...anged simultaneously when the frequency reference is changed while the FREF indicator is lit Take the following default steps for example to change the frequency reference with the FREF indicator lit...

Page 74: ...rence value Max frequency Acceleration time 2 and deceleration time 2 are enabled by setting 11 for acceleration deceleration time selection in any of the n36 through n39 parameters for multi function...

Page 75: ...e acceleration deceleration characteristic time is set the acceleration and deceleration times will be lengthened according to the S shape at the beginning and end of acceleration deceleration n20 S s...

Page 76: ...gh n39 multi function input parameters is set to acceleration deceleration time selection the Inverter will decelerate to stop according to the selected setting of deceleration time when the STOP comm...

Page 77: ...Multi function Input 1 S2 Changes during operation No Setting range 2 to 8 10 to 22 see note Unit of setting 1 Default setting 2 n37 Multi function Input 2 S3 Changes during operation No Setting rang...

Page 78: ...g starts from maximum frequency ON Speed search Searching starts from n09 15 Search command Searching starts from preset frequency ON Speed search 16 Acceleration Deceleration prohibit command ON Acce...

Page 79: ...motor wiring when changing the motor connections from the Inverter to a commercial power supply Note The external base block only shuts OFF the Inverter s output frequency and the Inverter s internal...

Page 80: ...urned by external force etc The speed search function searches for the present motor frequency from high frequency to low When the motor s rotation speed is detected it is accelerated from that freque...

Page 81: ...ding with output frequency 3 Idling ON Idling at less than min output frequency 4 Frequency detection 1 ON Output frequency frequency detection level n58 5 Frequency detection 2 ON Output frequency fr...

Page 82: ...Note 1 Set the multiplication ratio based on the set value in n44 For example if an output of 5 V is desired at maximum frequency with n44 set to 0 set n45 to 0 50 2 The maximum output voltage of the...

Page 83: ...unction 77 6 6 Slip Compensation Function 78 6 7 Other Functions 79 6 7 1 Motor Protection Characteristics n33 and n34 79 6 7 2 Cooling Fan Operation Function n35 80 6 7 3 Momentary Power Interruption...

Page 84: ...r frequency Reference carrier frequency 10 kHz at a maximum wiring distance of 100 m and 5 kHz at a wiring distance exceeding 100 m Excessive speed or torque dispersion at low speed Set the carrier fr...

Page 85: ...his function is enabled with 2 3 or 4 set in n46 for carrier frequency Voltage Model CIMR J7AZ Default setting Rated output current A Set to 3 Reduced rated output current A Set to 4 Reduced rated out...

Page 86: ...as percentage based on the rated current of the Inverter as 100 After the startup DC injection braking time is set the Inverter starts up at minimum frequency on completion of the startup DC injectio...

Page 87: ...r will be decelerated according to the set deceleration time If the deceleration time is too short the main circuit may result in overvoltage If 0 is set the deceleration time will be automatically le...

Page 88: ...s in normal operation Decrease the set value if the capacity of the motor is smaller than that of the Inverter or the motor stalls with the default value The set value is normally 2 or 3 times higher...

Page 89: ...2 n18 n19 Set the parameter as percentage based on the rated Inverter current as 100 The default setting does not need any changes in normal operation Decrease the set value if the capacity of the mo...

Page 90: ...ing 0 Value Description 0 Inverter does not monitor overtorque 1 Inverter monitors overtorque only when speed is matched It continues operation issues warning even after overtorque is detected 2 Inver...

Page 91: ...ault setting in the following cases The wiring distance between the Inverter and motor is long Set the gain to a larger value The capacity of the motor is lower than the maximum applicable motor capac...

Page 92: ...he parameter to 1 0 first and check the operation of the Inverter Then fine tune the gain with 0 1 gain increments or decrements If the speed is lower than the target value increase the set value If t...

Page 93: ...ter is used to set the electronic thermal protection constant of motor overload detection OL1 The default setting does not need any changes in normal operation To set the parameter according to the ch...

Page 94: ...e fault 1 will be detected if power failure continues for more than 0 5 s 2 If the parameter is set to 2 an undervoltage warning will be detected and the output of the Inverter will be shut off when a...

Page 95: ...unction operates instantly and the fault retry function does not operate This function is to be used only if the user does not want to interrupt the mechanical system even if this function may damage...

Page 96: ...ondition n49 n50 The value in n51 must be set for the jump width This function is disabled with n51 set to 0 0 The operation of the Inverter within the dead bands is prohibited While the Inverter is i...

Page 97: ...ut frequency is the same as or higher or lower than the set value frequency detection level in n58 The parameter n40 for multi function output must be set for the frequency detection function Frequenc...

Page 98: ...lue will be set in 0 1 Hz increments if the frequency is less than 100 Hz and 1 Hz increments if the frequency is 100 Hz or over n58 Frequency Detection Level Changes during operation No Setting range...

Page 99: ...d in the memory if n62 for UP DOWN command frequency memory is set to 1 By setting n62 to 1 the frequency reference kept on hold for 5 s or more will be retained even after a power interruption and op...

Page 100: ...ce lower limit in n31 whichever is smaller Value Description 0 The frequency on hold is not retrained 1 The frequency on hold for 5 s or more is retailed Operation of UP DOWN Function RUN command Forw...

Page 101: ...n the memory The output frequency will be held by the UP DOWN function when both UP and DOWN commands are ON or OFF together 6 7 8 Error History n78 The J7AZ stores information on the latest error The...

Page 102: ...88 Other Functions Chapter 6 7...

Page 103: ...tion n03 96 7 2 4 Setting the Multi function Inputs n36 to n39 97 7 3 Message Communications Basic Format 98 7 4 DSR Message and Response 101 7 4 1 Data Read Function Code 03 Hex 101 7 4 2 Data Write...

Page 104: ...Slaves 2 The communications processing time with RS 422 485 communications for J7AZ Inverters is proportional to the number of Slaves When performing Inverter control consider the communications proc...

Page 105: ...ations Unit SI 485 J7 3G3JV PSI485J to a J7AZ Inverter 1 Turn OFF the Inverter s power supply Mounting the RS 422 485 Communications Unit without turning OFF the Inverter s power supply may result in...

Page 106: ...mounted 5 Mount the front cover removed previously on top of the RS 422 485 Communications Unit and secure it using the front cover mounting screws Do not mount the optional cover Note When not using...

Page 107: ...nications Set Values Note 1 1 The fatal error is canceled with error reset input 2 The nonfatal error warning is canceled when the communications returns to normal Communications Frequency Reference D...

Page 108: ...the Slave will not communicate Communcations Baud Rate and Parity Selection n71 and n72 Set the baud rate and parity according to the communications conditions of the Master Set Values Value Descript...

Page 109: ...ing a response Set this value according to the response time of the Master RTS Control Selection n74 Select whether or not to enable the RTS request to send communications control function This functi...

Page 110: ...A 485 communications will be enabled 2 The frequency reference can be input through RS 422A 485 with multi function input settings as well For details refer to 7 2 4 Setting the Multi function Inputs...

Page 111: ...eference will be executed according to the setting in n03 frequency reference selection When the function set input terminal is ON the Inverter will operate according to the RUN command and frequency...

Page 112: ...hexadecimal data ASCII and FINS are not used Communications data is divided into the four areas shown in the following table Note In the above communications the default is 1 65535 and the LSB least...

Page 113: ...to the Inverter The following three functions codes are available Note 1 Do not use any code other than the above otherwise the Inverter will detect a communications error and return an error message...

Page 114: ...Slave address to the final communications data are connected in series as shown in the following diagram and this data is divided by a fixed 17 digit binary number 1 1000 0000 0000 0101 8 bits Slave...

Page 115: ...rol I O monitor item and parameter functions The register number of each parameter is indicated wherever the parameter is explained in this manual and in Section 10 List of Parameters For register num...

Page 116: ...of 02 DSR Message Byte No Data 1 Slave address 2 Function code 03 Hex 3 Number of bytes of attached data 4 Data of start register MS B 5 LSB 6 Data of next register MSB 7 LSB 8 Data of next register...

Page 117: ...er Allocations in Detail Note 1 A parameter corresponds to one register one word so the number of registers of write data indicates the number of parameters to be written i e the number of consecutive...

Page 118: ...ce can be written Byte No Data 1 Slave address 2 Function code 10 Hex 3 Register No of write start data 4 5 Number of registers of write data max 16 6 7 Data of start register 8 Data of next register...

Page 119: ...ister No of write start data 00 4 01 5 Number of registers of write data 00 6 02 7 Data of start register 04 8 Data in register No 0001 MSB 00 9 LSB 01 10 Data in register No 0002 MSB 02 11 LSB 58 12...

Page 120: ...t the number of data items remains changed This command is used for checking the status of communications or for dummy communications without detecting any communications time over DSR Message Respons...

Page 121: ...rmal Error Byte No Data Data example Hex 1 Slave address 01 2 Function code 08 3 Test data 1 00 4 00 5 Test data 2 A5 6 37 7 CRC 16 check DA 8 8D Byte No Data Data example Hex 1 Slave address 01 2 Fun...

Page 122: ...to issue the Enter command while the Inverter is not running DSR Message of Enter Command The Enter command is issued in response to the DSR message with a function code of 10 Hex to write data By wri...

Page 123: ...lection The unit of setting of each of the three registers below is determined by the set value in n69 For the units of setting of these constants refer to the List of Parameters The set value in n69...

Page 124: ...determined by the parameter set value The MSB of negative value data is always set to 1 Data with its MSB set to 1 is not however always negative value data Setting All Unused Bits to 0 Bits 9 through...

Page 125: ...er use the monitor functions refer to 7 7 2 Monitor Functions RUN Command Register 0001 Hex Note There is an OR relationship between input from the control terminals and input through communications e...

Page 126: ...rnal fault 1 External fault EF0 5 Fault reset 1 Fault reset 4 to 15 Not used Register No Hex Function Description 0020 Status signal Refer to the following corresponding table 0021 Fault status Refer...

Page 127: ...1 Error 5 Multi function output 1 ON 6 to 15 Not used Bit No Function Bit No Function 0 OC 8 F_ 1 OV 9 OL1 2 OL2 10 OL3 3 OH 11 Not used 4 Not used 12 UV1 5 Not used 13 GF 6 Not used 14 CE 7 EF_ STP 1...

Page 128: ...UV 1 UV 8 Base block 1 Base block 9 Frequency reference mode 1 Other than communications 10 RUN command mode 1 Other than communications 11 Overtorque detection 1 Overtorque detection 12 Not used 13...

Page 129: ...does not coincide with the number of bytes of the attached data 21 Hex Data setting error The write data is not within the permissible range Check the display on the Digital Operator and correct the d...

Page 130: ...5 to 35 through the Digital Operator 2 Turn OFF the Inverter and Wire the Terminal Turn OFF the Inverter and wire the following control terminals At this time make sure that all other circuit terminal...

Page 131: ...e or Acceleration is Slow 125 8 2 5 Motor Deceleration is Slow 125 8 2 6 Motor Burns 125 8 2 7 Controller or AM Radio Receives Noise when Inverter is Started 126 8 2 8 Ground Fault Interrupter is Actu...

Page 132: ...ect the motor power cable The V f setting is incorrect Reduce the V f set voltage The motor capacity is too large for the Inverter Reduce the motor capacity to the maximum permissible motor capacity T...

Page 133: ...Inverter overload OL2 The electronic thermal relay has actuated the Inverter overload protective function The load is excessive Reduce the load The V f setting is incorrect Reduce the V f set voltage...

Page 134: ...blished within 2 s The Inverter will detect this error if n68 RS 422A 485 communications time over detection selection is set to 0 1 or 2 A short circuit ground fault or disconnection has occurred on...

Page 135: ...er detects this warning only when RUN command selection n02 is set to 2 or frequency reference selection n03 is set to 6 Until the warning is reset no input other than communications input will be ign...

Page 136: ...ir Replace the fan ce Communications time over CE Normal RS 422A 485 communications were not established within 2 s The Inverter will detect this error if n68 RS 422A 485 communications time over dete...

Page 137: ...h the control circuit terminals Check and correct the setting in n02 Input in 2 wire sequence while 3 wire sequence is in effect and vice versa The Inverter will operate in 3 wire sequence according t...

Page 138: ...nd set the Inverter to remote mode with rE displayed If the above operation is not possible the multi function input will be set to local remote selection In that case the mode can be changed with the...

Page 139: ...of the motor is too big and the motor is used with the effective torque exceeding the rated torque of the motor the motor will burn out For example the rated torque of the motor and capacity may be li...

Page 140: ...frequency of the mechanical system and the carrier frequency There may be resonance between the characteristic frequency of the mechanical system and the carrier frequency If the motor is running with...

Page 141: ...uency range Make sure that the jump width settings in n49 through n50 for jump frequencies 1 and 2 and jump width in n51 are appropriate The preset output frequency exceeds the upper limit frequency T...

Page 142: ...vibrating or making unusual noises There should be no abnormal heat generation The output current value shown on the monitor display should not be higher than normal The cooling fan on the bottom of t...

Page 143: ...erature 40 C Load factor 80 Operation 8 hours per day Installation According to instructions in manual It is recommended that the ambient temperature and power on time be reduced as much as possible t...

Page 144: ...r located on the lower part of the radiation fin in the arrow 1 directions Then lift the bottom of the Fan in the arrow 2 direction to remove the fan as shown in the following illustration Disconnect...

Page 145: ...2 Adapter Panel 136 9 2 3 RS 422 485 Communications Unit 137 9 2 4 Fan Unit 137 9 2 5 Digital Operator 138 9 2 6 Digital Operator Case 139 9 2 7 Digital Operator Connection Cable 139 9 2 8 DC Reactor...

Page 146: ...7 4 3 Heat radiation W See note 2 14 1 20 0 31 9 51 4 82 8 Weight kg 0 5 0 5 0 9 1 5 1 5 Cooling method Natural cooling Cooling fan Max applicable motor capacity kW 0 1 0 2 0 4 0 75 1 5 2 2 3 7 Output...

Page 147: ...tage is approximately 410 V Undervoltage protection Stops when main circuit DC voltage is approximately 200 V 160 V for single phase 200 V AC model Momentary power Stops for 15 ms or more By setting t...

Page 148: ...t signal Selectable with FREQ adjuster 0 to 10 V DC 20 kW 4 to 20 mA 250 W and 0 to 20 mA 250 W Acceleration deceleration time 0 0 to 999 s Independent acceleration and deceleration time settings 2 ty...

Page 149: ...identical to the Digital Operator attached to standard V7AZ Inverters and has a built in EEPROM in which the Inverter s parameter settings can be stored If the Digital Operator Case 3G3IV PEZZ08386A i...

Page 150: ...l available The SI232 J7 is perma nently installed and cannot be removed and the SI232 J7C for copying para meters is installed so that it can be removed Connections Dimensions mm SI232 J7 Permanent S...

Page 151: ...eading writing parameter settings Note Refer to CHAPTER 7 Communications for details Dimensions mm 9 2 4 Fan Unit FAN00106_ The Fan Unit is a replacement for the presently installed cooling fan of the...

Page 152: ...he JVOP140 together with a Digital Operator Case 3G3IV PEZZ08386A Without the Case the Digital Operator s connection cable cannot be wired Using the Case also enables mounting to a control panel Note...

Page 153: ...r to a J7AZ Inverter Models and Specifications 9 2 8 DC Reactor The DC Reactor suppresses harmonic current generated from the Inverter and improves the power factor of the Inverter The DC Reactor supp...

Page 154: ...se 200 V AC CIMR J7AZ20P1 20P2 20P4 20P7 3G3IV PEZZ08122A CIMR J7AZ21P5 22P2 3G3IV PEZZ08122B CIMR J7AZ24P0 3G3IV PEZZ08122C Single phase 200 V AC CIMR J7AZB0P1 B0P2 B0P4 3G3IV PEZZ08122A CIMR J7AZB0P...

Page 155: ...ccording to the motor capacity Connection Example Applicable Range Applicable Models and Dimensions 200 V Class 400 V Class MCCB AC Reactor Motor Power supply capacity kVA AC Reactor required for smoo...

Page 156: ...onnection Example Inverter Noise Filter for 3 phase 200 V AC Inverter models Model CIMR J7AZ Schaffner Rasmi Rated current A Weight kg 20P1 20P2 20P4 20P7 3G3JV PFI2010 SE 3G3JV PFI2010 E 10 0 68 21P5...

Page 157: ...V 3G3JV PFI3005 SE 169 111 50 135 156 91 5 3 M5 22 96 118 M4 3G3JV PFI3010 SE 169 111 50 135 61 120 5 M5 28 128 118 M4 3G3JV PFI3020 SE 174 144 50 135 61 120 5 M5 28 128 118 M4 Rasmi model Dimensions...

Page 158: ...144 Option Specifications Chapter 9 3...

Page 159: ...145 CHAPTER 10 List of Parameters List of Parameters 146...

Page 160: ...RS 422A 485 communications are enabled Note The RUN command only through key sequences on the Digital Operator is acceptable in local mode 0 to 2 1 0 No 5 7 n03 0103 Frequency reference selection Use...

Page 161: ...00 see note 2 No 5 4 n11 010B Maximum voltage frequency FA 0 2 to 400 0 1 Hz see note 1 60 0 No 5 4 n12 010C Middle output frequency FB 0 1 to 399 0 1 Hz see note 1 1 5 No 5 4 n13 010D Middle output f...

Page 162: ...0 Yes 5 10 n25 0119 Frequency reference 5 0 0 Yes 5 10 n26 011A Frequency reference 6 0 0 Yes 5 10 n27 011B Frequency reference 7 0 0 Yes 5 10 n28 011C Frequency reference 8 0 0 Yes 5 11 n29 011D Inch...

Page 163: ...1 to 60 1 min 8 No 6 14 n35 0123 Cooling fan operation function Used to operate the Cooling Fan of the Inverter while the Inverter is turned on or only while the Inverter is in operation 0 Rotates onl...

Page 164: ...3 10 Inching frequency command ON Inching frequency command taking precedence over the multi step speed reference 11 Accelera tion Deceler lation time changeover ON Acceleration time 2 and deceleratio...

Page 165: ...contact opened Fault Fault output is ON and reset with RESET input Alarm output is ON no reset required STP is displayed lit with fault input ON and flashed with alarm input ON 20 Emergency stop alar...

Page 166: ...rque being monitored NO contact output Output if any of the following parameter conditions is satisfied n59 Overtorque detection function selection n60 Overtorque detection level n61 Overtorque detect...

Page 167: ...utput 0 00 to 2 00 0 01 1 00 Yes 5 22 n46 012E Carrier frequency selection Used to set the carrier frequency Note The default setting does not need and changes in normal operation Note Refer to 6 1 Se...

Page 168: ...g operation Set the level in percentage based on the rated current of the Inverter as 100 30 to 200 1 160 No 6 8 n58 013A Frequency detection level Used to set the frequency to be detected Note The pa...

Page 169: ...motor current as 100 Note Used as the constant of the slip compensation function 0 to 99 1 Varies with the capac ity No 6 12 n66 0142 Slip compensation gain Used to set the gain of the slip compensati...

Page 170: ...65 1 ms 10 No 7 7 n74 014A See note 3 RS 422A 485 RTS control selection Select whether or not to enable the RTS request to send communications control function 0 1 1 0 No 7 7 n75 014B Low speed carrie...

Page 171: ...ve table 3 The n68 n74 n76 and n77 parameters cannot be written via RS422 485 communications They are read only n78 014E Error log Used to display the latest error recorded Note ___ will be displayed...

Page 172: ...158 List of Parameters Chapter 10...

Page 173: ...159 CHAPTER 11 Using the Inverter for a Motor Using the Inverter for a Motor 160...

Page 174: ...he Inverter than when operated with a commercial power supply Check the load torque characteristics of the machine to be used with the motor to set a proper V f pattern Vibration The J7AZ Series emplo...

Page 175: ...n method and motor manufacturer In particular the continuous operation of an oil lubricated motor in the low speed range may result in burning If the motor is to be operated at a speed higher than 60...

Page 176: ...as a suffix to the catalog number on the front cover of the manual The following table outlines the changes made to the manual during each revision Page numbers refer to the previous version Cat No I6...

Page 177: ...EN 01 OMRON YASKAWA MOTION CONTROL B V Wegalaan 65 2132 JD Hoofddorp The Netherlands phone 31 0 23 568 74 00 fax 31 0 23 568 74 88 www omronyaskawa com Note Specifications subject to change without n...

Reviews: