2HA/2HB
1-2-6
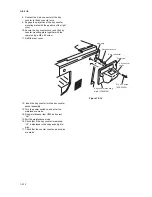
1. Connect the power cord to the connector on the copier.
2. Insert the power plug into the wall outlet and turn the power switch on.
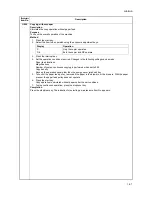
1. Enter the maintenance mode by entering "10871087" using the numeric keys.
2. Enter "130" using the numeric keys and press the start key.
3. Press the start key to execute the maintenance item.
Installation of toner starts and "10" is indicated in the copy quantity display. Each time one minute elapses, the
indicated value decrements. When the installation is complete, "Gd" will be displayed if the installation is suc-
cessful or "nG" will be displayed if it has failed.
4. Press the stop/clear key.
1. Load paper in the drawer.
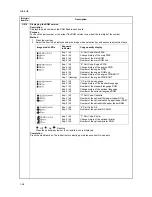
1. Enter "000" using the numeric keys and press the start key.
2. Select "d-L" and press the start key to output a list of the current settings of the maintenance items.
3. Press the stop/clear key.
1. Enter "001" using the numeric keys and press the start key.
The machine exits the maintenance mode.
1. Place an original and make test copies.
1-2-3 Setting initial copy modes
Factory settings are as follows:
Maintenance
item No.
Contents
Factory setting
U253
Switching between double and single counts
Double count
U254
Turning auto start function on/off
ON
U258
Switching copy operation at toner empty detection
SINGLE MODE
U260
Changing the copy count timing
After ejection
U277
Setting auto application change time
30
U342
Setting the ejection restriction
ON
U343
Switching between duplex/simplex copy mode
Simplex copy
U344
Setting preheat/energy saver mode
ENERGY STAR
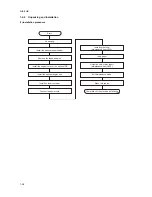
Connect the power cord.
Installing the toner (maintenance item U130).
Load paper.
Output an own-status report (maintenance item U000).
Exit maintenance mode.
Make test copies.
Completion of the machine installation.
Summary of Contents for d-Copia 1600
Page 1: ...SERVICE MANUAL Published in October 2005 842HB110 First Edition d Copia 1600 d Copia 2000...
Page 3: ...Revision history Revision Date Replaced pages Remarks...
Page 4: ...This page is intentionally left blank...
Page 10: ...This page is intentionally left blank...
Page 14: ...2HA 2HB 1 4 30 This page is intentionally left blank...
Page 20: ...2HA 2HB 1 4 30 This page is intentionally left blank...
Page 126: ...2HA 2HB 1 4 30 This page is intentionally left blank...
Page 162: ...2HA 2HB 1 4 30 This page is intentionally left blank...
Page 180: ...2HA 2HB 1 4 30 This page is intentionally left blank...
Page 213: ...INSTALLATION GUIDE FOR THE 300 SHEET CASSETTE...
Page 220: ...INSTALLATION GUIDE FOR THE DOCUMENT PROCESSOR...
Page 231: ...INSTALLATION GUIDE FOR THE DUPLEX UNIT...
Page 239: ...INSTALLATION GUIDE FOR THE Printing System X...
Page 242: ......

