Connecting to a Computer
- 33 -
Se
tup
1
Next, install the printer and fax driver into the
computer.
1
Ensure that your machine and the
computer are turned on and connected,
and then insert the "Software CD-ROM"
into the computer.
Reference
"Connecting an Ethernet Cable" P. 31
2
Click [
Run setup.exe
] after [
Auto
Play
] is displayed.
If the [
User Account Control
] dialog box
appears, click [
Yes
].
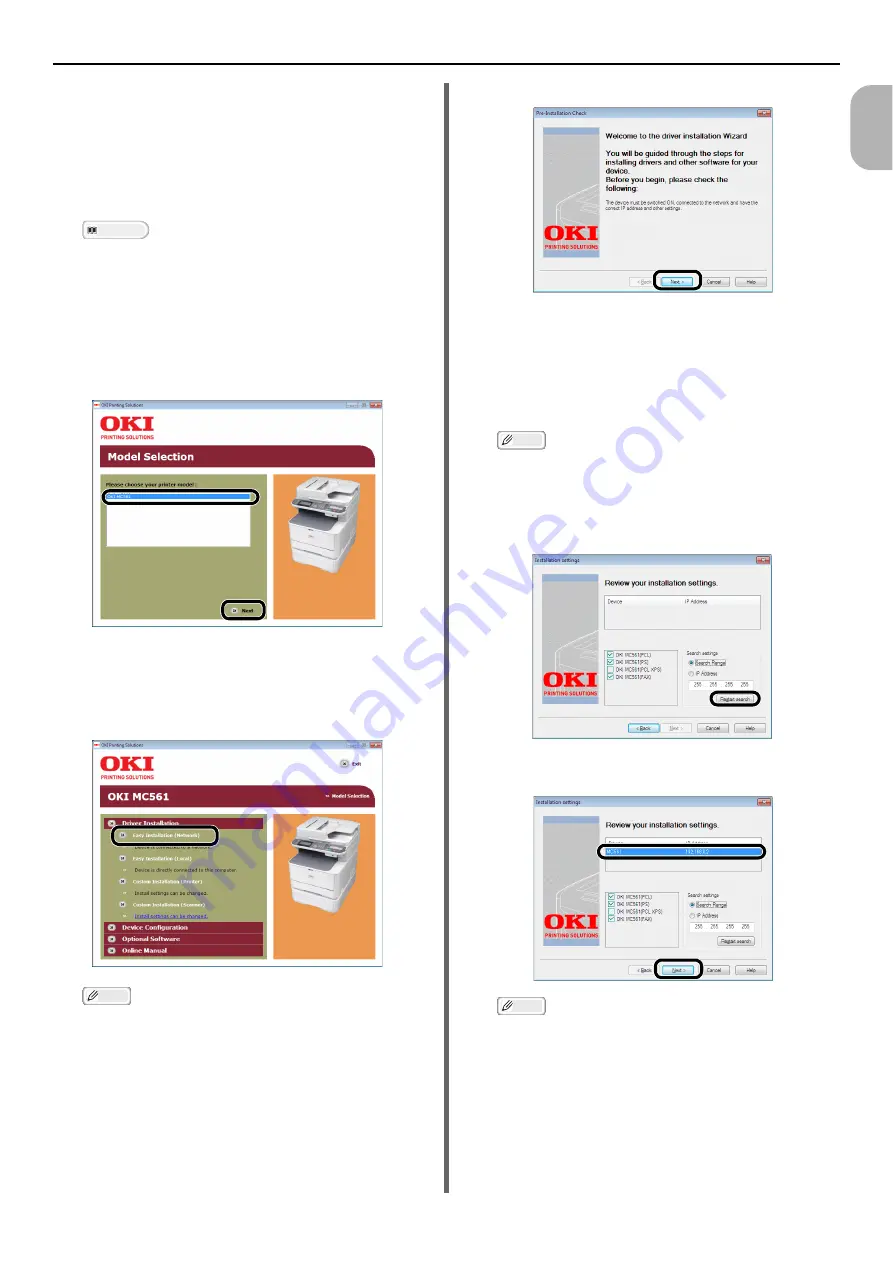
3
Select the model of your machine, and
then click [
Next
].
4
Read the license agreement and then
click [
I Agree
].
5
Select [
Easy Installation (Network)
]
under [
Driver Installation
].
Memo
In [
Easy Installation (Network)
], PCL, PS, FAX
drivers for your OS are installed. If you want to select
a driver to install manually, install a shared printer, or
use LPR Utility as a print method, select [
Custom
Installation (Printer)
] and then follow the
instruction displayed on the screen.
6
Click [
Next
].
The device search starts.
- If the machine is detected, it is automatically
installed. Proceed to the step 8.
- If the machine is not detected, the [
Check for
the installed devices
] screen is displayed.
Proceed to the step 7.
Memo
Besides the printer and fax driver, you can install the
scanner driver, Network Extension, and the Color
Swatch Utility at the same time.
7
click [
Restart search
] to restart the
device search.
After the machine is displayed, select the machine
and click [
Next
].
Memo
If the machine is not displayed by clicking [
Restart
search
], select [
IP address
] and enter the IP
address assigned to your machine, and then click
[
Next
].
8
If the [
Windows Security
] dialog box
appears, click [
Install this driver
software anyway
].


