60
Chapter 2 Printing With the Océ CPS900®
Create a print job
[18]
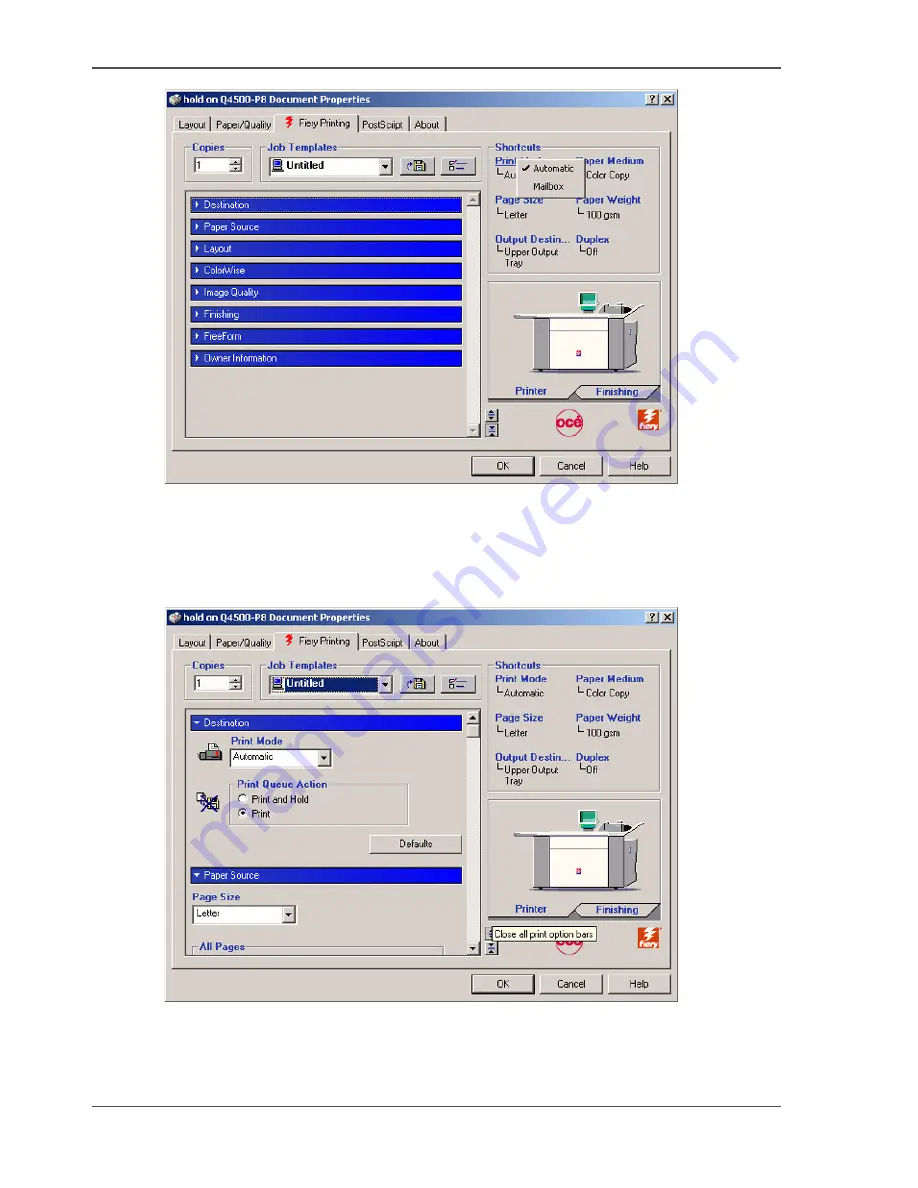
[18] The properties window of the printer driver
6.
Define the settings in the print window for the printer driver. The shortcuts on the
right-hand side of the print window are a group of the most used settings for the print.
7.
Click the blue bars to access the specific settings for the different sections. For
example, click the 'Destination' settings to select the 'Print mode'.
[19]
[19] Destination settings
8.
Click on 'OK'. The print window of the printer driver closes.
9.
Click on 'OK'. The print window of your application closes. The document is sent to
the controller. The job passes on to the job queue or to the mailbox.
Summary of Contents for CPS900
Page 1: ...Océ CPS900 Océ User manual Job Manual ...
Page 7: ...7 Chapter 1 Introduction ...
Page 46: ...46 Chapter 1 Introduction Controlling the backlight of the screen ...
Page 47: ...47 Chapter 2 Printing With the Océ CPS900 ...
Page 62: ...62 Chapter 2 Printing With the Océ CPS900 Manage print jobs on the Océ CPS900 ...
Page 63: ...63 Chapter 3 Print Jobs on the Océ CPS900 ...
Page 87: ...87 Chapter 4 The Job Queue ...
Page 95: ...95 Chapter 5 Accounting ...
Page 104: ...104 Chapter 5 Accounting Setting the account number ...
Page 105: ...105 Chapter 6 Maintenance ...
Page 114: ...114 Chapter 6 Maintenance Use coated paper ...
Page 115: ...115 Chapter 7 Problem Solving ...
Page 125: ...125 Appendix A Overview and Tables ...
Page 128: ...128 Appendix A Overview and Tables Paper tray information ...
Page 129: ...129 Appendix B Miscellaneous ...


