


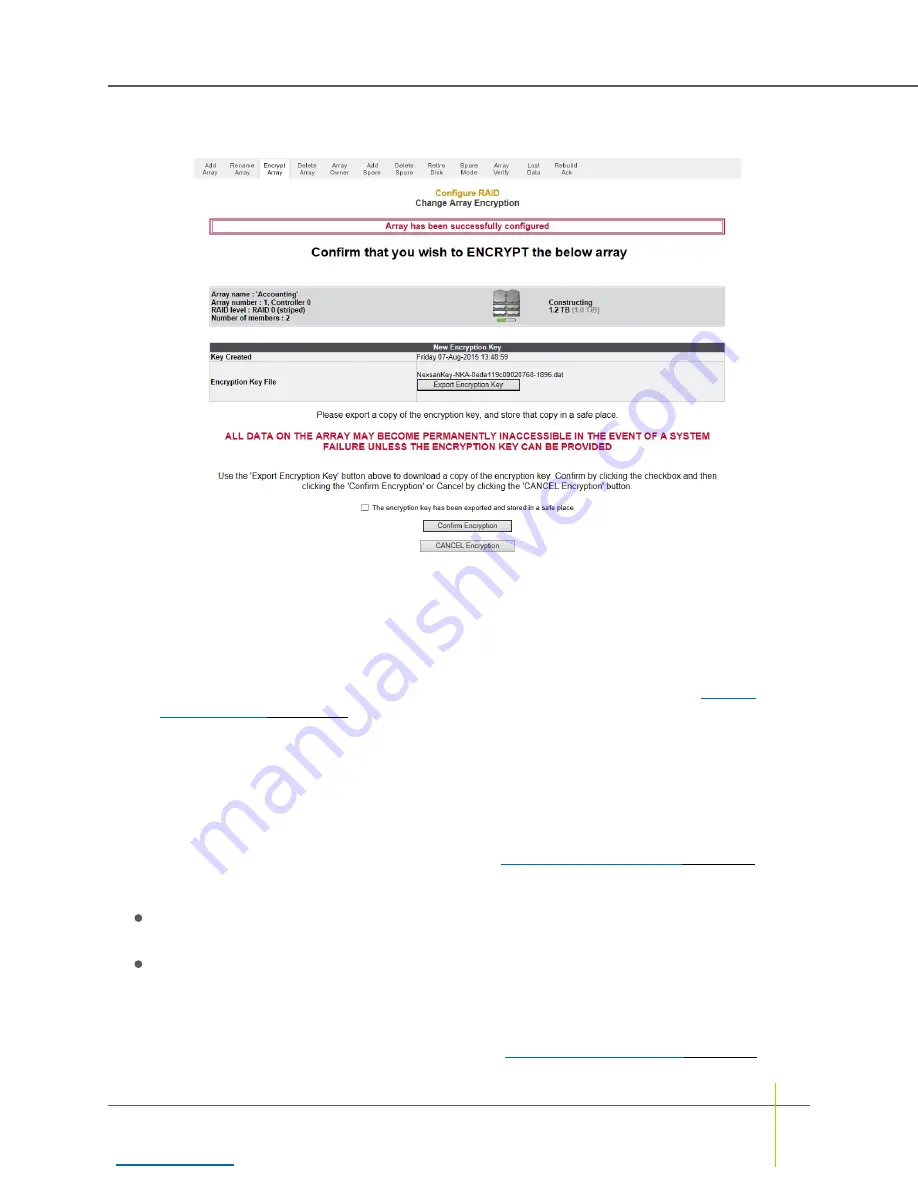
11. (E-Series only) If you are creating an encrypted array, the
Configure Array Encryption
page displays.
Figure 2-5:
Configure Array Encryption
confirmation page
Do the following:
a. Click the
Export Encryption Key
button to save the encryption key to your hard drive.
Note
When the encryption key for an encrypted array is changed, previous encryption keys cannot
be used to restore access to the array. Export the new encryption key file and keep the backup in a
secure place. If drives become inaccessible (for example, if they are removed from the chassis),
you can restore access to the drives by uploading exported encryption key files. See
b. Check the check box next to
The encryption key has been exported and stored in a safe
place
.
c. Click the
Confirm Encryption
button.
Note
If you decide that you do not wish to create an encrypted array, click the
CANCEL Encryption
button.
12. You are taken to the
Configure Logical Volume
page (see
on page 67). The
message
Array has been successfully configured
is displayed at the top of the page, along with an
additional message:
If you left the
Online Create
check box checked in step 6, the message displayed is
Performance
willbe degraded until tuning is completed
.
If you unchecked
Online Create
, the message displayed is
Volumes will not be accessible until
initialisation is completed
.
Note
The array construction process takes many hours, depending on how many disks are in the array
and whether you selected
Online Create
in the creation tool. You can check the array construction
progress by clicking
RAID Information > Progress
(see
Chapter 2: Common Tasks — Create a new RAID array
Nexsan High-Density Storage
User Guide
44