


If the selected array already has one or more logical volumes configured, the volume creation tool looks like
this:
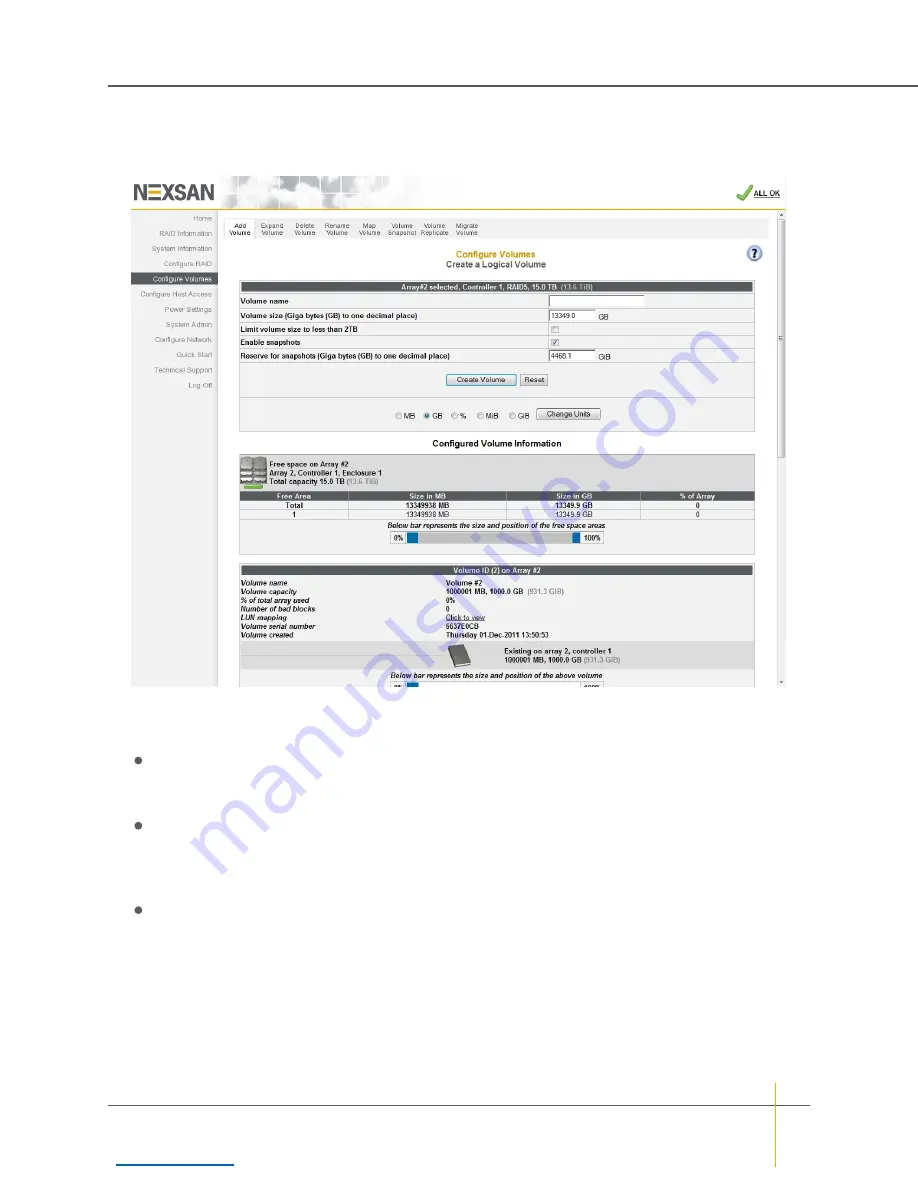
Figure 3-88:
Create a Logical Volume
tool page (one or more volumes in selected array)
►
To add volumes to a RAID array:
1. Enter the following information:
Volume Name
: If this is the first volume configured for this array, the name defaults to the name of
the array. If there are already volumes on the array, then the
Volume Name
field is blank. Enter a
name for the volume. Volume names can be up to 63 characters long.
Volume Size (
X
to one decimal place)
: The value of this field defaults to all of the remaining space
left on the array. The units defaults to true gigabytes (GB), but this can be changed using the unit type
selection buttons and
Change Units
button (located below the
Create Volume
and
Reset
buttons).
Enter the desired size of the new volume.
Limit volume size to less than 2TB
: This option is unchecked by default. If your hosts do not
support volumes of more than 2 terabytes (TB) in size, check this option.
Note
If you select this option, the value entered in
Volume Size (
X
to one decimal place)
must not
exceed 2TB, or else the volume will not be built and an error message will appear.
Chapter 3: The Graphical User Interface — Configure Volumes
Nexsan High-Density Storage
User Guide
140