


The
Array Encryption
section displays the following:
Encryption Status
—
Encrypted
,
Unencrypted
, or
Disabled (not supported by disks)
.
Note
If the array does not support encryption, then all buttons are grayed out and
Encryption Status
reads
Disabled (not supported by disks)
.
Key Created
—date and time of key creation in format
Day DD-Mon-YYYY HH:MM:SS
.
Encryption Key File
—the name of the encryption key file and the
Export Encryption Key
button.
It also contains the
Encrypt Array
,
Decrypt Array
, and
Change Encryption Key
buttons.
►
To encrypt an array:
1. Click the
Encrypt Array
button.
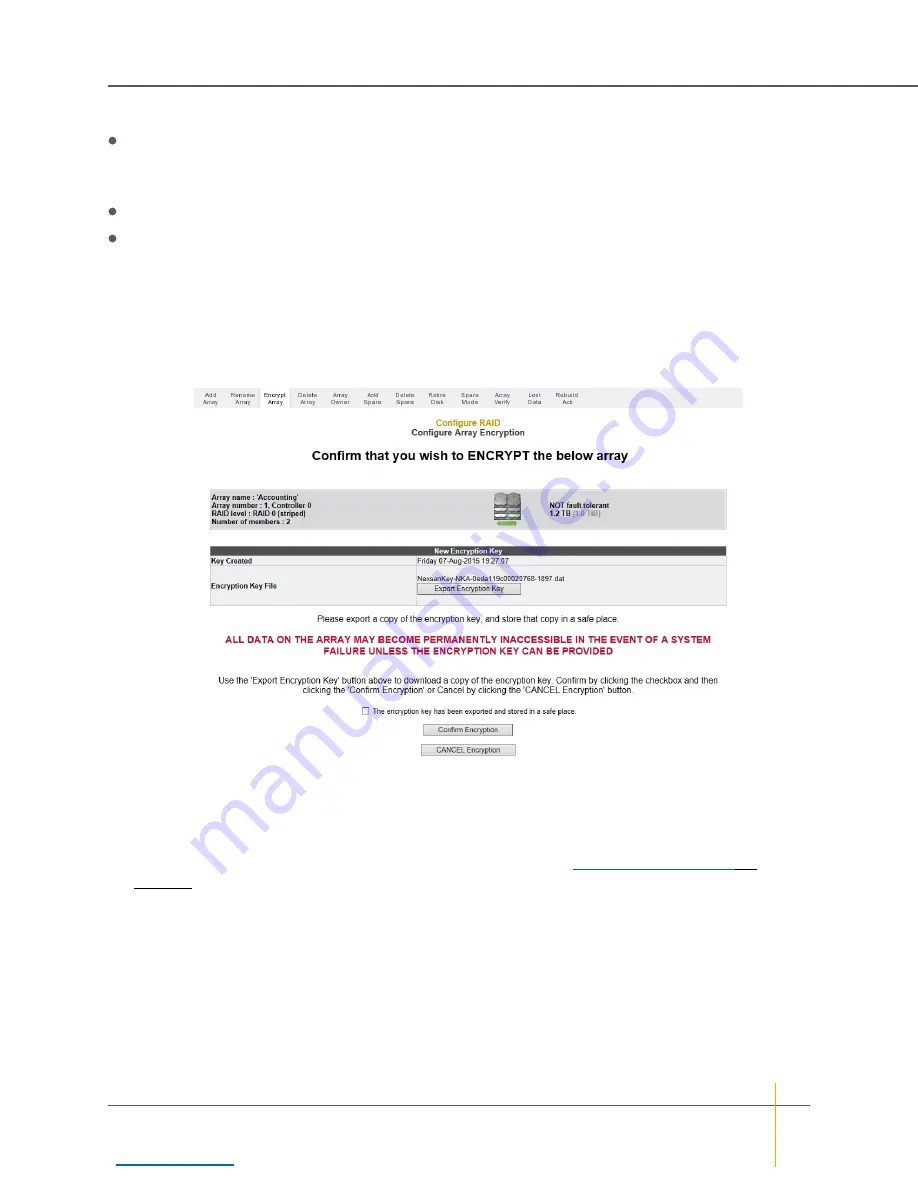
The array encryption confirmation page is displayed:
Figure 3-66: Array encryption confirmation page
2. Click the
Export Encryption Key
button to save the encryption key to a .dat file on your hard drive.
Note
When the encryption key for an encrypted array is changed, previous encryption keys cannot be
used to restore access to the array. Export the new encryption key file and keep the backup in a secure
place. If drives become inaccessible (for example, if they are removed from the chassis), you can restore
access to the drives by uploading exported encryption key files. See
3. Check the check box next to
The encryption key has been exported and stored in a safe place
.
4. Click
Confirm Encryption
.
A message is displayed, letting you know that the array has been encrypted.
Note
If you change your mind about encrypting the array, click the
CANCEL Encryption
button.
Chapter 3: The Graphical User Interface — Configure RAID
Nexsan High-Density Storage
User Guide
121