3
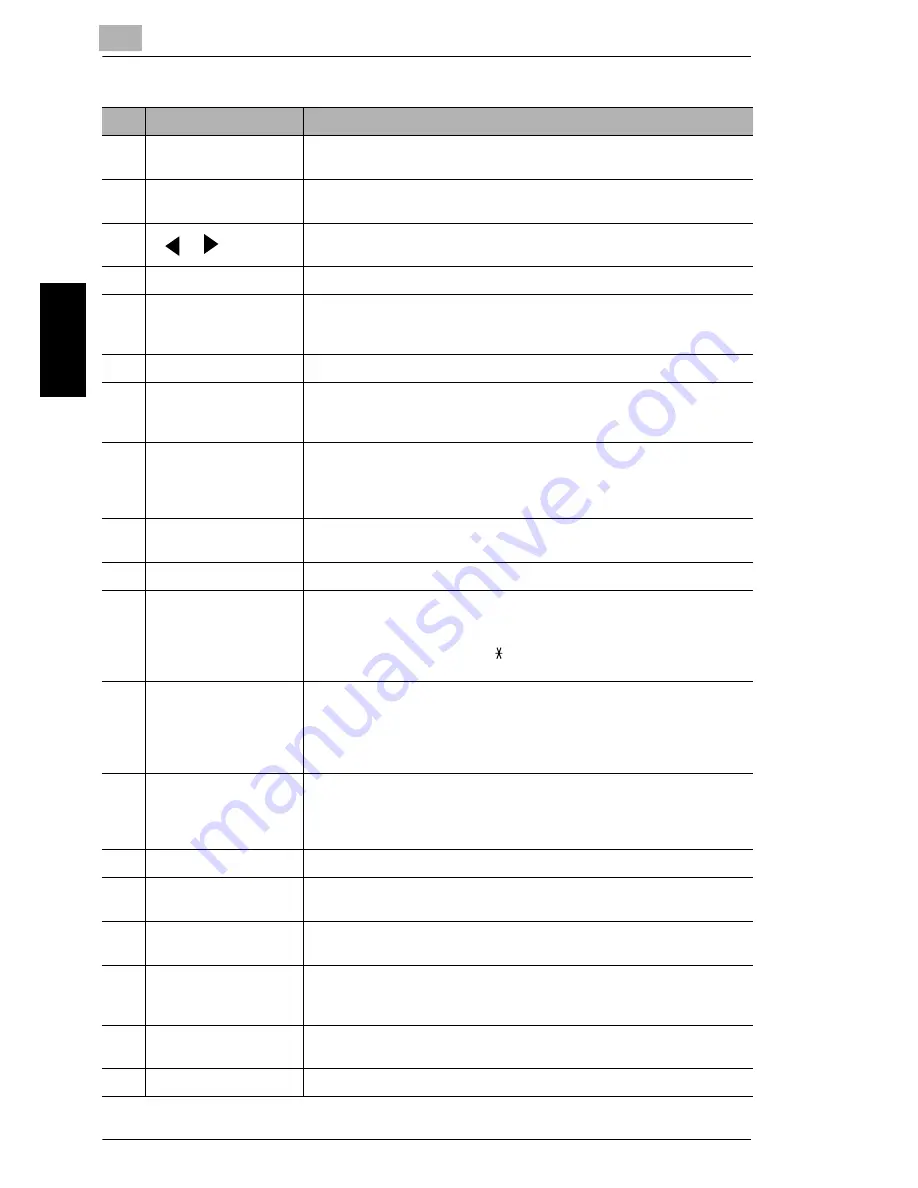
3.4 Control Panel
3-10
Bef
o
re
Ma
ki
ng C
opi
es
or
F
a
x
ing
Ch
apte
r 3
No.
Part Name
Description
1
[Utility] key
Press to enter Utility mode.
For details, refer to
“Utility Mode” on page 7-2
.
2
[Printer] key
Press to enter Printer mode.
For details, refer to the User Manual for the printer controller.
3
[
] [
] key
• Press to adjust the image density.
• Press to specify the various settings.
4
[Auto/Photo] key
Press to change the image density mode.
5
[Status] key
Press to view the counters and transmission results. In addition, the list
of settings specified for each function and the reports can be printed.
(p. 3-31)
6
[Paper] key
Press to select the paper tray and paper source.
7
[2in1] key
Press to select the 2in1 function.
* Only for NEFAX691
8
[
▲
] [
▼
] key
• Press to change the zoom ratio in the range between
×
0.50 and
×
2.00 in
×
0.01 increments.
• Press to scan through the various settings and information, in order.
• Press to specify the various settings.
9
[Zoom] key
Press to select a zoom ratio from among those fixed ratios available as
standard.
10
[Sort] key
Press to select the sort function.
11
10-Key Pad
• Use to enter the number of copies to be made and any other numeric
date.
• Used to enter text such as a name.
• In the Fax mode, use the [ ] key for tone transmission (with pulse
dialing) and use the [#] key for accessing an outside line.
12
[Stop] key
• Press to stop a print cycle.
• Press to stop a scanning sequence.
• Stops the fax transmission or reception.
• The indicator flashes in orange when the machine is paused or while
printing.
13
[Start] key
• Press to start a scanning or print cycle.
• Starts a fax transmission.
• Press to specify the various settings.
• The indicator lights up in green when the machine can accept print jobs.
14
[Panel Reset] key
Press to reset all print functions and settings to their defaults.
15
[Copy] key
Press to enter Copy mode. The indicator lights up in green to indicate
that the machine is in Copy mode.
16
[Fax] key
Press to enter Fax mode. The indicator lights up in green to indicate that
the machine is in Fax mode.
17
[Scan] key
Press to enter Scan mode. The indicator lights up in green to indicate
that the machine is in Scan mode.
* Only for NEFAX691
18
[123/ABC] key
Press to switch the 10-Key Pad between typing in numbers and typing
in letters.
19
Error lamp
The indicator lights up in orange if an error or malfunction occurs.
Summary of Contents for NEFAX - 691 B/W Laser
Page 1: ......
Page 8: ...Introduction Chapter 1 1 1Introduction ...
Page 27: ...1 1 6 Explanation of Basic Concepts and Symbols 1 20 Introduction Chapter 1 ...
Page 28: ...Precaution Chapter 2 2 2Precaution ...
Page 34: ...Before Making Copies or Faxing Chapter 3 3 3 Before Making Copies or Faxing ...
Page 71: ...3 3 11 Print Area 3 38 Before Making Copies or Faxing Chapter 3 ...
Page 72: ...Making Copies Chapter 4 4 4Making Copies ...
Page 87: ...4 4 6 Finishing Copies 4 16 Making Copies Chapter 4 ...
Page 88: ...Faxing Chapter 5 5 5Faxing ...
Page 103: ...5 5 4 Checking Transmission Results 5 16 Faxing Chapter 5 ...
Page 104: ...Fax Transmission Reception Methods Chapter 6 6 6Fax Transmis sion Reception Methods ...
Page 131: ...6 6 3 Using F codes 6 28 Fax Transmission Reception Methods Chapter 6 ...
Page 132: ...Using the Utility Mode Chapter 7 7 7Using the Utility Mode ...
Page 213: ...7 7 11 Specifying Initial User Data 7 82 Using the Utility Mode Chapter 7 ...
Page 214: ...When a Message Appears Chapter 8 8 8When a Message Appears ...
Page 245: ...8 8 11 When Faxing Is Not Performed Correctly 8 32 When a Message Appears Chapter 8 ...
Page 330: ...Miscellaneous Chapter 10 10 10Miscella neous ...
Page 340: ......


