1. Installation
1-9
Charging the Handset Battery
The rechargeable lead-acid battery must be fully charged before using your
phone for the first time. Charge the battery without interruption for 15-20 hours.
You should not completely discharge the battery as this could possibly damage
it. If you see the BATT LOW icon on the phone, either replace the battery with
the fully charged spare battery or place the phone in the desktop charger for 15-
20 hours to recharge.
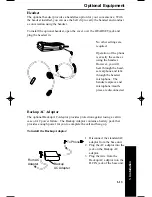
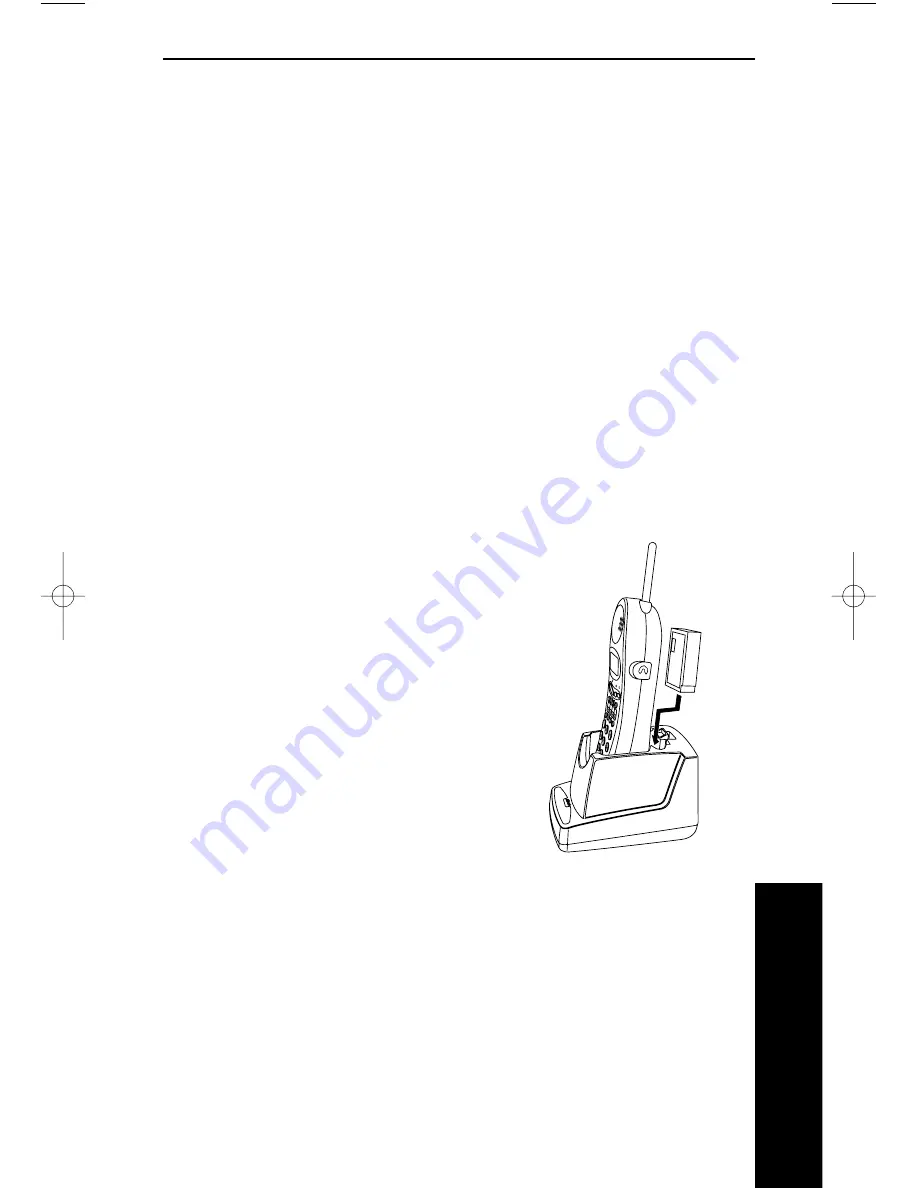
1. Place the phone into the desktop charger. The dial pad should be facing out
in order for the battery contacts to connect.
2. Make sure the CHARGE 1 LED lights. If the LED doesn’t light, check to
see that the AC adapter is plugged in, and that the handset is making good
contact with the battery contacts.
Charging the Spare Battery
The desktop charger of your phone is equipped with a Battery Charger for
charging the optional spare battery.
1. Place the spare battery into the battery slot.
There are positive and negative indications
on both the desktop charger and the battery.
Make sure that the battery is placed in the
charger so that the indications match.
2. Press the battery down until it snaps into
place.
Make sure the CHARGE 2 LED lights. If the
LED does not light, check to see that the AC
Adaptor is plugged in, and that the battery is
seated into the Charging Compartment.
When charging is complete, press the latch
back slightly to remove the battery if it is needed. Otherwise, leave the battery
in the Charging Compartment. It can stay in the charger for up to a month
without overcharging.
ch
arg
e 1
ch
arg
e 2
85456 - 6
a
Installation
900ia.qxd 3/26/01 8:51 AM Page 9
Summary of Contents for 900i
Page 1: ...Cordless Phone Installation and User Guide 85456DINS02 900i ...
Page 25: ...2 7 2 Features Onyx VSi Features ...
Page 26: ...2 8 2 Features For Your Notes ...
Page 57: ...2 39 2 Features i Series Features ...
Page 58: ...2 40 2 Features For Your Notes ...
Page 68: ...i Series System 2 50 2 Features For Your Notes ...
Page 112: ...2 94 2 Features For Your Notes ...
Page 116: ...2 98 2 Features For Your Notes ...
Page 118: ...2 100 2 Features For Your Notes ...
Page 120: ...3 2 SPECIFICATIONS 3 Specifications Parts List ...
Page 125: ...Section 4 Index In this section Page Index 4 1 4 Index 4 1 ...
Page 126: ...4 2 SPECIFICATIONS 4 Index ...

