Disk Drive
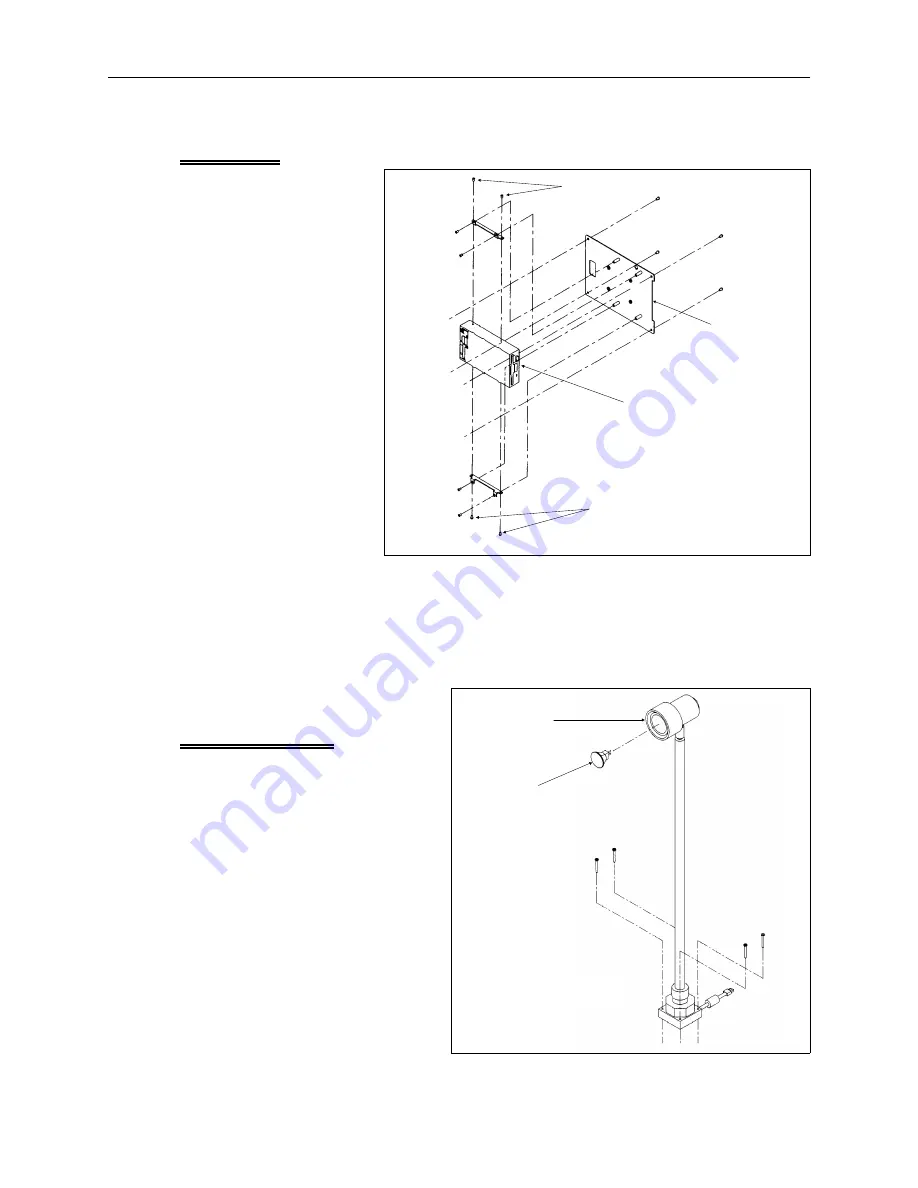
1. Remove the
keyboard/display
assembly and cover
as previously
described.
2. Disconnect the disk
drive harnesses.
3. Remove the 4
screws shown in
Figure 2-3 that
hold the drive to
the side brackets.
4. Replace the disk
drive and re-install
the hardware,
harnesses, and
keyboard/display
assembly and cover
that were removed
earlier.
NOTE:
When installing the disk drive data ribbon orient the harness so the edge with
the colored stripe (indication pin #1) is lying adjacent to the power
harness.
Lamp Assembly
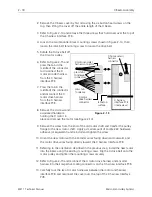
The halogen bulb replacement
is described in the operation
manual. The bulb has 2 pins that
simply plug into the base socket
at the end of the lamp post. The
bulb case must be removed by
rotating it counter-clockwise off
the base to access the lamp.
disk drive
side bracket
screws
keyboard
base plate
side bracket screws
Figure 2 - 3
Lamp Assembly
bulb
bulb
case
Figure 2 - 4
2 - 4
Lamp Assembly
EMT 1 Technical Manual
Melco Embroidery Systems


