


PC software
Xciter
user
manual
113
17.3.2
Remove a fixture definition
1.
Select category and manufacturer from the Xciter library.
2.
Select fixture definition(s) in the Xciter library list.
3.
Press ‘Remove’ to remove the selected definitions from the Xciter library at the next update. A warning will
pop up with four options:
•
Press ‘No’ if you wish to skip the definition mentioned in the message.
•
Press ‘Yes’ if you wish to remove the definition mentioned in the message. The message will reappear
for each definition that is to be removed.
•
Press ‘Yes to all’ if you are sure you want to remove all definitions. The message will no longer appear.
•
Press ‘Cancel’ if you have changed your mind and do not want to continue removing definitions.
4.
Repeat steps 1-3 until you are done removing fixture definitions.
5.
Finally press ‘Update’ to start actually removing the definitions from the Xciter. When the update is
successful, Xciter will download the library list again.
17.3.3
Export to lib
You can export your own-made fixture definitions from Xciter’s internal library to the source library on PC.
1.
Select category and manufacturer from the Xciter library.
2.
Select fixture definition(s) in the Xciter library list.
3.
Press ‘Export’ to place the selected definitions in the PC source library. This is done immediately. You do
not need to press ‘Update’ explicitly.
The application will place the fixture definitions in the ‘FixLib’ subfolder of the Xciter installation (C:\Program
Files\Martin Professional\Xciter\Xciter Manager\FixLib). Important! Do not modify the structure of this
folder. If you do, the library manager may not run properly and you may need to re-install the PC software.
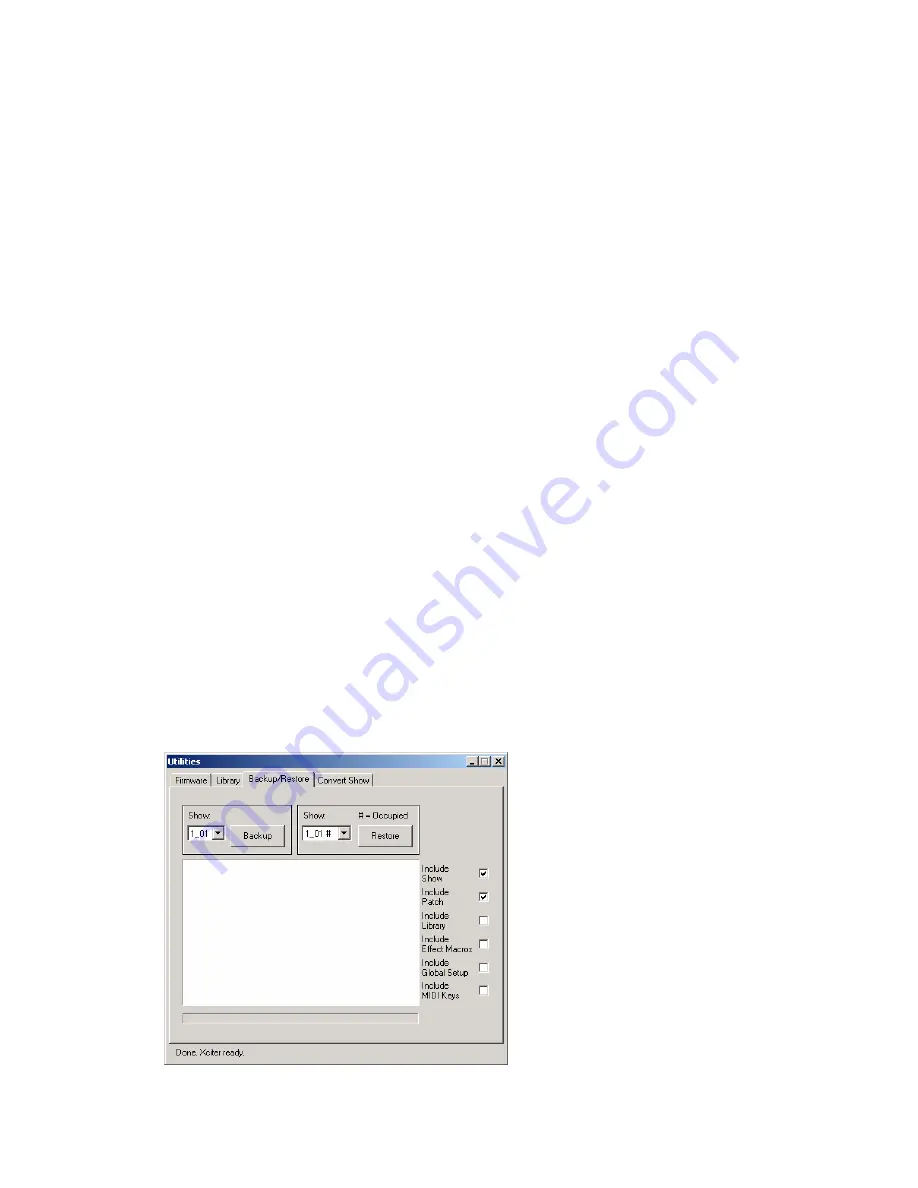
17.4
Backup / Restore
1.
Make sure Xciter is connected to the PC.
2.
Make sure Xciter is booted.
3.
Select the utilities section.
4.
Go to the tab page ‘Backup/Restore’.