


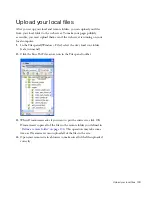


Define a remote folder 131
2.
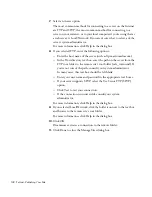
In Dreamweaver, select Site > Manage Sites.
3.
In the Manage Sites dialog box, select the Cafe Townsend site.
If you did not define the Cafe Townsend site, create a local folder for
the site before you proceed. For more information, see
“Tutorial:
Setting Up Your Site and Project Files” on page 49
.
4.
Click Edit.
5.
In the Site Definition dialog box, click the Advanced tab if the
Advanced settings aren’t showing.
6.
Select Remote Info from the Category list on the left.
ABOU
T..
.
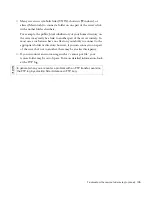
Creating a remote folder with Dreamweaver
If Dreamweaver is your only means of access to the
remote server, you won’t be able to create an empty folder on the remote server until you’ve completed
the remote settings in Dreamweaver and established a connection. If that’s the case, you can either
define your host directory as your remote folder, or you can create a remote folder after you’ve
established a connection with the server. In either case, continue with the instructions in this tutorial until
you’re connected to a remote server. After you’ve established a connection, you can use the
Dreamweaver Files panel to create a new remote folder.
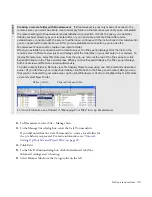
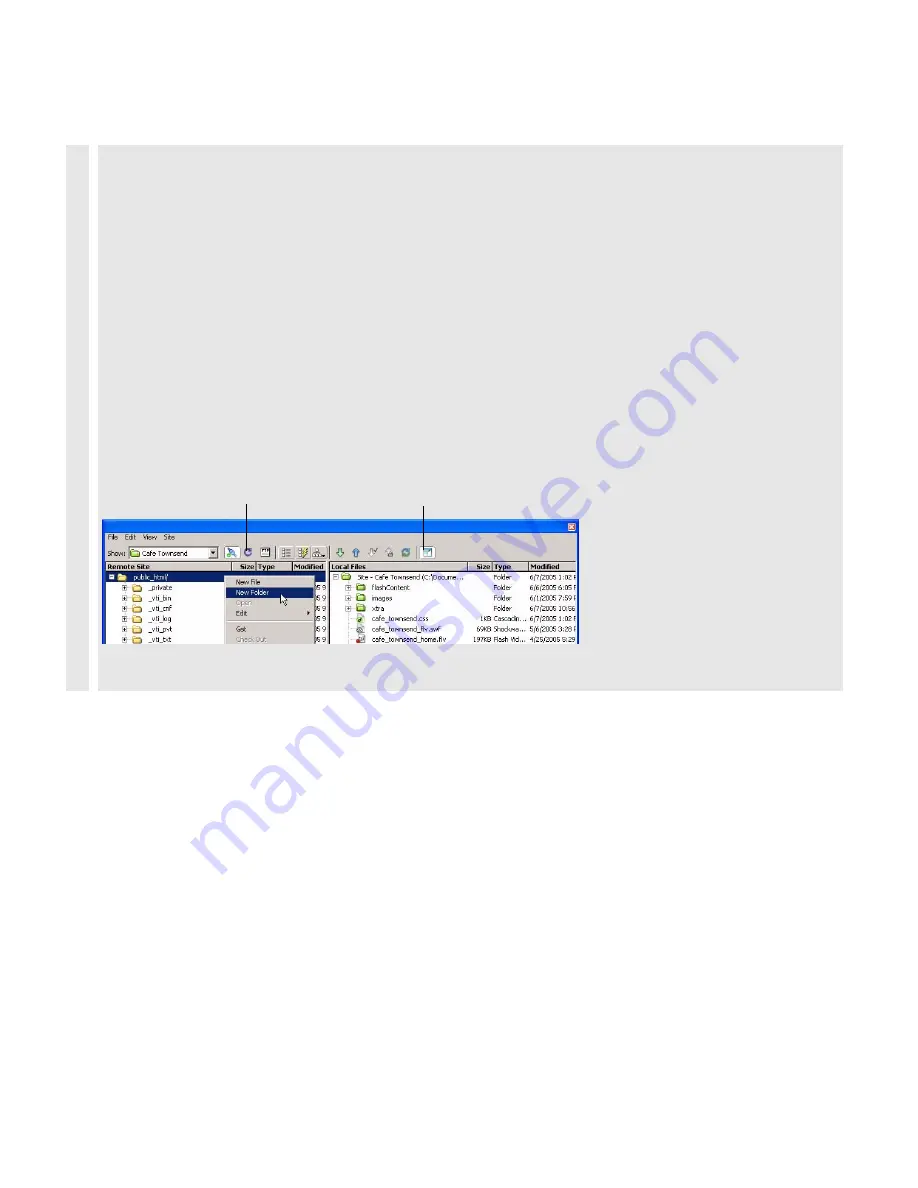
When you establish a connection with a remote server, the Files panel displays all of the files on the
remote server in Remote view (just as it displays all of the local files on your computer in Local view). To
display Remote view, select Remote view from the pop-up menu at the top of the Files panel, or click
Expand/Collapse in the Files panel toolbar. When you click Expand/Collapse, the Files panel displays
both Local view and Remote view simultaneously.
To add an empty folder in Remote view, first display Remote view using one of the methods described
earlier. (If you don’t see your connection initially, click Refresh in the Files panel toolbar.) After you see
that you’re connected to your web server, right-click (Windows) or Control-click (Macintosh) in Remote
view and select New Folder.
For more information, see Chapter 4, “Managing Your Files” in
Using Dreamweaver
.
Expand/Collapse button
Refresh button
Summary of Contents for DREAMWEAVER 8-GETTING STARTED WITH...
Page 1: ...Getting Started with Dreamweaver...
Page 8: ...8 Contents...
Page 10: ......
Page 46: ...46 Dreamweaver Basics...
Page 48: ......
Page 128: ...128 Tutorial Formatting Your Page with CSS...
Page 136: ...136 Tutorial Publishing Your Site...
Page 138: ......
Page 189: ...Add a Repeat Region XSLT object 189 3 Select Insert XSLT Objects Repeat Region...
Page 196: ...196 Tutorial Displaying XML Data...
Page 216: ......
Page 230: ...230 Understanding Web Applications...
Page 236: ...236 Installing a Web Server...
Page 254: ...254 Setup for Sample ColdFusion Site...
Page 268: ...268 Setup for Sample ASP NET Site...
Page 284: ...284 Setup for Sample ASP Site...
Page 300: ...300 Setup for Sample JSP Site...
Page 320: ...320 Setup for Sample PHP Site...


