


Selecting
Back
will hide the audio controls.
Media player controls using a remote
control
You can control audio wirelessly using a Raymarine
RCU-3 remote control unit.
The Shortcut key on the RCU-3 must be set to
Start/Stop audio playback, refer to the
Using a
Remote control
section for further details.
1.
Press
UP
arrow for next track.
2.
Press
DOWN
arrow for previous track.
3.
Press
SHORTCUT
button to play/pause audio.
Note:
On New c Series multifunction displays,
whilst the audio controls appear on the screen you
cannot interact with them. To control audio you
must use a connected RCU-3.
Unpairing a Bluetooth device
If you are experiencing problems when attempting to
use a Bluetooth device with the multifunction display
it may be necessary to unpair the device (and any
other paired Bluetooth devices) and then retry the
pairing procedure.
With the homescreen displayed:
1. Select
Set-up
.
2. Select
System Settings
.
3. Select
Wireless Connections
.
4. Select
Connection Manager
.
5. Select the media player device in the list.
6. Select
Unpair / Forget this device
.
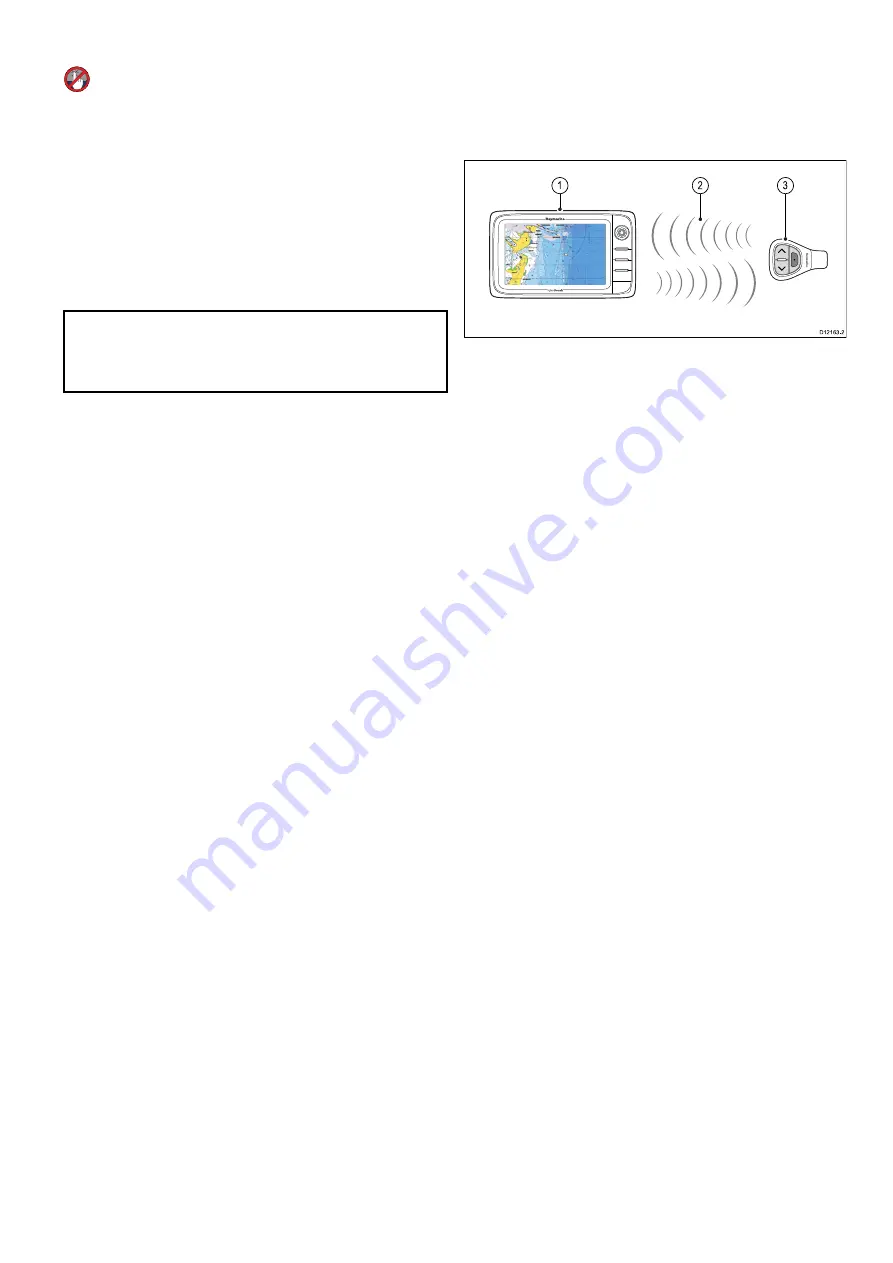
4.26 Bluetooth remote control
connection
You can control the multifunction display wirelessly
using a Raymarine remote control unit.
The remote control uses a Bluetooth wireless
connection.
D12163-2
1
3
2
1.
Multifunction display.
2.
Bluetooth connection.
3.
Raymarine Bluetooth remote control (for
example, RCU-3).
To use the remote control you must first:
• Enable Bluetooth in the System Settings on the
multifunction display.
• Pair the remote control unit with the multifunction
display.
Operating principles
Remote control operating principles.
• Only 1 multifunction display may be operated by
a remote control unit at any one time. You cannot
pair a multifunction display to more than 1 remote
control at the same time.
• The 3 buttons on the remote control unit have
different functions depending on the CONTEXT in
which you are using it. For example, in the chart
application the buttons control different functions
than they do in the homescreen.
• All functions are accessed using a combination of
the 3 buttons. For some functions you must press
a button MOMENTARILY. You can also HOLD
a button for continuous response (for example,
continuous ranging in the chart application).
• The main methods of operation involve the use
of the
UP
and
DOWN
“arrow” buttons to highlight
different on-screen options. The
SHORTCUT
button is used to select (execute) them.
• During the pairing process you must define which
of the arrow buttons you want to be the “UP”
button.
• The
SHORTCUT
button is customizable and can
be configured to operate one of a number of
functions, using the System Settings menu on
your multifunction display.
Pairing the remote and configuring the UP
and DOWN buttons
The remote control unit must be “paired” with the
multifunction display that you want to control. On
your multifunction display, with the homescreen
displayed:
Cables and connections
77
Summary of Contents for a125
Page 2: ......
Page 6: ......
Page 16: ...16 a Series c Series e Series ...
Page 43: ...13 GPS receiver 14 Thermal camera 15 Wireless connection Planning the installation 43 ...
Page 50: ...50 a Series c Series e Series ...
Page 82: ...82 a Series c Series e Series ...
Page 114: ...114 a Series c Series e Series ...
Page 120: ...120 a Series c Series e Series ...
Page 186: ...186 a Series c Series e Series ...
Page 190: ...190 a Series c Series e Series ...
Page 208: ...208 a Series c Series e Series ...
Page 230: ...230 a Series c Series e Series ...
Page 320: ...320 a Series c Series e Series ...
Page 340: ...340 a Series c Series e Series ...
Page 364: ...364 a Series c Series e Series ...
Page 420: ...420 a Series c Series e Series ...
Page 424: ...424 a Series c Series e Series ...
Page 434: ...434 a Series c Series e Series ...
Page 459: ......
Page 460: ...www raymarine com ...


