


11.1 Autopilot Control overview and
features
Raymarine
®
autopilots can be controlled directly
from a compatible LightHouse powered
MFD
, with or
without a dedicated Pilot control head.
Note:
For information on connecting a
Raymarine
®
autopilot to a compatible
MFD
, refer
to the documentation that accompanied your
autopilot.
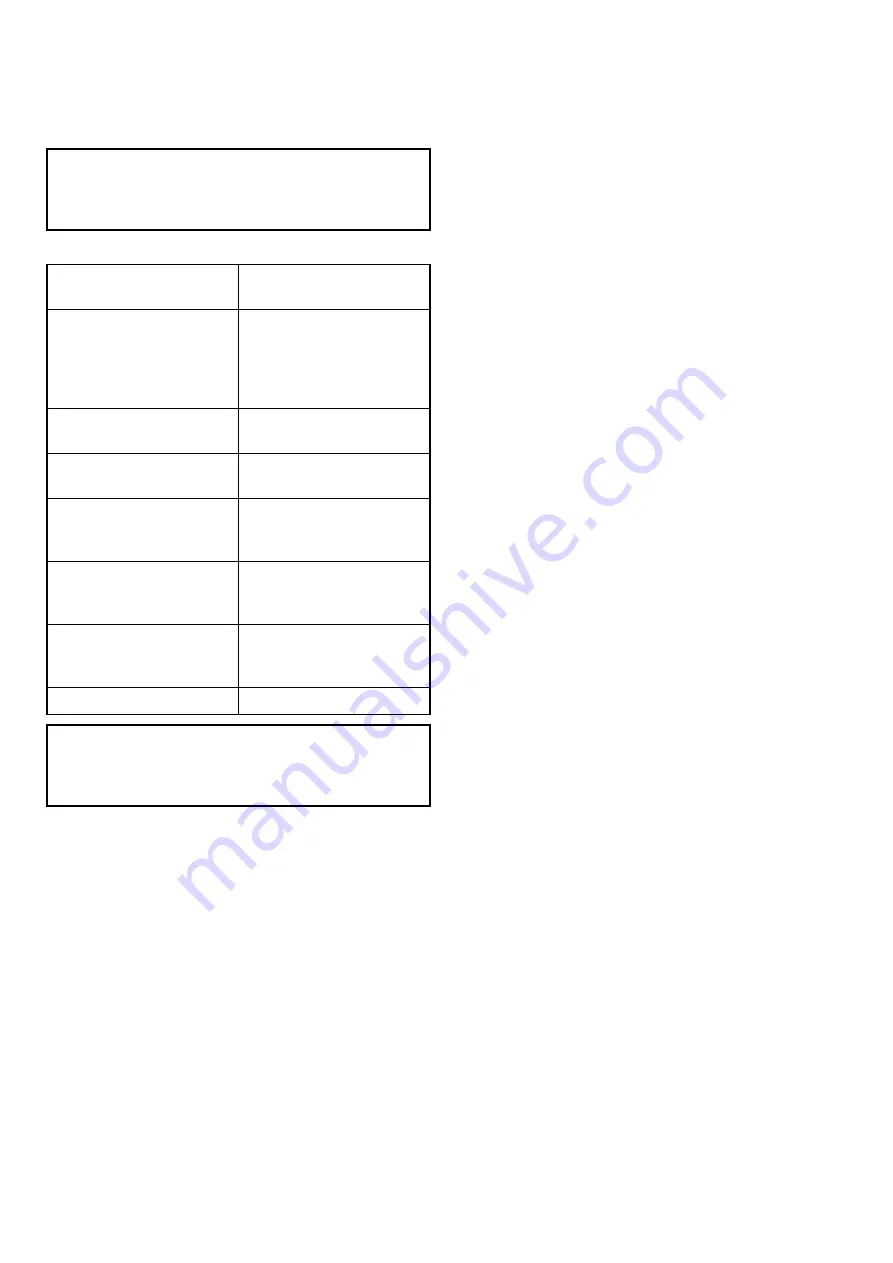
The
MFD
can be used to:
Control a connected
Autopilot.
•
6.15 Enabling autopilot
control
Engage the autopilot in Track
mode (Goto a specified
position or follow a route) or
Auto mode (Remain on the
current heading).
•
Adjust the current locked
heading when in
Auto
mode.
•
11.4 Adjusting the current
locked heading
Disengage the autopilot.
•
Provide close integration
with the Chart application for
seamless navigation.
•
Select different performance
modes, when connected to
an
Evolution
autopilot.
•
Adjust the
Pilot Settings
,
when connected to an
Evolution
autopilot.
•
Manage autopilot alarms.
•
Note:
In a system that does not include a
dedicated Pilot control head the Data Master
MFD
cannot be switched Off or put into
PowerSave
mode whilst the autopilot is engaged.
11.2 Enabling autopilot control
Enabling the autopilot control function —
SeaTalk and SPX SeaTalk
ng
autopilots
To enable control of your SeaTalk or SPX SeaTalk
ng
autopilot using your multifunction display follow the
steps below.
From the Homescreen:
1. Select
Set-up
.
2. Select
System Settings
.
3. Select
Autopilot Control
so that On is
highlighted.
Selecting Autopilot Control will switch the control
between On and Off.
On a system containing multiple displays the pilot
control is enabled on all displays at the same time.
Enabling the autopilot control function —
Evolution autopilots
To enable control of your Evolution autopilot using
your multifunction display follow the steps below.
From the Homescreen.
1. Select
Set-up
.
2. Select
System Settings
.
3. Select
External Devices
.
4. Select
Pilot Set-up
.
5. Select
Pilot control
so that On is highlighted.
Selecting Pilot control will switch the Autopilot
control function on and off.
164
a Series / c Series / e Series
Summary of Contents for a125
Page 2: ......
Page 6: ......
Page 16: ...16 a Series c Series e Series ...
Page 43: ...13 GPS receiver 14 Thermal camera 15 Wireless connection Planning the installation 43 ...
Page 50: ...50 a Series c Series e Series ...
Page 82: ...82 a Series c Series e Series ...
Page 114: ...114 a Series c Series e Series ...
Page 120: ...120 a Series c Series e Series ...
Page 186: ...186 a Series c Series e Series ...
Page 190: ...190 a Series c Series e Series ...
Page 208: ...208 a Series c Series e Series ...
Page 230: ...230 a Series c Series e Series ...
Page 320: ...320 a Series c Series e Series ...
Page 340: ...340 a Series c Series e Series ...
Page 364: ...364 a Series c Series e Series ...
Page 420: ...420 a Series c Series e Series ...
Page 424: ...424 a Series c Series e Series ...
Page 434: ...434 a Series c Series e Series ...
Page 459: ......
Page 460: ...www raymarine com ...


