3: Installation
EMG™ Edge Management Gateway User Guide
39
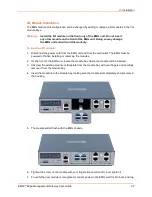
2. Prepare the EMG unit for installation:
If free-standing, attach the adhesive-backed rubber feet to the base of the EMG unit.
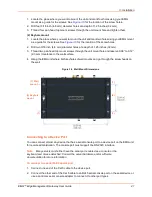
If rack-mounted or wall-mounted, attach the brackets on the sides of the EMG unit using a
screw driver and the screws provided with the mounting kit.
3. Mount the EMG unit.
If free-standing, place the unit securely on a desktop or other flat horizontal surface.
If rack-mounted, mount the unit securely in a 19-inch rack. See
.
If wall-mounted, mount the unit securely on a flat vertical surface. See
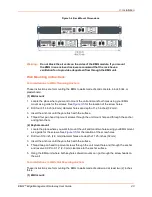
Warning:
Do not block the air vents on the sides of the EMG module. If you mount
the EMG in an enclosed rack, we recommend that the rack have a
ventilation fan to provide adequate airflow through the EMG unit.
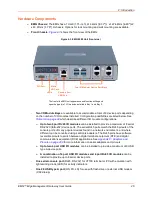
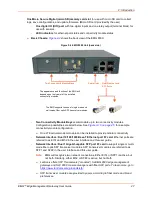
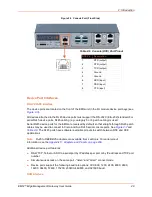
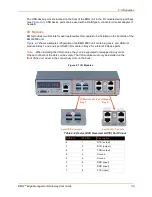
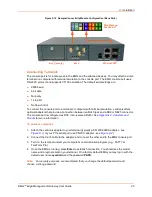
4. Connect the serial device(s) to the EMG unit’s device ports. See
5. Choose one of the following options:
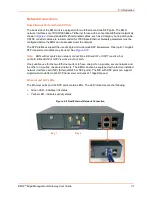
To configure the EMG using the network, or to monitor serial devices on the network,
connect at least one EMG network port to a network. See
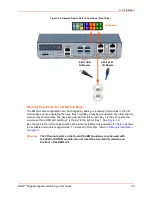
To configure the EMG unit using a dumb terminal or a computer with terminal emulation,
connect the terminal or PC to the front panel EMG console port. See
Connecting Terminals (on page 45)
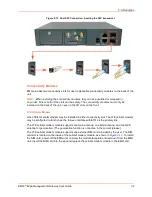
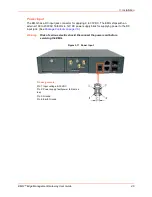
6. Connect the power cord to power on the unit. See
.
7. Wait approximately one minute for the boot process to complete.
The first time the EMG boots, it attempts to get an IP address from DHCP. To configure the
network settings, see
Rack Mount Installation
Attach the brackets on the sides of the EMG unit using a screwdriver and the screws provided with
the mounting kit.
Mount the unit securely in a 19-inch rack.

