13: User Authentication
EMG™ Edge Management Gateway User Guide
281
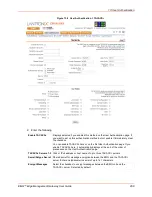
Command
to
Nickname
and back to
Command
(if
Nicknames
is selected), or keep the
cursor on Command (if Nicknames is not selected). Commands (and the optional
nicknames) are added to the
Menu Commands/Nicknames
list when carriage return is
entered at the
Command
field (if
Nicknames
is not selected) or the
Nickname
field (if
Nicknames
is selected). Most browsers have a "Select All" keystroke (such as Control-A)
which allow you to select all of the text in a field; this can be used in conjunction with the
Delete key to clear the contents of a field before entering a new command or nickname.
The
Clear Command & Nickname
button can also be used to delete the contents of the
Command and Nickname fields.
Commands can also be added to the list when
QuickEdit Mode
is not selected. Enter the
command and the optional nickname and click the
right
arrow
. The command will be
added before the logout command (if a command/nickname is not selected in the list) or
will replace the currently selected command/nickname in the list. The
Unselect
Command & Nickname
button can be used to unselect the currently selected command/
nickname in the list.
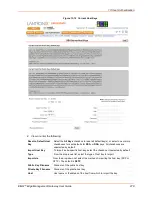
4. To add more commands to the custom menu, repeat step 3.
5. You also have the following options:
-
To edit a command/nickname in the custom menu, select the command in the
Commands/Nicknames List
box and select the
left
arrow
button. Change the
command and/or the nickname, and with the same command still selected in the list,
select the
right
arrow
button.
-
To remove a command/nickname from the custom menu, select the command in the
Commands/Nicknames List
box and select the
Delete Command & Nickname
button.
-
To move a command higher up in the menu (the commands are shown in the order they
will be presented in the custom menu, with command #1 listed first), select the command
in the
Commands/Nicknames List
box and click the
up
arrow
.
-
To move a command further down in the menu, select the menu in the
Commands/
Nicknames List
and click the
down
arrow
.
6. Click the
Add Custom Menu
button.
To view or update a custom menu:
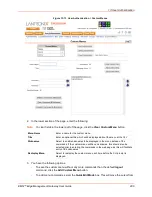
1. In the
Custom Menus
table, select the custom menu and click the
View Custom Menu
button. The custom menu attributes appear in the lower part of the page.
2. Update the menu attributes following the instructions for adding a menu above.
3. Click the
Edit Custom Menu
button.
To delete a custom menu:
1. Select the custom menu in the
Custom Menus
table.
2. Click the
Delete Custom Menu
button.
To create a new custom menu from an existing custom menu:
1. Select the custom menu in the
Custom Menus
table.
2. Enter a name for the new menu in the
New Menu Name
field.
3. Click the
Copy Custom Menu
button.


