4-14
Printing from PC > Printing from PC
3
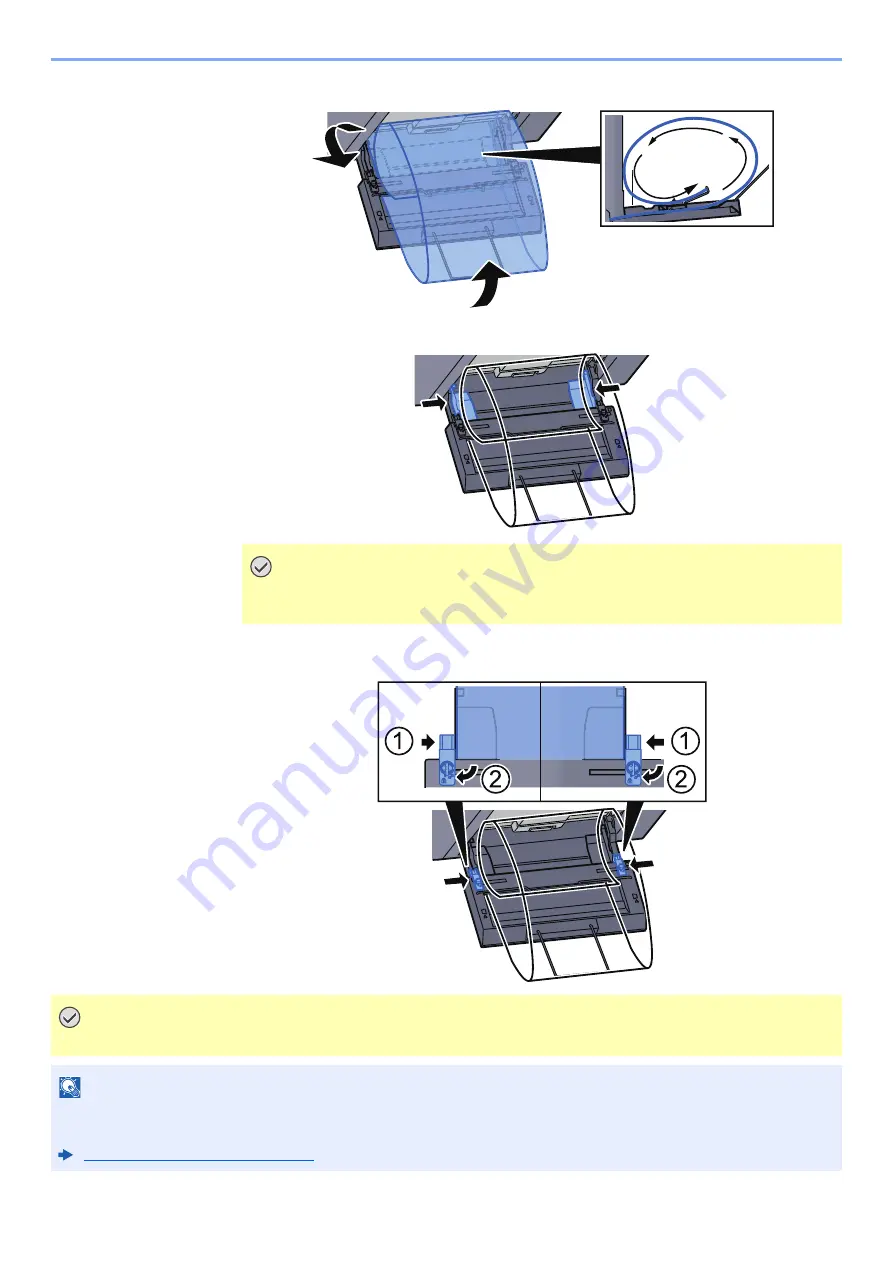
Loop the banner paper back and place the end on the paper support.
4
Adjust the paper width guides to the width of the paper.
5
Adjust the paper width guides on the banner tray to the same width as the paper width
guides on the multipurpose tray and lock.
IMPORTANT
If there is a gap between the paper and the paper width guides, readjust the guides
to fit the paper in order to prevent skewed feeding and paper jams.
IMPORTANT
Remove the paper when banner printing finishes, or when you are not using the banner tray.
NOTE
The print confirmation screen can be set in System Menu to not appear when the banner tray is attached. This will
allow continuous printing on multiple sheets. Refer to the follows:
Summary of Contents for TASKalfa 7353ci
Page 1: ...kyoceradocumentsolutions com Operation Guide TASKalfa 8353ci TASKalfa 7353ci ...
Page 553: ...10 20 Troubleshooting Regular Maintenance 4 Install the Staple Waste Box 5 Close the cover ...
Page 555: ...10 22 Troubleshooting Regular Maintenance 4 Install the Punch Waste Box 5 Close the cover ...
Page 616: ...10 83 Troubleshooting Clearing Paper Jams 12Return the side feeder to the original position ...
Page 661: ...10 128 Troubleshooting Clearing Paper Jams 14Return the covers to the original position ...
Page 720: ......
Page 723: ...2019 6 2XNKDEN000 is a trademark of KYOCERA Corporation 2019 KYOCERA Document Solutions Inc ...


