About the Control Panel
13
4
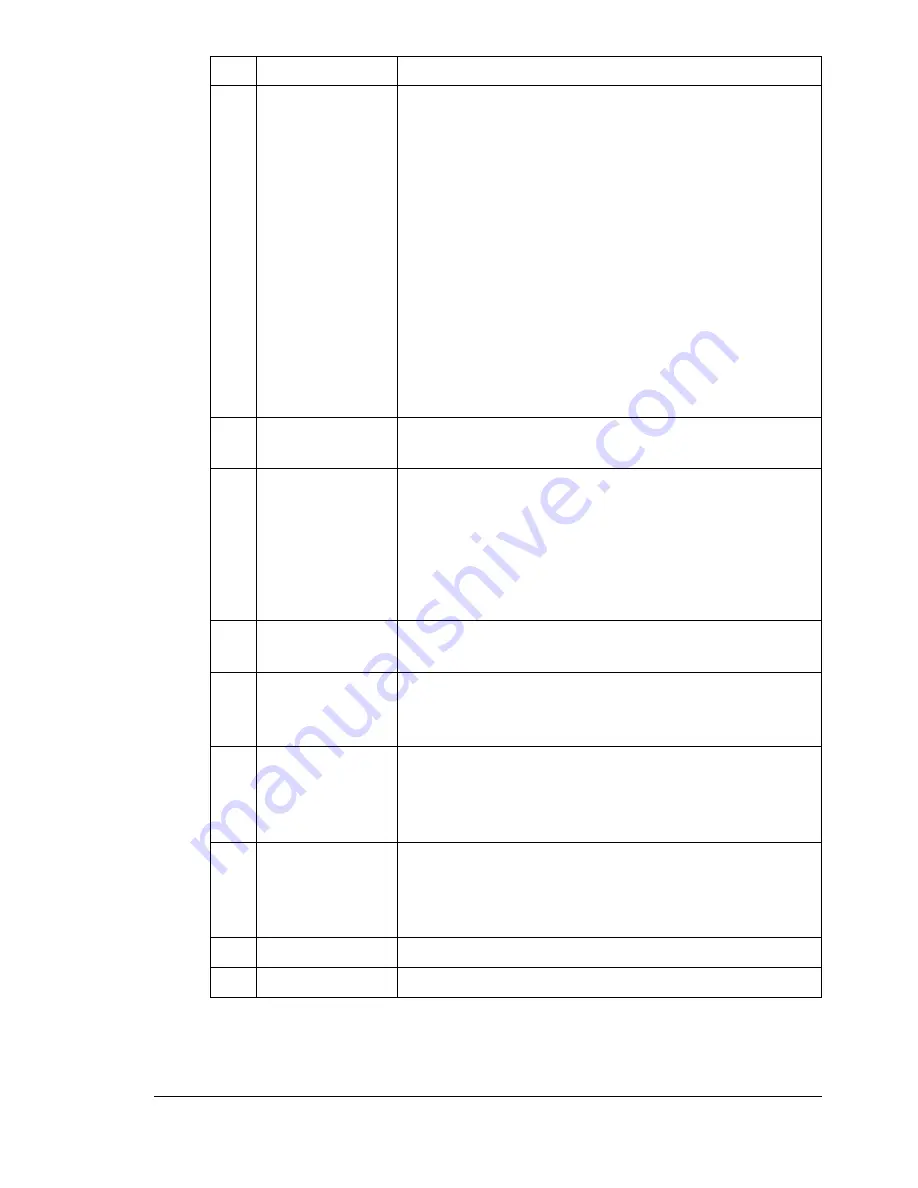
Display
key
Press to check the status of this machine and the
specified settings.
Displays a rough estimate of the amount of toner
remaining.
Displays the total number of pages that have
been copied, printed and scanned.
Displays the results for fax transmissions and
receptions.
Prints the machine settings, lists and reports
related to fax.
For details, refer to “Checking the Machine Status
and Settings” on page 19.
5
Quality
key
Press to specify the document type to be copied and
the resolution.
6
Message Win-
dow
Displays information such as the media type,
copy density, and zoom ratio. For details, refer to
“Display Indications” on page 16.
Displays an error message when an error occurs.
For details on error messages, refer to “Status,
Error, and Service Messages” on page 191.
7
Keypad
Enters desired number of copies. Enters fax num-
bers, E-mail addresses, and names of recipients.
8
Fax
key
Press to enter Fax mode. The key lights up in green
while the machine is in Scan mode. For details, refer
to the bizhub C10 Facsimile User's Guide.
9
Scan
key
Press to enter scan mode. (Scan to E-mail or Scan
to PC) The key lights up in green while the machine
is in Scan mode. For details on the Scanner func-
tions, refer to chapter 7, “Using the Scanner”
10
Copy
key
Press to enter Copy mode. The key lights up in
green while the machine is in Copy mode. For
details on the Copy functions, refer to chapter 6,
“Using the Copier”.
11
2in1
key
Press to specify 2in1 copying.
12
Collate
key
Press to specify collated copying.
No. Name
Function
Summary of Contents for BIZHUB C10
Page 1: ...bizhub C10 Printer Copier Scanner User s Guide 4556 9607 00A ...
Page 14: ...Contents viii ...
Page 15: ...1 Introduction ...
Page 24: ...Getting Acquainted with Your Machine 10 ...
Page 25: ...2 Control Panel and Configuration Menu ...
Page 52: ...Configuration Menu Overview 38 ...
Page 53: ...3 Media Handling ...
Page 71: ...Loading Media 57 10 Carefully close the engine cover ...
Page 77: ...Loading Media 63 6 Reattach the lid to Tray 2 7 Reinsert Tray 2 into the machine ...
Page 87: ...4 Using the Printer Driver ...
Page 96: ...Printer Driver Settings 82 ...
Page 97: ...5 Using Direct Print ...
Page 100: ...Camera Direct Photo Printing 86 ...
Page 101: ...6 Using the Copier ...
Page 112: ...Making Advanced Copies 98 ...
Page 113: ...7 Using the Scanner ...
Page 138: ...Basic Scan to PC Operation 124 ...
Page 139: ...8 Replacing Consumables ...
Page 155: ...9 Maintenance ...
Page 170: ...Storing the machine 156 ...
Page 171: ...10 10 Troubleshooting ...
Page 181: ...Clearing Media Misfeeds 167 8 Reinstall the drum cartridge 9 Carefully close the engine cover ...
Page 185: ...Clearing Media Misfeeds 171 20 Reinsert Tray 2 ...
Page 214: ...Status Error and Service Messages 200 ...
Page 215: ...11 11 Installing Accessories ...
Page 223: ...A Appendix ...
Page 236: ...Index 222 ...


