5.
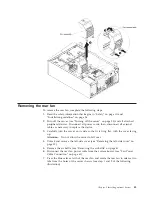
Remove the air baffle (see “Removing the air baffle” on page 41) if necessary.
6.
Touch the static-protective package that contains the simple-swap fan to any
unpainted metal surface on the server; then, remove the fan from the package.
7.
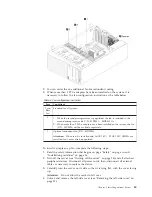
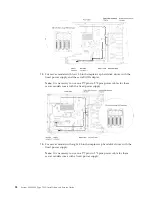
Slide the fan down directly into the server. (see step 1 in the following
illustration).
8.
Align the release latches of the fan and make sure the fan is firmly seated on
the right position. (see step 2 and 3 in the following illustration).
9.
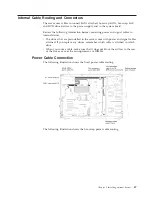
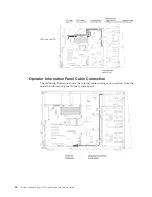
Connect the fan power cable on the system board. (see “Internal Cable Routing
and Connectors” on page 47).
If you have other devices to install or remove, do so now. Otherwise, go to
“Completing the installation” on page 104.
46
System x3300 M4 Type 7382: Installation and Service Guide
Summary of Contents for System x3300 M4
Page 1: ...System x3300 M4 Type 7382 Installation and Service Guide...
Page 2: ......
Page 3: ...System x3300 M4 Type 7382 Installation and Service Guide...
Page 8: ...vi System x3300 M4 Type 7382 Installation and Service Guide...
Page 18: ...xvi System x3300 M4 Type 7382 Installation and Service Guide...
Page 44: ...26 System x3300 M4 Type 7382 Installation and Service Guide...
Page 128: ...110 System x3300 M4 Type 7382 Installation and Service Guide...
Page 156: ...138 System x3300 M4 Type 7382 Installation and Service Guide...
Page 382: ...364 System x3300 M4 Type 7382 Installation and Service Guide...
Page 405: ...Chapter 6 Removing and replacing components 387...
Page 450: ...432 System x3300 M4 Type 7382 Installation and Service Guide...
Page 454: ...436 System x3300 M4 Type 7382 Installation and Service Guide...
Page 468: ...450 System x3300 M4 Type 7382 Installation and Service Guide...
Page 469: ......
Page 470: ...Part Number 00V9709 Printed in USA 1P P N 00V9709...


