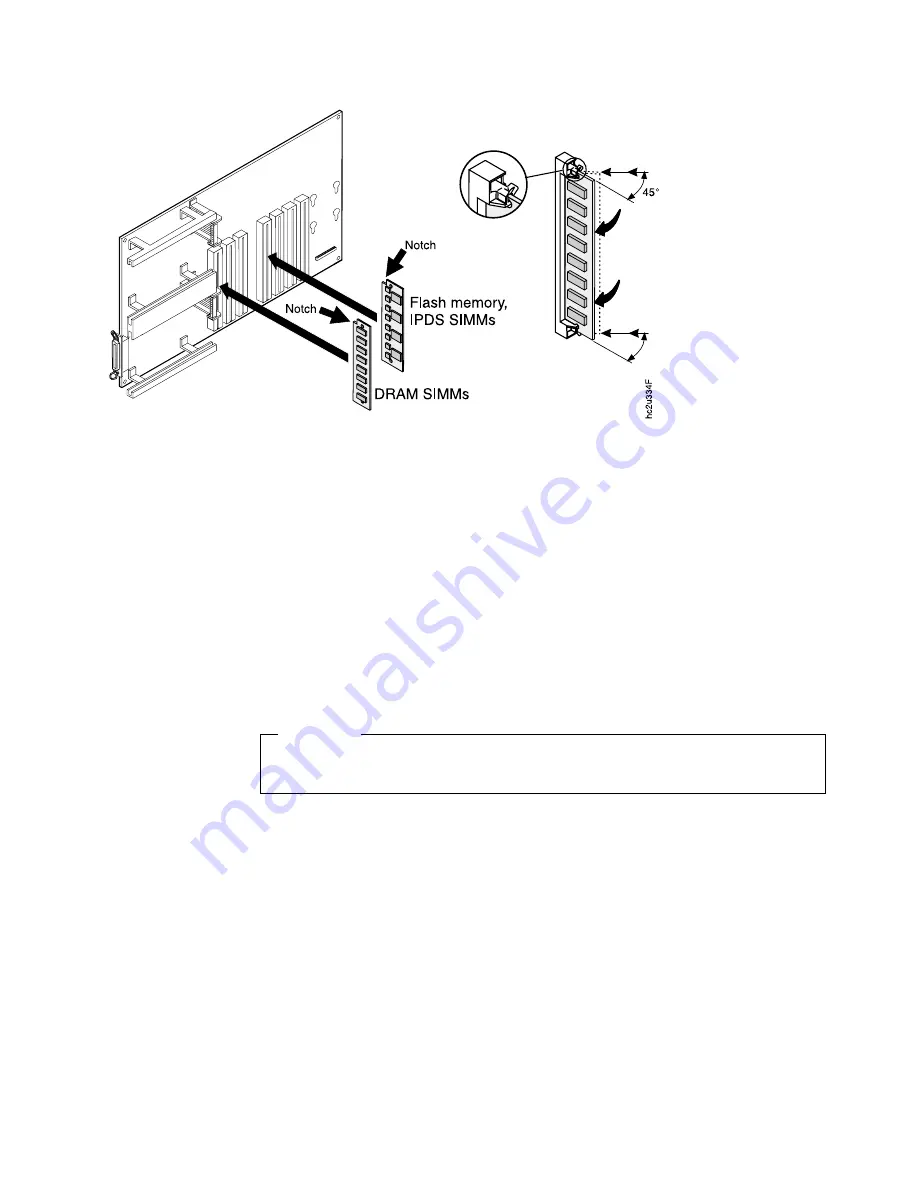
4. Hold the SIMM with the notch facing the socket and the notch at the top. Insert
the SIMM at a 45 degree angle and move it into position in the socket. Using
your thumbs, press with even pressure on both ends of the SIMM until the
SIMM is firmly seated in the socket.
Make sure the clips on either end of the socket snap into place to hold the
SIMM. If necessary, use your thumbs to move the clips upright into the grooves
to lock the SIMM in place.
5. Verify that the SIMM is correctly installed in the socket by looking at its position
from the sides of the controller card.
6. Reinstall the side cover. Follow the procedure “Reinstalling the Side Cover” on
page 116.
Installing a Hard Drive
Attention
Follow the instructions for handling static-sensitive devices described on page
117.
Use the following procedure to install a hard drive:
1. Ensure that printer is powered off and unplugged from the wall outlet.
2. The side cover must be removed before installing the hard drive. Follow the
procedure “Removing the Side Cover” on page 113.
3. Unpack the hard drive.
Chapter 8. Installing Printer Options
115
|
|
|
|
|
|
|
Summary of Contents for InfoPrint 20
Page 1: ...IBM InfoPrint 20 User s Guide Web Version S544 5516 W1...
Page 2: ......
Page 3: ...IBM InfoPrint 20 User s Guide Web Version S544 5516 W1...
Page 22: ...1 Turn off the printer and unplug it from the wall 12 InfoPrint 20 User s Guide Web Version...
Page 34: ...24 InfoPrint 20 User s Guide Web Version...
Page 62: ...52 InfoPrint 20 User s Guide Web Version...
Page 122: ...112 InfoPrint 20 User s Guide Web Version...
Page 182: ...172 InfoPrint 20 User s Guide Web Version...
Page 184: ...174 InfoPrint 20 User s Guide Web Version...
Page 192: ...182 InfoPrint 20 User s Guide Web Version...
Page 202: ...192 InfoPrint 20 User s Guide Web Version...
Page 205: ......
Page 206: ...File Number S370 4300 9370 16 Printed in U S A...


