component locations” on page 120 for the
connector locations on the I/O function card.
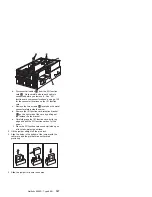
b. Remove the two screws located on the metal
connector plate inside the server.
c. Remove the I/O function card retention bracket
on the right side of the card by pulling out the
fastener on the bracket.
d. Carefully grasp the I/O function card by its top
edge and pull the I/O function card out of the
server.
e. Place the I/O function card connector side up on
a flat, static-protective surface.
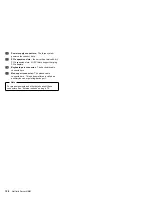
3. Remove all insulators
.3/
. See “Hot-plug PCI adapter
installation” on page 84 for more information.
4. Remove the I/O board protector shield
.5/
covering
the I/O board
.7/
.
5. Remove VRMs
.4/
from their slots on the I/O board.
See “VRM latch releases” on page 119.
6. Unscrew the 14 screws
.6/
securing the I/O board to
the I/O housing
.8/
.
7. Reverse the procedure to install the I/O board into the
server.
118
Netfinity Server HMM
Summary of Contents for 8500R - Netfinity - 8681
Page 2: ......
Page 8: ...vi Netfinity Server HMM...
Page 25: ...1 LVD low voltage differential Netfinity 8500R Type 8681 17...
Page 62: ...Caution Use safe practices when lifting 54 Netfinity Server HMM...
Page 242: ...I O Housing Assembly 1 2 3 4 5 6 7 234 Netfinity Server HMM...
Page 261: ...Related service information 253...
Page 262: ...254 Netfinity Server HMM...
Page 263: ...Related service information 255...
Page 264: ...256 Netfinity Server HMM...
Page 265: ...Related service information 257...
Page 278: ...270 Netfinity Server HMM...
Page 279: ...Related service information 271...
Page 280: ...272 Netfinity Server HMM...
Page 290: ...IBM Part Number 37L5123 Printed in U S A S37L 5123...


