Identifying the failed component
IMPORTANT:
A replacement X9700cx I/O module could have the wrong version of firmware
pre-installed. The X9700cx I/O module cannot operate with mixed versions of firmware. Plan for
system downtime before inserting a new X9700cx I/O module.
1.
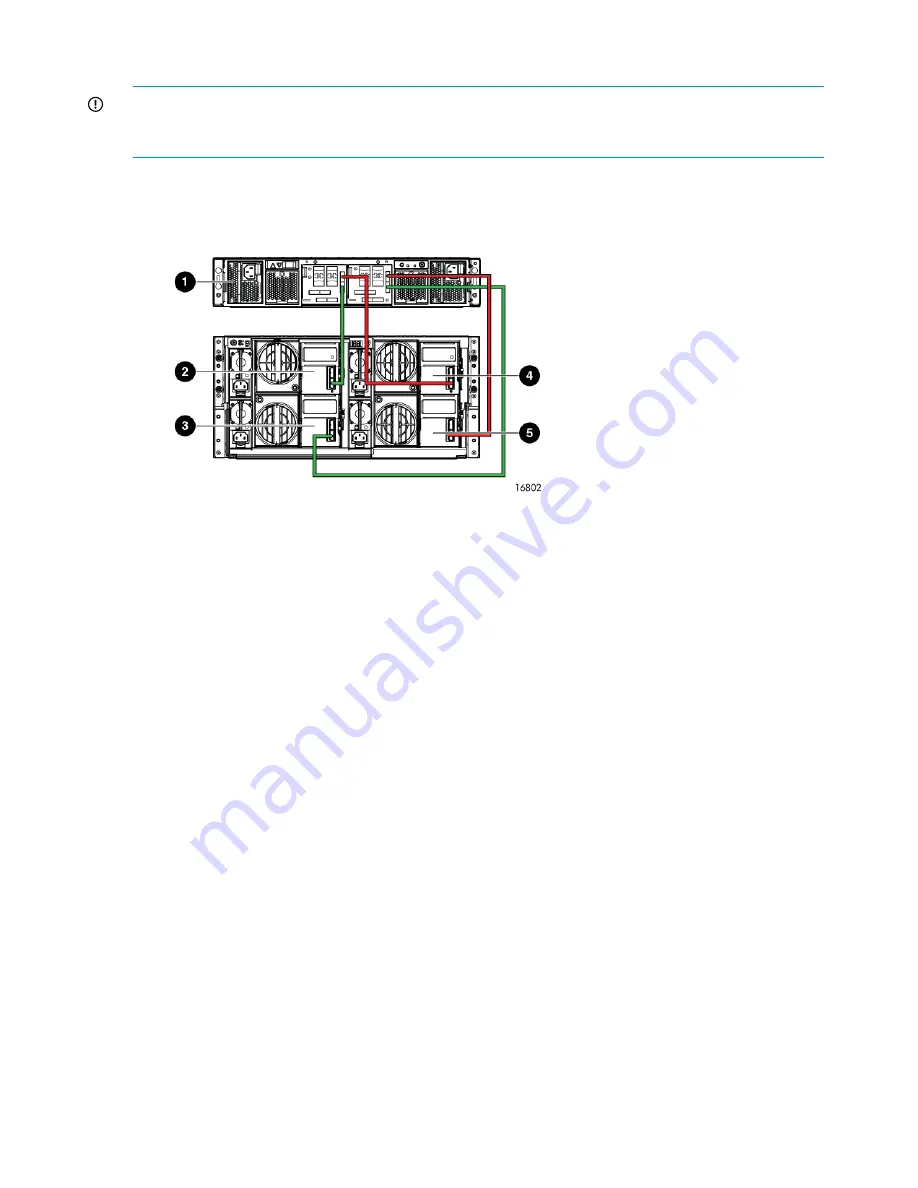
Verify that SAS cables are connected to the correct controller and I/O module. The following
diagram shows the correct wiring of the SAS cables.
X9700c
1.
X9700cx primary I/O module (drawer 2)
2.
X9700cx secondary I/O module (drawer 2)
3.
X9700cx primary I/O module (drawer 1)
4.
X9700cx secondary I/O module (drawer 1)
5.
As indicated in the figure above, the X9700c controller 1 (left) is connected to the primary
(top) X9700cx I/O modules and the controller 2 (right) is connected to the secondary (bottom)
I/O modules. If possible, trace one of the SAS cables to validate that the system is wired
correctly.
2.
Check the seven-segment display and note the following as it applies to your situation:
•
If the seven-segment display shows “on,” then both X9700c controllers are operational.
•
If the seven-segment displays shows “on” but there are path errors as described earlier
in this document, then the problem could be with the SAS cables connecting the X9700c
controller to the SAS Switch in the blade chassis. Replace the SAS cable and run the
exds stdiag
command, which should report two controllers. If not, try connecting the
SAS cable to a different port of the SAS switch.
•
If the seven-segment displays does not show “on,” it shows an alphanumeric code. The
number represents the controller that has an issue. For example “C1” indicates the issue
is with controller 1 (the left controller). Press the down button beside the seven-segment
102 Troubleshooting


