background image

viii

Company confidential.  Murillo/Ravillo User’s Guide. Final  Freeze Status:  Frozen

This is the cyan on page viii (seq: 8)

This is the black on page viii (seq: 8)

6 Managing Your Plots

Managing Plots Currently Being Printed or Drying

6-2

. . . . . . . . . . . . . . . . . . . . . . 

To Cancel a Plot

6-2

. . . . . . . . . . . . . . . . . . . . . . . . . . . . . . . . . . . . . . . . . . . . . . . 

To Cut a Plot Before Drying Is Complete (Roll Media Only)

6-2

. . . . . . . . . . . . 

To Pause while Printing a Series of Plots

6-3

. . . . . . . . . . . . . . . . . . . . . . . . . . . . 

Managing Plots Not Yet Printed (The Queue)

6-4

. . . . . . . . . . . . . . . . . . . . . . . . . . . 

To Start Printing a Plot That Is Waiting for a Timeout

6-4

. . . . . . . . . . . . . . . . . . 

What Is the Queue?

6-5

. . . . . . . . . . . . . . . . . . . . . . . . . . . . . . . . . . . . . . . . . . . . . 

To Identify a Page in the Queue

6-6

. . . . . . . . . . . . . . . . . . . . . . . . . . . . . . . . . . . 

To See the Size of a Page in the Queue

6-7

. . . . . . . . . . . . . . . . . . . . . . . . . . . . . 

To Prioritize a Page in the Queue

6-7

. . . . . . . . . . . . . . . . . . . . . . . . . . . . . . . . . . 

To Delete a Page from the Queue

6-7

. . . . . . . . . . . . . . . . . . . . . . . . . . . . . . . . . . 

To Make Copies of a Page in the Queue

6-8

. . . . . . . . . . . . . . . . . . . . . . . . . . . . . 

To Replot an Image Using the Plotter’s Memory (DesignJet 700)

6-9

. . . . . . . . . . . 

Avoiding Media Waste by Nesting Pages (Roll Media Only)

6-10

. . . . . . . . . . . . . . 

What Is Nesting?

6-10

. . . . . . . . . . . . . . . . . . . . . . . . . . . . . . . . . . . . . . . . . . . . . . 

When Does the Plotter Try to Nest Pages?

6-11

. . . . . . . . . . . . . . . . . . . . . . . . . . 

Which Pages Qualify for Nesting?

6-11

. . . . . . . . . . . . . . . . . . . . . . . . . . . . . . . . 

Which Pages May be Rotated?

6-11

. . . . . . . . . . . . . . . . . . . . . . . . . . . . . . . . . . . 

To Turn Nesting On or Off and Choose the Nesting Method

6-12

. . . . . . . . . . . . 

What Happens to Nesting if You Turn Queueing Off?

6-12

. . . . . . . . . . . . . . . . . 

How Long Does the Plotter Wait for Another File?

6-12

. . . . . . . . . . . . . . . . . . . 

Getting the Best From Nesting (Nesting and Margins)

6-13

. . . . . . . . . . . . . . . . 

Nesting and the Rotate Feature

6-13

. . . . . . . . . . . . . . . . . . . . . . . . . . . . . . . . . . . 

Contents

Summary of Contents for C4705A

Page 1: ...This is the black on outside front cover HP DesignJet 700 Plotter HP DesignJet 750C Plus Plotter User s Guide ...

Page 2: ...make expressed or implied warranty of any kind with regard to this material including but not limited to the implied warranties of merchantability and fitness for a particular purpose The Hewlett Packard Company shall not be liable for incidental or consequential damages in connection with or arising out of the furnishing performance or use of this document and the program material which it descri...

Page 3: ...C4705 90031 English HP DesignJet 700 Plotter HP DesignJet 750C Plus Plotter C4705A C4706A C4708A and C4709A User s Guide ...

Page 4: ...ii ...

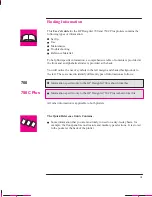
Page 5: ... the left margin and shaded backgrounds to the text These are used to identify different types of information as follows Information specific only to the HP DesignJet 700 is shown like this Information specific only to the HP DesignJet 750C Plus is shown like this All other information is applicable to both plotters The Quick Reference Guide Contains Some information that you are most likely to ne...

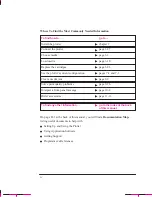
Page 6: ...ration pages 7 2 and 7 3 Clear a media jam page 9 8 Solve print quality problems page 9 16 Interpret a front panel message page 10 2 Order accessories page 11 13 To find any other information go to the index at the back of this manual On page D 1 at the back of this manual you will find a Documentation Map listing useful documents to help with Setting Up and Using the Plotter Using Application Sof...

Page 7: ...tration Plot Optional 1 24 Task 7 Connect the Plotter To Your Computer 1 27 Task 8 Configure the Serial Interface Serial Interface Users Only 1 29 Task 9 Set Up Your Software 1 35 Task 10 Print a Test Plot 1 39 Extra Tips for UNIX Users 1 40 2 Learning How to Use the Front Panel Display Tutorial The Front Panel 2 2 The Display Section 2 3 Printing the Menus Plot 2 5 Description of the Menus Plot 2...

Page 8: ...uality 3 6 Typical Media Type Choices by Application 3 7 Caring For Your Media 3 9 Loading Media 3 10 To Change a Roll 3 10 To Load a Sheet 3 18 Compensating for Badly Cut Media 3 21 To Adjust Skew Tolerance 3 21 Unloading Media 3 22 Drying Time 3 22 To Adjust Drying Time 3 23 To Unload a Sheet After Plotting 3 24 To Remove an Unused Sheet 3 25 Replacing Cartridges 3 26 When to Replace Cartridges ...

Page 9: ...all Appearance Ways To Control the Plot s Appearance 5 2 Why Change the Appearance of the Plot Using the Front Panel Rather Than from Your Software 5 2 Changing Pen Widths and Colors Shades Using the Plotter s Internal Palettes 5 3 To See the Current Palette Settings 5 3 To See the Colors Available For a Palette DesignJet 750C Plus 5 4 To Change the Palette Settings 5 5 To Change the Selection of ...

Page 10: ...a Page in the Queue 6 7 To Delete a Page from the Queue 6 7 To Make Copies of a Page in the Queue 6 8 To Replot an Image Using the Plotter s Memory DesignJet 700 6 9 Avoiding Media Waste by Nesting Pages Roll Media Only 6 10 What Is Nesting 6 10 When Does the Plotter Try to Nest Pages 6 11 Which Pages Qualify for Nesting 6 11 Which Pages May be Rotated 6 11 To Turn Nesting On or Off and Choose the...

Page 11: ...e Setting for a Different Application 7 7 To Change the Graphics Language Setting 7 7 Graphics Language and Networks 7 8 Changing the Serial Interface Settings 7 9 To Change the Serial Interface Settings 7 9 Change the I O Timeout Setting 7 9 To Upgrade Your Plotter with More Memory 7 10 File Size and Memory Usage 7 10 To Upgrade Your Plotter with the Postscript Option 7 11 To Upgrade Your Plotter...

Page 12: ...Access Cartridge s Key Does Not Work 9 7 If the Plotter Runs the Cartridge alignment Routine Unexpectedly 9 7 If Brand New Cartridge s Have Problems 9 7 Clearing a Media Jam 9 8 Solving Communication Problems 9 9 If There is a Problem Communicating between Your Computer and the Plotter 9 9 Solving Problems with Plot Position or Content 9 10 If the Plot Is Completely Blank 9 10 If the Output Contai...

Page 13: ...Bleeds from Lines 9 19 If there are Blotchy Areas Uneven Fill Density 9 19 If the Plot Is Too Dark or the Color Too Saturated 9 19 If there Is Pronounced Banding In Area Fills 9 20 If Ink Smears After You Remove a Plot 9 20 Solving Front Panel Problems 9 21 If the Access Cartridges Key Does Not Work 9 21 If None of the Front Panel Keys Work 9 21 If Page Format Rotate Does Not Work 9 21 If A Displa...

Page 14: ... 11 10 To Obtain a Material Safety Data Sheet MSDS 11 10 Electromagnetic Compatibility EMC 11 10 Telecommunications Statement 11 11 Declaration of Conformity 11 12 Ordering Accessories 11 13 HP GL 2 and HP RTL Programming Information 11 16 How to Order Supplies and Accessories 11 16 12 Glossary Index Documentation Map Please Give Us Your Feedback Removable Contents ...

Page 15: ... a set of four disposable print cartridges yellow cyan magenta and black a set is supplied with your plotter a spare black cartridge is also included From time to time you will need to replace them All other supported colors are generated using these four cartridges up to a total of over 16 million different colors for all your needs Product C4705A is the DesignJet 700 and Product C4708A is the De...

Page 16: ...s front panel These are Best Normal Fast Media You can plot on rolls or sheets up to E A0 size or D A1 size depending on the plotter model you have bought A large variety of media types are supported Opaque bond one roll is supplied with your plotter Translucent bond Natural tracing paper Vellum Coated paper one roll is supplied with your plotter Heavy coated paper Matte and clear film In addition...

Page 17: ...tation color and quality the key is to use the correct driver for the combination of your application software and your plotter and to be confident that it is configured correctly Two types of HP drivers are supplied with your plotter One or more for AutoCAD users One for users of MicrosoftR Windows applications These drivers come with printed and on line documentation to help you install and conf...

Page 18: ...of 11 MB 8 MB of main memory and 3 MB of printing memory In case you need to print particularly large files1 you can upgrade your plotter with up to two 32 MB memory expansion modules taking the maximum memory up to 75 MB 11 2 x 32 Other upgrades available are A PostScriptr upgrade kit including a ROM SIMM for the plotter and an Adobe PostScript driver for your software A network interface card th...

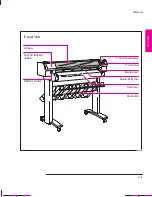
Page 19: ...xvii Front Panel Roll Cover Window Front Panel Display Media Lever Media Entry Slot Media Bin ON OFF Switch Print Cartridge s Inside Front View 1835 Welcome WELCOME ...

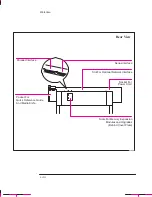
Page 20: ...erface Serial Interface Slot For Optional Network Interface Slots For Memory Expansion Modules and Upgrades Behind Cover Plate Socket For Power Cord Rear View Pocket For Quick Reference Guide And Media Knife 1844 Welcome ...

Page 21: ...tional 1 9 Task 4 Load Media 1 11 Task 5 Load the Print Cartridge s 1 20 Task 6 Print a Demonstration Plot Optional 1 24 Task 7 Connect the Plotter to Your Computer 1 27 Task 8 Configure the Interface Serial interface users only 1 29 Task 9 Set Up Your Software 1 35 Task 10 Print a Test Plot 1 39 Extra Tips For UNIX Users 1 40 Setting Up Your Plotter Installation Connection and Configuration 1 SET...

Page 22: ...r computer s RS 232 C settings are 9600 baud no parity 8 data bits and 1 stop bit Just Do the Following Six Steps and Skip the Rest of This Chapter 1 Connect the power cord and switch on 2 Load the roll of media supplied following the instructions on the label inside the plotter s roll cover Watch the front panel display for further instructions 3 Press Access Cartridge s and open the plotter wind...

Page 23: ... and then switch them on again 6 Choose your driver disk s read the instructions on the label and follow any printed instructions accompanying the disks For AutoCAD or Microsoft Windows applications the driver is shipped with the plotter For other applications see page 1 38 for advice and if necessary contact your software vendor SETUP 1 Setting Up the Plotter Fast Track ...

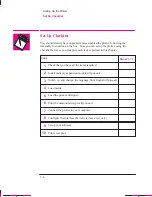
Page 24: ...is chapter Task Done 1 Check that you have all the items required 2 Install memory expansion modules Optional 3 Switch on and change the language from English Optional 4 Load media 5 Load the print cartridge s 6 Print the demonstration plot Optional 7 Connect the plotter to your computer 8 Configure the interface Serial interface users only 9 Set up your software 10 Print a test plot Setting Up th...

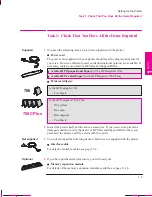
Page 25: ...black For the HP DesignJet 750C Plus One yellow One cyan One magenta Two black 2 Inspect the plotter itself and the above accessories If you received any item in a damaged condition notify the dealer or HP Sales and Support Office where you purchased the plotter and file a claim with the carrier 3 You will also need the following items which were not supplied with the plotter Interface cable For d...

Page 26: ...ne or two memory expansion modules in any combination Supported sizes are 4 MB 8 MB 16 MB and 32 MB So the maximum standard memory for your plotter is 5 5 32 32 69 5 MB 11 32 32 75 MB For HP part numbers see page 11 14 1 Make sure that the plotter is switched OFF and that neither the power cord nor an interface cable is connected X X 1847 Setting Up the Plotter Task 2 Optional Install Memory Expan...

Page 27: ...e The two slots on the right are for memory expansion modules Use slot 3 first and then slot 4 Slot for second memory module installed Slot for first memory module installed If your plotter has only one memory module it must be in slot number 3 1 2 3 4 Cover plate 1845a SETUP 1 Setting Up The Plotter Task 2 Optional Install Memory Expansion Modules ...

Page 28: ...its bag holding the module only by the edges 4 a Hold the module by its edges with the nonmetallic edge toward you and the small notch at the bottom b With the nonmetallic edge angled to the right firmly push the module into the slot Gradually straighten the angle and push it in until it clicks into place 1846 Grounding Wrist Strap 5 Using a flat blade screwdriver replace the cover plate and its f...

Page 29: ... power cords with this plotter 1 Make sure that the power switch on the front of the plotter is OFF 2 Plug the power cord into the socket at the back of the plotter and then into your power outlet 1848 3 Switch on the plotter by pushing the power switch Then go to Step 4 on If there is no sound nor any light on the front panel you have a power problem 1843 1 The physical front panel overlay is als...

Page 30: ...no sound nor any light on the front panel you have a power problem 2 Switch on 1 Press and hold Enter 1843a 5 When the word English appears on the front panel screen press the or key until your language appears Then press Enter LANGUAGE English Enter 0014 Setting Up the Plotter Setup Task 3 Switch On and Optional Change the language From English If English not OK or if you want to change the langu...

Page 31: ... procedure A roll of suitable HP Media is supplied with your plotter To load roll media start with step 1 below To load sheet media go to page 1 18 To Load a Roll 1 Make sure the plotter wheels are locked the brake levers pressed down to prevent the plotter from moving 2 Open the roll cover and remove the empty spindle by pulling firmly on each end The two ends are different end A has a media stop...

Page 32: ...the media must wind clockwise If the media stop falls off push it back in until it snaps into position End cap removed A 0015 4 Push the end cap back in making sure that the tabs are flush against the ends of the roll Push it far enough to be firm but do not use excessive force as this may break the tabs B 0016 Setting Up the Plotter Task 4 Load Media ...

Page 33: ... Be sure the media remains flush against the media stop The relationship of the media to the roller must be as shown in the diagram above A B A Media path 1837 0017 6 Check the leading edge as it unwinds from the spool If it is uneven trim it as explained in step 7 Otherwise go to step 8 SETUP 1 Setting Up the Plotter Task 4 Load Media ...

Page 34: ...ildren 7 a Pull the media over the top of the machine and lay it over the cutting track b Use the media cutting knife in the pocket located at the back of the plotter to cut off the first few inches of the media c Retract the blade and return the media cutting knife to its pocket Trim the leading edge of the media roll 1838 Setting Up the Plotter Task 4 Load Media W A R N I N G ...

Page 35: ... the entry platen b Insert the leading edge into the plotter until the page buckles slightly c Let go of the media when the plotter begins to pull it in 1839 9 Press the key next to the front panel display to indicate you are loading a roll Sheet load Roll load 0014 SETUP 1 Setting Up the Plotter Task 4 Load Media ...

Page 36: ...ress the Enter key 700 SELECT MEDIA Opaque bond Enter if you are using the roll supplied with the plotter scroll to Opaque bond 0014 750C Plus SELECT MEDIA Coated paper Enter 0014 if you are using the roll supplied with the plotter scroll to Coated paper Setting Up the Plotter Task 4 Load Media ...

Page 37: ...structs you lower the media lever A B 0018 12 a When the plotter instructs you to close the roll cover rewind the media stop in the direction shown by the large arrow below to take up any slack in the roll Make sure that the leading edge of the media is outside the roll cover and then close the cover b Press the key to continue The plotter automatically trims off the first few inches of media c Th...

Page 38: ...ng Coated paper load with the coated side down For advice on other media types see page 3 18 1 Make sure the media lever is down and the roll cover is closed 2 a Holding the media from the sides align the right edge with the perforated line on the entry platen b Insert the media until it buckles slightly that is push all the way to the media stops Let go of the media when the plotter begins to pul...

Page 39: ...lar plotter paper scroll to Opaque bond if coated paper scroll to Coated paper and then press the Enter key 0014 5 The plotter moves the sheet in and out to check its size and alignment and then advances it to the start of the page When sheet loading is complete STATUS Ready is displayed If you have persistent difficulty loading media this may indicate poorly cut media see page 3 21 for advice SET...

Page 40: ...cating the color of the cartridge that should be installed You must put the correct cartridge in the correct stall otherwise not only will your colors be wrong but also print quality may be impaired The sequence of the colors is from left to right yellow cyan magenta and black Yellow Cyan Magenta Black 00019 For users with color vision deficiencies You can identify the colors of the cartridges by ...

Page 41: ...d the cartridge carriage its edge is very sharp Keep hair jewelry clothing and foreign objects away from the plotter mechanisms 1 It is essential to load the cartridge s with the plotter switched ON otherwise you will get poor print quality and the reliability of your cartridge s will be impaired Keep new and used print cartridge s out of the reach of children Setting Up Your Plotter Task 5 Load t...

Page 42: ...bel with the color of the dot above the stall c Make sure that the plotter is still switched ON Never install cartridges with the plotter switched OFF d Insert the cartridge in the stall Press down lightly and push the cartridge away from you until it snaps into place If the front panel display says Reseat cartridge s then remove the cartridge and insert it again Do so until the message disappears...

Page 43: ...mplete You can throw away the small print produced during the cartridge alignment procedure To make your cartridges last as long as possible you should not remove them once they are installed except to replace them Now that the cartridge s are loaded never turn the plotter upside down or ink will spill Setting Up Your Plotter Task 5 Load the Print Cartridge s SETUP 1 C A U T I O N ...

Page 44: ...internal sample plots This ensures that the plotter itself is operating properly 1 If media is not already loaded load a roll or a sheet as explained earlier in task 4 For advice on the availability and use of different media types see the section starting on page 3 2 Setting Up the Plotter Task 6 Optional Print a Demonstration Plot ...

Page 45: ...vailable it starts processing as soon as you press Enter Menu prints a menu tree of the entire front panel menu structure Press Enter Press Enter Press Enter to choose this or to get to the next option Press Enter to choose this or to get to the next option Press Enter STATUS Ready SHORT MENUS Demos DEMOS Palette DEMOS Samples DEMOS Menu Press SHORT MENUS Queueing Nesting Setting Up the Plotter Ta...

Page 46: ...n gently pull the sheet out from the plotter On HP Coated Paper you don t need to wait at all 4 Examine the plot with the following questions particularly in mind Are the lines clean and complete Are the area fills smooth Are the black and white areas correctly defined Is the color of good quality Unless you changed it the print quality setting on the front panel was Best If you have any concerns ...

Page 47: ...you may want to use the network interface instead of or in addition to the parallel and serial interfaces The slot for a network interface card is situated at the back of the plotter alongside the parallel and serial ports Using a flat head screwdriver unscrew only the two screws on its cover plate For installation and configuration of the HP JetDirect Print Server see the documentation supplied w...

Page 48: ...nce from your plotter we recommend you only use genuine Hewlett Packard interface cables whose reliability and performance have been thoroughly tested to give trouble free performance 3 Switch OFF the plotter and then the computer 4 Connect one end of the cable to the appropriate port on the back of the plotter Port for parallel interface cable plotter end of cable 36 pin male Port for serial inte...

Page 49: ... 4800 9600 19200 38400 9600 2 9600 Parity 1 None Even Odd None 2 None Italics factory default 1 Parity of None 8 data bits 1 stop bit Parity of Even or Odd 7 data bits 1 stop bit 2 Consult your software documentation The settings on the plotter must match those of the computer and software sending the data Use their documentation to find the requirements If in doubt try with the above suggestions ...

Page 50: ...y defaults shown in the table on page 1 29 The factory default configuration is always available as well giving you up to three stored configurations to choose from The instructions that follow explain how to specify and apply Configuration A Configuration B can be specified in the same way To restore the factory default configuration see page 7 6 Setting Up the Plotter Task 8 Serial Interface Use...

Page 51: ...step and go to step 2 Press Enter Press Press Enter Press Press Enter STATUS Ready SHORT MENUS Demos UTILITIES Menu mode Short MENU MODE Short MENU MODE Full Press Previous UTILITIES Menu mode Full FULL MENUS Utilities Press SHORT MENUS Queueing Nesting SETUP 1 Setting Up the Plotter Task 8 Serial Interface Users Only Configure the Interface ...

Page 52: ... Press FULL MENUS Utilities FULL MENUS I O setup I O SETUP Modular I O SETUP RS 232 C RS 232 C Config Factory Press Enter RS 232 C SETUP Define config DEFINE CONFIG Config A CONFIG A Baudrate 9600 Press Press Enter Setting Up the Plotter Task 8 Serial Interface Users Only Configure the Interface ...

Page 53: ...G A Baudrate 9600 BAUDRATE 9600 BAUDRATE 19200 CONFIG A Baudrate 19200 CONFIG A parity None 0 Press PARITY none 0 PARITY Even CONFIG A Parity Even Press Enter Press Enter This example changes the configuration to 19200 Baud and Even parity RS 232 C Config Factory SETUP 1 Setting Up the Plotter Task 8 Serial Interface Users Only Configure the Interface ...

Page 54: ...ion Press Previous until you return to Press Enter RS 232 C Config Factory CONFIG Factory CONFIG Config A RS 232 C Config A Press Enter STATUS Ready Press Setting Up the Plotter Task 8 Serial Interface Users Only Configure the Interface ...

Page 55: ...e from which you intend to send plots to your plotter for example a CAD system a graphics package a desktop publishing system etc Drivers Your application software needs to know to which type of plotter it is sending information This knowledge and other configuration information is held in a driver The driver is a piece of software that handles communications between your application software and ...

Page 56: ...hrough CONFIG Add a Plotter in AutoCAD Printer setup in Microsoft Windows applications or Printer type in Macintosh applications In most cases you don t need to add the plotter for each individual software application but for example just once for all Microsoft Windows applications 4 Configure the driver This usually involves a series of dialog boxes where you can specify such items as default med...

Page 57: ...ed or optional Installation Drivers for AutoCAD PC Supplied Install the software on your computer Driver for Microsoft Windows 95 and 3 1 Applications1 PC Supplied Install the software on your computer PostScript Upgrade Kit PC Macintosh Optional Install the firmware in your plotter Install the software on your computer HP JetDirect Print Server PC Macintosh Unix Optional Install the hardware in y...

Page 58: ... 350C or HP DesignJet 330 3 HP DesignJet 250C or HP DesignJet 230 4 HP DesignJet 220 5 HP DesignJet 650C With a preference for C2858B C2859B rather than C2958A C2859A 6 HP DesignJet 200 7 HP DesignJet 600 or HP DesignJet 8 HP GL 2 Device or a similar option including a reference to HP GL 2 9 HP 7600 10 HP 7595B DraftMaster SX or HP 7596B DraftMaster RX or HP 7599A DraftMaster MX or HP 7595C DraftM...

Page 59: ...panel display Does the image appear in the size orientation and position on the sheet that you expected Is any of the image clipped Are the lines of the correct width Are the colors an exact representation of what you expected If you find any problem at all start by consulting chapter 9 of this manual Troubleshooting There you will find advice on many different types of problems from obtaining no ...

Page 60: ... place in the background while you continue using your application A Print Server is also recommended as it will give you not only more flexibility in locating the plotter but also the possibility of network integration and centralized plotter configurations using BOOTP Bootstrap Protocol and TFTP Trivial File Transfer Protocol If you choose the parallel interface you may need a parallel interface...

Page 61: ...ol cad chmod 777 usr spool cad 2 Edit the etc printcap file to set up the plotter configuration You must assign a name to each printer or plotter managed by the print spooler Refer to the example below if you need help completing this step Add these lines to your etc printcap file if your plotter is named djet the device name of your parallel port is dev bpp0 and your spool directory is called usr...

Page 62: ...below if you need help completing this step 3 Add these lines to your etc printcap file if your plotter is named djet and your plotter is connected to the device named dev ttya usually the first serial port on the workstation and the spooling directory you created in step 1 is called usr spool cad Entry for an HP plotter on a serial port djet lp dev ttya sd usr spool cad br 9600 lf usr adm lpd err...

Page 63: ...rinter Manager window and from the Add Printer edit menu select Add Local Printer 4 In the Add Local Printer dialog box Item Select Printer Name For example HP DesignJet 700 or HP DesignJet 750C Plus depending on the plotter you have HP DesignJet 750C Plus de ending on the lotter you have purchased Printer Type Other and set it to Unknown File Contents Any Banner Not required For full details on h...

Page 64: ...1 44 ...

Page 65: ... Menus Plot 2 5 Entering the Menu System 2 6 Navigating the Menu System 2 7 Menu Graphics Used in This Manual 2 9 Other Types of Screen 2 10 Examples 2 11 Example 1 Changing Margins 2 11 Example 2 Changing the Drying Time 2 12 Learning How To Use the Front Panel Display Tutorial 2 FRONT PANEL 2 ...

Page 66: ...DesignJet 700 and 750C Plus plotters is shown below 700 Display section Plotting mode keys Status lights Action keys Display section Plotting mode keys 750C Plus Action keys Status lights Learning How To Use the Front Panel Display The Front Panel ...

Page 67: ...rwards 1 Make sure that media is loaded See page 3 10 for loading information 2 Print the Current Configuration plot by pressing the and keys simultaneously STATUS Ready Keep the plot for later reference Press these two simultaneously Previous Enter The Display Section STATUS Ready The display section of the front panel consists of the display itself and the four display keys to its right Previous...

Page 68: ...se messages may concern machine status actions required or errors In this case you can use the display keys to respond to messages See chapter 10 Front panel messages for more information In this case you can use the display keys to navigate the menu system and select menu options Menu title Menu option Learning How To Use the Front Panel Display The Front Panel ...

Page 69: ...ibed in chapter 1 task 6 The Front Panel Menus plot will be printed Description of the Menus Plot Look at the Front Panel Menus plot It shows the full menu structure Here is a sample section of it concerned with pen settings 1 2 3 4 5 6 There are six columns 1 contains the highest level menu options 6 contains the lowest level menu options Area expanded for use in the navigation example on page 2 ...

Page 70: ...Front Panel Menus plot accessible Shaded gray if printing in black only All menus accessible Change to full menu mode if necessary See page 1 31 press the Enter key 1 You may not be able to access the menu system immediately if the current task overrides it If this happens wait until the task is completed and try again You are now in the first level menu shown in the first column of the Front Pane...

Page 71: ...lot The option list is continuous allowing you to move from the bottom to the top by pressing or from the top to the bottom by pressing a select an option and move to the next menu level when in the menu system equivalent to moving one column to the right in the Front Panel Menus plot b add to the configuration your displayed choice from the options available in the lowest level menu 1 The colored...

Page 72: ... to select the option and move to the Merge third level menu The option currently selected is displayed with a 5 Change the displayed option by pressing the or the key 6 Press the Enter key to set Merge equal to the new displayed value You will be returned to the Merge second level menu 7 To exit the menu system press the Previous key twice Note A character in a menu option box indicates that anot...

Page 73: ...ill appear in the left margin giving a concise explanation of how to navigate to the exact place The graphics look similar to this but further levels may be shown First column selection Second column selection Represents pressing Enter Menu mode required and other useful information for item Full menu mode Default 0 Affects next plot sent Stays after power off Learning How To Use the Front Panel D...

Page 74: ...ing media type during media loading are in fact further examples of selection menus which are not part of the main menu system These behave in the same way as other menus in that you can scroll through the options using the and keys and select a displayed option using the Enter key Learning How To Use the Front Panel Display Other Types of Screen ...

Page 75: ...eady 1 Enter the menu system by pressing the Enter key Either the SHORT MENUS screen or the FULL MENUS screen is displayed with the Queueing Nesting option If necessary see page 1 31 and change to full menu mode FULL MENUS Queueing Nesting With the STATUS screen displayed 2 Press the key once or the key 6 times to display the required option 3 Press the Enter key FULL MENUS Page format PAGE FORMAT...

Page 76: ...ample 2 Changing the Drying Time The section on adjusting the drying time to suit different environmental conditions contains the icon shown on the left indicating that you should go to the DRYING TIME menu This example assumes that the display is in full menu mode following example 1 but can be used in short menu mode With the STATUS screen displayed STATUS Ready 1 Enter the menu system by pressi...

Page 77: ... below is displayed at this point so go to instruction 5 4 Press the key once or the key 4 times to display the required option DEVICE SETUP Drying time Normal 5 Press the Enter key to display the DRYING TIME menu DRYING TIME Normal 6 Use the and keys to display the available options and when the one required is displayed press the Enter key to select it as the value for Drying time FRONT PANEL 2 ...

Page 78: ...2 14 ...

Page 79: ...3 1 Choosing Media 3 2 Caring For Your Media 3 9 Loading Media 3 10 Unloading Media 3 22 Replacing Cartridge s 3 26 Working With Media and Cartridge s 3 MEDIA AND CARTRIDGES 3 ...

Page 80: ...ly essential for good print quality to specify this correctly The table on page 3 3 gives you all the information you need If media is already loaded and you are unsure which media type was specified go to Utilities Statistics in the front panel as explained on page 7 2 You should also be aware of which print quality setting best normal or fast you are using You can set this either from your softw...

Page 81: ...aper y g Heavyweight inkjet paper Heavyweight color inkjet paper Heavyweight matte paper Note HP Heavyweight Special Inkjet Paper is not supported on the HP DesignJet 700 plotter Matte film Matte polyester Poly matte film Mylar HP Matte Film Clear film Translucent film Clear polyester HP Clear Film High gloss photo High gloss photo paper High gloss paper HP High Gloss Photo Paper Semi gloss photo ...

Page 82: ...que Matte No Natural tracing paper Semi opaque Matte No Vellum Semi opaque Matte No Coated paper Opaque Matte Yes1 Heavy coated paper Opaque Matte Yes Matte film Semi opaque Matte Yes Clear film Clear Yes High gloss photo Opaque Glossy Yes Semi gloss photo Opaque Glossy Yes High gloss film Opaque Glossy Yes 1 When loading coated paper into the plotter ensure the coated side is facing downwards Wor...

Page 83: ...media only Coated paper Low moderate Yes Heavy coated paper Moderate Yes Matte film High Yes Clear film High Yes High gloss photo High Yes Semi gloss photo High Yes High gloss film High Yes 1 The limitations using non coated media for color depends on the amount of filled area in your drawing the more there is the less likely that the print quality on opaque bond will be satisfactory the quality o...

Page 84: ...igh gloss photo Not recommended OK OK Semi gloss photo Not recommended OK OK High gloss film Not recommended OK OK IMPORTANT If you are using an add on a third party Raster Image Processor RIP in order to create additional print modes on your plotter then the above table may not apply In this case consult your RIP vendor for advice on the best settings for your re quirements A clue as to whether y...

Page 85: ...ue bond Matte film Clear film Normal or Best Normal or Best Normal or Best Archives Vellum Matte film Clear film Best Best Best Diazo reproductions Translucent bond Natural tracing paper Vellum Matte film Normal or Best Normal or Best Normal or Best Normal or Best 1 CAD Computer Aided Design 2 Using the generic media types on the front panel display 3 Set either on the front panel or in the softwa...

Page 86: ...r Normal Fast or Normal Final versions Coated paper Heavy coated paper for durability Matte film Clear film Normal or Best Normal or Best Normal or Best Fast or Normal Archives Matte film Clear film Best Normal Overlays Clear film Fast or Normal Imaging and graphics package s color Matte Opaque bond for drafts Coated paper Heavy coated paper for Fast Normal or Best Fast Normal or color Heavy coate...

Page 87: ...utomatically cuts the plot and drops it into the bin Note that mixing plot sizes can cause shorter plots to curl and shuffle in the bin Colors may eventually fade or change when exposed to office light or sunlight over a period of time Therefore avoid exposing your plots longer than necessary to direct sunlight ideally when not using your plots store them away from any light for example in a drawe...

Page 88: ...oving 2 If the old roll is not used up then to remove the media from the media path a Raise the media lever to release the media b Open the roll cover and turn the media stop to wind the media out of the plotter and onto the roll Raise the lever Wind the roll c Lower the media lever 1840a Working With Media and Cartridge s Loading Media ...

Page 89: ...y on each end of the spindle A B 1837a 4 a Rest the old roll upright on the floor so that the media stop A is on top b Pull out the media stop and the spindle and set it aside A 0021 Working With Media and Cartridge s Loading Media MEDIA AND CARTRIDGES 3 ...

Page 90: ...n the plotter You can skip the rest of these steps 7 a Remove the new roll from its wrapping b Turn the spindle upside down that is with the media stop at the bottom and the end cap still removed c Place the new roll on the spindle so that the leading edge winds clockwise If the media stop falls off push it back in until it snaps into position Endcap removed A 0015 Working With Media and Cartridge...

Page 91: ...that the media stop A is to the right and the endcap B to the left Push in firmly on both ends Make sure the media remains flush against the media stop The media should wind up from behind the roll A Media path A B 1837 0017 10 Check the leading edge as it unwinds from the spool If it is uneven trim it as explained in step 11 Otherwise go to step 12 MEDIA AND CARTRIDGES 3 Working With Media and Ca...

Page 92: ... 11 a Pull the media over the top of the plotter and lay it over the cutting track b Use the media cutting knife in the pocket located at the back of the plotter to cut off the first few inches of the media c Retract the blade and return the media cutting knife to its pocket To trim the leading edge of the media roll 1838 Working With Media and Cartridge s Loading Media W A R N I N G ...

Page 93: ... b Insert the leading edge into the plotter until the page buckles slightly c Release the media when the plotter begins to pull it in 1839 13 Press the key next to the front panel display to indicate you are loading roll media Sheet load Roll load 0014 MEDIA AND CARTRIDGES 3 Working With Media and Cartridge s Loading Media ...

Page 94: ...at controls the print mode not the plotter For more details on special print modes see page 3 6 0014 15 a When the front panel instructs you lift the media lever b Take hold of the edge s of the media now extending from the exit slot and pull the media toward you until taut Then align the left and right edge s of the media so that they are flush with the edge s of the roll c When the front panel i...

Page 95: ... shown by the large arrow below to take up any slack in the roll Make sure the leading edge of the media is outside the roll cover and then close the cover b Press to continue The plotter trims off the first few inches of media 1840 Working With Media and Cartridge s Loading Media MEDIA AND CARTRIDGES 3 ...

Page 96: ...nt bond Natural tracing paper Vellum Both sides are the same If the sheet is curled load with the curve hollow side towards you Coated paper Heavy coated paper Load with the coated side down On HP Coated Paper and Heavyweight Coated Paper look for the small notch in the corner When loading in a portrait orientation make sure the notch is on the right side of the leading edge When loading in a land...

Page 97: ... edge with the perforated line on the entry platen b Insert the media until it buckles slightly That is push all the way to the media stops Let go of the media when the plotter begins to pull it in 1841 4 Press next to the front panel display to indicate you are loading a sheet Sheet load Roll load 0014 Working With Media and Cartridge s Loading Media MEDIA AND CARTRIDGES 3 ...

Page 98: ...and then press the Enter key For advice on media types see page 3 2 0014 6 The plotter moves the sheet in and out to check its size and alignment then advances it to the start of the page When sheet loading is complete the STATUS Ready message is displayed Working With Media and Cartridge s Loading Media ...

Page 99: ...ly cut media When you properly load the leading edge of badly cut media along the perforated line on the platen you may notice the trailing edge is displaced from the line by a small distance and the plotter will not accept the media The plotter can accept poorly cut media that is displaced 1 0 cm or less from the perforated line Media that is cut properly should not need the help of the skew tole...

Page 100: ...ing the plot Typical Drying Times minutes Print Quality Media Type on the Front Panel Display Fast Normal or Best Opaque bond 0 5 1 0 Translucent bond 0 5 1 0 Natural Tracing paper 0 5 1 0 Vellum 1 0 2 0 Coated paper 0 0 25 Coated heavy paper 0 0 25 Matte film Not recommended 2 0 Clear film recommended 2 0 High gloss photo Not 4 0 Semi gloss photo Not recommended 4 0 High gloss film eco e ded 4 0 ...

Page 101: ...for the most humid expected environmental conditions Not recommended if you are using roll media and leaving the plotter unattended as the ink may smear when the plots are dropped into the media bin If you are operating your plotter in an extremely dry environment select Less in the front panel menu In an extremely humid environment select More For environmental specifications see page 11 4 IMPORT...

Page 102: ...tting 1 Wait until the appropriate drying time has passed see table on previous page no drying time is necessary for some media types 2 Gently pull the sheet out from the plotter 1842 Working With Media and Cartridge s Unloading Media ...

Page 103: ...Feed and Cut 2 When the plotter has finished feeding it out pull out the sheet 1842a Form Feed and Cut or 1 Lift the media lever 2 Pull out the sheet 3 Lower the media lever 1842b MEDIA AND CARTRIDGES 3 Working With Media and Cartridge s Unloading Media ...

Page 104: ...e nozzles are working this is called automatic checking You can switch off the automatic checking using the front panel menus Note that automatic checking does not check the ink levels 2 When either poor print quality or the ink level indicator on the cartridge indicates that the cartridge is out of ink To check a cartridge s ink level Green full Black empty A considerable portion of ink has been ...

Page 105: ... the cartridge s have been installed they should not be removed except to replace them This will ensure the best lifetime for your cartridge s 4 Make sure you are aware of the general warning and cautions below Don t touch the stainless steel strip that runs the length of the plotter behind the cartridge carriage its edge is very sharp Keep hair jewelry clothing and foreign objects away from the p...

Page 106: ...h the plotter switched ON 2 Make sure the front panel display reads STATUS Ready not STATUS Ready for media 3 a Press the Access Cartridge s key and wait for the cartridge carriage to come to a complete stop next to the front panel 1849a 750C Plus 700 Continued Working With Media and Cartridge s Replacing Cartridge s ...

Page 107: ...ll in the carriage has a dot indicating the color when loading the new cartridge you must put the correct cartridge in the correct stall For users with color vision deficiencies You can identify the colors of the cartridges by the part numbers on the boxes see page 11 15 The sequence of the stalls is from left to right yellow cyan magenta and black Black Continued MEDIA AND CARTRIDGES 3 Working Wi...

Page 108: ...artridge away from you until it snaps into place Yellow Cyan Magenta Black If the front panel display says Reseat cartridge s then remove the cartridge indicated in the display and insert it again Do so until the message disappears 0019 1754 750C Plus 700 750C Plus 6 When you have finished installing the cartridge s the plotter runs the automatic alignment procedure When the front panel displays S...

Page 109: ...4 1 Page Size 4 2 Adjusting the Margins Roll Media Only 4 6 Rotating a Plot 4 7 Plotting a Mirror Image 4 10 Controlling the Page Format Page Size Margins and Other Controls 4 PAGE 4 ...

Page 110: ...ng overrides the front panel setting unless the latter is Inked area and you are sending a PostScript file in this case the front panel setting takes precedence When using the AutoCAD driver the User Size is the plotting area Margins These are specific to the plotter and are normally 17 mm on the leading and trailing edges and 5 mm on the sides The 17 mm can be adjusted for roll media as explained...

Page 111: ...you want to print the inked area only but the driver you are using does not specify Inked area In this case set Page format Size to Inked area Note If you can select Inked area from your driver any selection you have made in the front panel menu will be overridden by the settings in the driver When the plots you are creating need to be of a specific standard for example ISO or ANSI but the actual ...

Page 112: ...area of the plot For example if the inked area of the plot is between A3 and A4 ANSI E D C B A inked area of the lot is between A3 and A4 the plotter chooses A3 as the page size Di t ti JIS Best JIS B Discrete options ISO A0 1 2 3 4 JIS B1 2 3 4 ANSI E D C B A JIS B1 2 3 4 ARCH Best ARCH J S 3 ARCH E1 E D C B A Over A1 2 ARCH E1 E D C B A Over A1 2 The plotted page size is exactly the size you Ove...

Page 113: ...Clipped area Page Size and Nesting Roll Media Only Nesting means placing two or more plots side by side on a roll to save media There are certain cases when your plots will not be nested for a complete explanation of nesting see page 6 10 If you have queueing and nesting switched on the plotter will use the page size to determine which plots are nested and whether the plots can be automatically ro...

Page 114: ...s of the media you can use 14 mm more plotting area along that axis The adjustment is available in the front panel 5 0 mm 5 0 mm 17 0 mm 17 0 mm 5 0 mm 10 mm 10 mm Smaller Margins Normal Margins Leading edge Trailing edge 5 mm 0 2 in 10 mm 0 4 in 17 mm 0 67 in 0024 Margins and Automatic Cutting IMPORTANT When Margins is set to Smaller the plotter waits for the plot to dry and the next plot to begi...

Page 115: ...this plotter your files do contain raster data and therefore you cannot use this Rotate option The normal line drawings of most CAD software do not contain raster data and can use this Rotate option To Rotate a Plot from the Front Panel Except in the circumstances stated above you can rotate a plot from the plotter s front panel without changing the drawing in your software The options are 90 180 ...

Page 116: ...d You should always load sheet media in the same orientation as you have specified in the software A A A A 0 90 180 270 0026 The Rotate Feature and Clipped Plots With either roll or sheet media if you rotate to landscape a plot whose original orientation was portrait it is possible that the media is not wide enough for the drawing and so it may be clipped For example rotating by 90 a portrait D A1...

Page 117: ...80 degrees and you set Rotate in the front panel to 90 your plot s final rotation will be 270 degrees For software applications which rotate clockwise for example AutoCAD the result is the difference For example if your software has specified a rotation of 90 degrees and you set Rotate in the front panel to 90 there will be no rotation For further information on the Rotate feature see page 9 21 in...

Page 118: ... plot from the plotter s front panel without changing the drawing in your software Mirror off Mirror on Do not change the setting during a plot as the change becomes effective immediately if you change the setting in the middle of the current plot the remaining data is plotted in the mirrored orientation Controlling the Page Format Plotting a Mirror Image ...

Page 119: ...he Plotter s Internal Palettes 5 3 Changing the Treatment of Overlapping Lines Merge Features 5 7 Changing the Overall Lightness Darkness of a Plot 5 8 Printing Color Drawings in Monochrome 5 9 Choosing an Appropriate Print Quality 5 11 Controlling a Plot s Overall Appearance 5 PLOT 5 ...

Page 120: ...his is the case it is stated in the relevant part of this chapter Some of the controls are available using the front panel menus pen width overlapping lines and lightness Print quality is controlled from the front panel keys This chapter explains them in the sequence of the list at the top of this page For the HP DesignJet 750C Plus the pen color can be controlled using the front panel menus Color...

Page 121: ...50C Plus any combination of the plotter s internal 256 colors To See the Current Palette Settings 1 Make sure either a roll or a sheet of media is loaded 2 Make sure that the front panel Color Mono switch is set to Color 3 Print the Current Configuration Plot by pressing the and keys simultaneously STATUS Ready Press these two simultaneously 0014 Notice on the Current Configuration Plot that the 1...

Page 122: ...agenta Color number 0 through 255 Pen number in factory default palette and initially therefore in all three palettes 0 through 15 Notice that RGB and CMYK plus white are assigned by default to pens 0 through 7 and that eight grayscales are included in the 256 colors The 256 colors shown in the Palette Demo are not the only colors you can print with your plotter Using your software you can create ...

Page 123: ...lette A 2 Scroll to the pen number you want to change and press Enter 3 The current width assigned to this pen is displayed for example Width 0 35mm If you want to change it press Enter scroll to the width you want and then press Enter again If you wish to change the color for the pen scroll to Color 4 The current color assigned to the pen is displayed for example Color 110 If you want to change i...

Page 124: ...igns the attributes defined in Palette A to the pens defined in your software as 0 through 15 Palette B The plotter assigns the attributes defined in Palette B to the pens defined in your software as 0 through 15 Factory The plotter assigns the attributes defined in the Factory Palette to the pens defined in your software as 0 through 15 Controlling a Plot s Overall Appearance Changing Pen Widths ...

Page 125: ...set this feature from your software in some applications for example in AutoCAD Merge off A subsequent line hides a previous line where they overlap Merge on Overlapping lines and area fills are merged Merge off A subsequent line hides a previous line where they overlap Merge on Overlapping lines and area fills are merged PLOT 5 Controlling a Plot s Overall Appearance Changing the Treatment of Ove...

Page 126: ...ur software for different effects However some examples of situations where you may find the feature useful are Where a tracing paper produces better print quality when the plotter uses a smaller volume of ink Where a small variation in the amount of ink used produces a significant change in the apparent darkness or color saturation of an image Where you want to reduce the drying time required for...

Page 127: ... to black in your software This is most easily achieved in CAD software by using a pen number that is 100 black Alternatively you could make one of the plotter s internal palettes A or B all black and then select this as the current palette see earlier in this chapter for an explanation of palettes With monochrome plotting you have the option to choose between true 300 and true 600 dpi resolution ...

Page 128: ...er setting will override the front panel setting The front panel setting will however remain available as the default value and the front panel light displayed will not change If you use the supplied AutoCAD driver you can force a color plot to monochrome by additionally setting the current palette to something other than Software see page 5 6 0027 2 Send the plot from your computer The setting al...

Page 129: ...oosing Normal and a suitable media type you will get high quality output in a reasonable time By choosing Best you will get the highest possible quality for the media type but the printing time will be longer However your plotter s output speed quality and particularly its resolution also varies according to Whether Sharp lines is set to Auto On or Off see page 5 14 on the front panel or in your s...

Page 130: ...e used 2 Addressable dpi with Sharp lines set to Auto or On using opaque bond coated paper and matte film only This resolution depends on the type of image created in your software application Recommended combinations of print quality and media type are given in the table on page 3 6 To get the very best print quality for images and drawings from graphics packages other than CAD drawings or other ...

Page 131: ...so make this setting or an equivalent within the driver In this case the driver setting will override the front panel setting The front panel setting will however remain available as the default value and the front panel light displayed will not change 2 Send the plot from your computer The setting also impacts the plotter s internal sample plots You cannot change the print quality setting for plo...

Page 132: ...e factory default setting is Auto With Sharp lines set to Auto you will always get best quality color plots except when you send the following files Mixed lines and scanned color images Mixed lines and color photographs CorelDRAW with color images For these files it is recommended that the Sharp lines default setting is changed depending on your preference for image or line quality Select On if yo...

Page 133: ...may be because You have not selected Best on the front panel Print Quality key refer to page 5 13 You are using media other than Coated paper Opaque bond or Matte film Your application software driver is overriding the front panel selection You are plotting a color raster image or a line drawing combined with a color raster image PLOT 5 Controlling a Plot s Overall Appearance Choosing an Appropria...

Page 134: ...5 16 ...

Page 135: ...lots Being Printed or Drying 6 2 Managing Plots Not Yet Printed The Queue 6 4 To Replot an Image Using the Plotter s Memory 6 9 Avoiding Media Waste by Nesting Pages Roll Media Only 6 10 Managing Your Plots 6 PLOT 6 ...

Page 136: ...elled plot is placed in the queue and you can replot it as explained on page 6 8 If in addition to cancelling the plot you want to delete it from the queue see page 6 7 To Cut a Plot Before Drying Is Complete Roll Media Only Press Form Feed and Cut on the front panel Form Feed and Cut The plotter ignores the drying time and immediately drops the page into the media bin 0027 X Managing Your Plots M...

Page 137: ...panel Pause The plotter finishes the current plot and pauses indicated by the Pause light being on until your press Pause again While the plotter is paused you can use the front panel as normal for example to change a front panel menu setting or to load and specify a new media type 0027 2 To resume printing press Pause again Managing Your Plots Managing Plots Currently Being Printed or Drying PLOT...

Page 138: ...rtridges loaded no file error there are still two reasons why a plot you have sent from your computer may not start printing when expected The plot file may lack a proper file terminator and the plotter is therefore waiting for the specified I O timeout period before assuming it is complete See page 7 9 Nesting may be on and the plotter is waiting for the specified Nest wait timeout period before ...

Page 139: ...ing as explained on page 7 10 However it is clear that the larger your files are the fewer you can store in the queue With queueing turned ON You can send one or more plots to the plotter without waiting for the current page to finish You can manipulate the pages in the queue for example prioritizing them and replotting them You can use nesting the plotter s media saving feature see page 6 10 With...

Page 140: ...lotted 3 up to 32 pages 3 Plot name Some applications let you give your plot a descriptive name which it then conveys to the plotter for example Building 2 Exterior If your software supports this feature this plot name is applied to each page and displayed after its queue position 1 Building 2 Exterior Position in queue If your software does not support this feature your plotter will assign names ...

Page 141: ...en use Move to top to move it to the top of the queue To Delete a Page from the Queue Under normal circumstances there is no need to delete a page from the queue after plotting it as it will just fall off the end of the queue as more files are sent However if you have sent a file in error and want to avoid any chance of it being replotted you can simply delete it by selecting it and choosing Delet...

Page 142: ...ueue Having selected the page and chosen Copies use the scrolling keys to specify the number of copies required and press Enter The number you enter is the actual number of pages to be printed for example choosing 2 for a page not yet plotted means you will get the one original and one copy The maximum is 99 The setting you specify in this option overrides any value set by your software Note that ...

Page 143: ... panel The Replot light flashes briefly while the plotter prints the current image again Replot does not work if another file has already been sent to the plotter including internal sample plots for example the Setup Sheet you have switched the plotter off and on again since first sending the plot some files that contain Raster data may not replot because the entire file may not still be held in t...

Page 144: ...er the other to avoid wasting media nesting on roll nesting off media saved 0028 direction of paper flow The plotter may automatically rotate a page in nesting see page 6 11 It may do this even with a single page nesting on nesting off media saved 0029 direction of paper flow Managing Your Plots Avoiding Media Waste by Nesting Pages Roll Media Only ...

Page 145: ...ochrome Remember that monochrome may include a color plot rendered in grayscales by use of the front panel Color Mono key see page 5 9 Print resolution Either all are 300 dpi or all are 600 dpi see page 5 11 Which Pages May be Rotated Apart from obvious physical limitations on the roll any page containing raster data will not be rotated If you are using the Microsoft Windows driver supplied with t...

Page 146: ...t has already created What Happens to Nesting if you Turn Queueing Off Turning queueing off does not turn nesting off for pages already in the queue The plotter prints all the pages in the queue before accepting any more files As soon as you turn queueing off the nesting setting also changes to off When queueing is turned on again the plotter restores nesting to its previous setting How Long Does ...

Page 147: ...lightly narrower than a standard size You can reduce the side margins too for every page as explained on page 4 6 In order to give the plotter the best chance of nesting the most pages we recommend that you set Page format Margins to Smaller Nesting and the Rotate Feature Since nesting may automatically rotate pages the front panel s Page format Rotate setting is ignored as long as nesting is on M...

Page 148: ...6 14 ...

Page 149: ...ccuracy 7 5 Changing the Graphics Language Setting for a Different Application 7 7 Changing the Serial Interface Settings 7 9 Changing the I O Timeout Setting 7 9 To Upgrade Your Plotter with More Memory 7 10 To Upgrade Your Plotter with the Postscript Option 7 11 To Upgrade Your Plotter with a Network Interface 7 12 Reconfiguring Your Plotter Reconfiguration Recalibration and Upgrades 7 RECONFIG ...

Page 150: ...nal code RAM present This is the size in megabytes of the plotter s main standard memory plus the amount of memory reserved for printing This does not correspond directly to the size of your files on the computer as explained on page 7 10 This is the total RAM not the RAM currently free Media This is the media type which the plotter thinks is currently loaded or was last loaded on the basis of wha...

Page 151: ...he HP DesignJet 750C Plus Note that some of the items do not appear in the front panel display unless you have set Utilities Menu mode to Full the default is Short so that they do not appear See the legend at the bottom of the plot for details NOTE Do not confuse the Current Configuration Plot with the Service Configuration Plot which you can print by selecting Utilities Service config Apart from ...

Page 152: ...settings It also explains the small menu graphics that appear in the left margins of this manual whenever a particular menu item is explained The meanings of all the items in the front panel menus are explained at the relevant point in this manual Refer to the index at the back of the manual for the item you want to change Reconfiguring Your Plotter To Change the Front Panel Settings ...

Page 153: ...are using a non standard media type you should first recalibrate the plotter for that media type For supported media types see page 3 3 You may also need to recalibrate the plotter if you have banding problems see page 9 20 A Quick Guide to Whether Recalibration is Necessary 1 Make sure E A0 size or D A1 size media is loaded 2 Print the Service Configuration plot by choosing the option shown in th...

Page 154: ...ocedure If using sheet media load it in portrait orientation unless you chose D A1 size media for an E A0 size plotter in which case load it in landscape orientation 6 When the calibration plot is finished remove it 7 Unload any unplotted media 8 Rotate the calibration plot 90_ counterclockwise and reload it printed side down so that the black arrows go into the plotter first NOTE Even if you sele...

Page 155: ...ng to HP GL 2 as explained in the table below To Change the Graphics Language Setting Graphics Language Comments 7586 HP GL 2 This should work successfully for most software applications With this graphics language setting another parameter is available Terminator Try changing this setting from Normal the default to Special if you are using an obsolete HP 7586 pen plotter driver and your plots are...

Page 156: ...switching commands at the beginning and end of each file This allows the plotter to switch automatically into the correct graphics language for your current plot and returns the plotter to the front panel graphics language setting for subsequent plots For PJL reference information see page 11 13 Reconfiguring Your Plotter Changing the Graphics Language Setting for a Different Application ...

Page 157: ...the plotter When you output to the plotter from a new application If you experience problems with distorted or unintelligible plots To Change the Serial Interface Settings This task is explained in detail on page 1 29 including a note of the defaults and likely requirements To Change the I O Timeout Setting Some software may not write a proper file terminator at the end of the file In this case th...

Page 158: ...numbers see page 11 14 For installation details see the task starting on page 1 6 File Size and Memory Usage There is no direct relationship between file size on your computer and memory used in the plotter to print that file In fact because of file compression and general complexity it is often impossible to estimate how much memory will be used In general thicker lines 0 5 mm complex objects suc...

Page 159: ...ut in most cases all you need is the Microsoft Windows driver supplied with your plotter As well as a PostScript driver for your software the PostScript Upgrade Kit includes a ROM SIMM which you install in the back of your plotter Slot for PostScript Option 1 2 3 4 The upgrade kit comes with its own detailed installation instructions When removing the cover plate as instructed use a flat head scre...

Page 160: ...orts Using a flat head screwdriver unscrew only the two screws on the cover plate For installation and configuration of the HP JetDirect Print Server see the documentation supplied with that product Slot for network interface card 1845d HP JetDirect Print Server For part numbers of the HP JetDirect Print Server see page 11 15 This interface supports most common network environments and the specifi...

Page 161: ...8 1 Replacing the Print Cartridge s 8 2 Cleaning the Plotter 8 2 Normal Plotter Use 8 3 Maintaining Your Plotter Cleaning and Service 8 MAINTENANCE 8 ...

Page 162: ...d how to replace cartridge s see the section starting on page 3 26 Cleaning the Plotter Cleaning is limited to the outside of the machine Use a damp sponge or a soft cloth and household cleaner To avoid an electric shock make sure that the plotter is switched OFF and unplugged before you clean it Do not let water get inside the plotter Do not use abrasive cleaners on the plotter Any maintenance or...

Page 163: ...passes of the cartridge carriage If the front panel periodically displays STATUS Maintenance advised this means that your use of the plotter has exceeded one of the following warranty limits either 20 000 pages printed or 4 500 000 passes of the cartridge carriage Contact your local HP dealer or HP service engineer to arrange a service After the service the message will disappear If you choose not...

Page 164: ...u mode Utilities Service config 8 4 To Print the Service Configuration Plot 1 Make sure media is loaded 2 In the front panel menus choose the option shown on the left Maintaining Your Plotter Normal Plotter Use ...

Page 165: ... Problems 9 4 Solving Print Cartridge Problems 9 7 Clearing a Media Jam 9 8 Solving Communication Problems 9 9 Solving Problems with Plot Position or Content 9 10 Solving Print Quality Problems 9 16 Solving Front Panel Problems 9 21 Solving Miscellaneous Problems 9 23 Getting Help 9 25 Troubleshooting 9 TROUBLE 9 ...

Page 166: ...fer to the appropriate section in this chapter The sections are Solving media handling problems Clearing a media jam Solving problems with plot position or content Solving print quality problems Solving miscellaneous problems If the problem could be related to your software driver and you are using an HP driver refer to the drivers troubleshooting documentation and the On Line Help in your applica...

Page 167: ...ace Ensure that you have the correct interface cable between the computer and the plotter and that it is firmly connected to the correct ports see the sections starting on page 1 27 Check that your plotter s graphics language setting in Device setup Lang matches the requirements of your software Serial interface users only Check that your plotter s serial interface settings in I O Setup RS 232 C m...

Page 168: ...d edge must be parallel to the perforated line on the plotter Pushed or held the media back as it is loading You must hold the media only by the edges and immediately release it when the plotter is loading It is also possible that the media itself is crumpled or warped or has irregular edges If you are using hand cut media perhaps the edges do not form a right angle or they are rough It is not rec...

Page 169: ...lize for at least 15 minutes before loading it Roll media only Open the roll cover and raise the lever Unload the leading edge of the roll Push the media all the way to the right so that it is flush against the media stop on the roll core Then reload the media If Plots Do Not Feed Out Properly From the Plotter Make sure the roll cover is completely closed before you plot If The Automatic Cutter Do...

Page 170: ...n the Plotter The plotter is undertaking an automatic calibration check Simply wait for the STATUS Ready message and then reload the sheet If Plots Do Not Stack Properly in the Bin You may be too close to the end of the roll The natural curl near the end of the roll can cause stacking problems Load a new roll or remove plots manually as they are completed If plotted media is sagging or wrinkling b...

Page 171: ...idge s unnecessarily You can stop the alignment by pressing Cancel but the plotter will restart the alignment procedure the next time you switch it on If Brand New Cartridge s Have Problems Check the cartridge s to be sure you have removed the protective nozzle tape Try reseating the cartridge s Don t forget that after you remove or reseat a cartridge the plotter will run its automatic cartridge a...

Page 172: ...ou are able to move it depends on where the media is jammed If the plotter was in the process of cutting media at the time of the jam the cutter carriage will be attached to the cartridge carriage and will move with it 3 Carefully remove any of the jammed media which you can easily lift up and out from the top of the plotter 4 Carefully pull the rest of the roll or sheet down and out of the media ...

Page 173: ...plicable errors misplaced lines partial drawings etc Items to start checking are Have you selected the correct interface port in your software Does the plotter work correctly when receiving files from other software If the plotter is connected to a network try using it when connected directly to your computer If your plotter is connected to your computer via any other intermediate devices such as ...

Page 174: ...utoCAD HP plotter driver for Microsoft Windows applications The documentation supplied with your application software for example the AutoCAD Reference Manual If the Plot Is Completely Blank Check the print cartridge s to be sure you have removed the protective nozzle tape from all of them Do not forget that after you remove or reseat a cartridge the plotter will run its automatic cartridge alignm...

Page 175: ...nd plot again See page 7 9 The file may be too big for the plotter s memory For information on memory expansion modules see page 11 14 There may be a communications problem between your computer and the plotter Make sure interface cable is connected properly Check to make sure that your software settings are correct for your current plot size e g long axis plots If you are using network software m...

Page 176: ...e option changes the orientation of a drawing and on roll media the orientation of the page It is possible that a rotated plot on roll media may be slightly clipped in order to retain the correct page size as explained on page 4 8 You may have asked to rotate the plot from portrait to landscape on media that is not wide enough for example a D A1 size plot rotated on a D A1 size roll If necessary c...

Page 177: ...ion Notes supplied with your plotter If you still have not found the solution try changing the plotter s Graphics Language setting on the front panel Device setup Lang If the Plot Is Unexpectedly Rotated Check the front panel Page format Rotate setting See page 4 7 If Queueing and Nesting are both ON plots may be automatically rotated to save media See page 6 11 If the Plot Is a Mirror Image of Yo...

Page 178: ...oo long Decrease the setting and plot again See page 7 9 If Device setup Lang is set to 7586 HP GL 2 the default try changing the Terminator setting and send the files again If Pen Settings Seem To Have No Effect Either you have changed them in Pen settings Define palette but forgotten to select that palette in Pen settings Palette or you expected the software driven pen settings but the front pan...

Page 179: ...e Config The Palette Demo Plot A plot with 256 colored squares This is plotted from the front panel menu Demos Palette If the Quality Of A Color Plot Is Not as Good as You Were Expecting Select Best on the front panel Print Quality key and plot again Did you specify the correct media type when loading The highest line quality is only produced using Opaque Bond Coated Paper or Matte Film For detail...

Page 180: ...documentation in the Microsoft Windows driver shipped with your plotter particularly in the Color Options dialog box Additionally remember that your plotter may be configured to use one of its internal pen palettes instead of your software s palette which is the default See the section starting on page 5 3 If There Are White Streaks in Solid Fill Areas This may mean that a cartridge nozzle is bloc...

Page 181: ...ating it to ensure good electrical connections While it is out of the carriage check the print nozzles to make sure the protective tape has been removed Don t forget that after you remove or reseat a cartridge the plotter will run its automatic cartridge alignment procedure see page 3 27 4 If you don t know which cartridge has the problem then print the Service Configuration Plot by choosing Utili...

Page 182: ...is can happen if it has been used or stored in an extreme environment For all environmental specifications see page 11 4 If There are Color Shadows Force the automatic cartridge alignment procedure by reseating any one of the print cartridges If One or More Cartridges are not Printing at All Look to see if the cartridge is out of ink See 3 26 If it is still not printing remove the faulty cartridge...

Page 183: ...djustments see page 3 23 If There are Blotchy Areas Uneven Fill Density Perhaps you are not using HP media For details of HP media see page 3 3 and the Supplies Source catalog supplied with the plotter Did you specify the right media type when loading the media For details of front panel media types see page 3 3 To find out the plotter s current type of media setting see page 7 2 Note that some me...

Page 184: ...tridge s See page 3 26 If Ink Smears After You Remove a Plot Use HP media for best quality This can be caused by extreme environmental conditions For environmental specifications see page 11 4 With roll media the plotter automatically allows a suitable ink drying time before cutting the roll and dropping the plot in the media bin To allow for extremely dry or humid environments within the specific...

Page 185: ...our plots contain raster data typically images with heavy area fill and shading that you have scanned into your software you will not be able to rotate the plot The plotter cannot rotate any file sent using the Microsoft Windows driver supplied with the plotter as they contain raster images If a Display Message Will Not Clear Look up the message in chapter 10 The message description may help you u...

Page 186: ...numeric code and have the plotter serviced Report the code to the service technician knowing the code number will help the technician resolve the problem If an Out Of Memory Data Was Lost Message Is Displayed The current plot is too large for the plotter s buffer To print this plot you will have to install additional memory For information on memory expansion modules and memory usage see page 7 10...

Page 187: ...n If no other printing mode is available or if your file still does not print you may need to consider obtaining a memory expansion module For informa tion on memory expansion modules see page 11 14 If you continue to have problems see Getting help on page 9 25 If the Plotter Seems Too Slow Did you specify Best Print Quality on the front panel Best quality plots are produced more slowly See page 5...

Page 188: ...ter will align the cartridge s every time you replace or even reseat a cartridge whether or not it is new If the Bail Black Metal Bar Does Not Lower All the Way If the the bail the black metal bar just inside the plotter s window will not lower all the way check for obstructions underneath it Make sure the cutting carriage is pushed all the way to the right Troubleshooting Solving Miscellaneous Pr...

Page 189: ...r software application first contact your software vendor 4 If you still have difficulty refer to the HP Support Services booklet shipped with this plotter This document contains a comprehensive list of various support services available to help solve plotter problems 5 If you do call one of the Hewlett Packard offices please have the following information available to help us answer your question...

Page 190: ...9 26 ...

Page 191: ...10 1 Front Panel Messages 10 MESSAGES ...

Page 192: ...press to continue Create pattern Measure pattern Press to create the pattern for automatic calibration Press to start the automatic calibration Edge not found Reload media The plotter could not find edge of media during loading procedure Check the leading edge of the media for unevenness or tears cut a straight edge if necessary and reload Be sure to position the right edge along the perforated li...

Page 193: ...ndow to access the cartridge s Out of memory Data was lost The current plot is too large for the plotter s buffer Install additional memory to plot this drawing Pull Align edges to roll Grasp the left and right free edges of the roll media and pull toward you until the media is taut At the same time align the left and right edges of the media so that they are flush with the left and right edges of...

Page 194: ...rtridge s STATUS Cancelling You have pressed the Cancel button and the plotter is in the process of cancelling the procedure Continue when this message is no longer displayed STATUS Checking media The plotter is checking to see if media is properly positioned with respect to the perforated line of the entry platen STATUS Calibrating The plotter is performing calibration STATUS Ink drying xx m xx s...

Page 195: ...ed cartridge or bad electrical connection improper seating Switch power off Check cartridge path Turn off the plotter The cartridge carriage cannot move The plotter may be jammed with media Check the media path and clear it if necessary Then turn on the plotter Switch power off Check paper path Turn off the plotter The drive roller cannot move or the roll feed spindle cannot freely rotate The plot...

Page 196: ...10 6 ...

Page 197: ...11 1 Plotter Specifications 11 2 Interface Specifications 11 7 Interface Cables 11 8 Regulatory Notices 11 10 Ordering Accessories 11 13 Reference 11 REFERENCE ...

Page 198: ...dia Reference Guide For alternative names HP commercial names and physical characteristics of these media types see chapter 3 Opaque bond Translucent bond Natural tracing paper Vellum Coated paper Matte film Clear film Heavy coated paper Opaque bond CAD drawings only Natural tracing paper 1 Vellum 1 Coated paper Matte film Clear film Heavy coated paper High gloss photo paper 2 Semi gloss photo pap...

Page 199: ...ty 600 x 600 dpi 2 Accuracy Maximum accumulated error 0 38 mm 0 015 in or 0 2 of the specified vector length whichever is greater at 23 C 73 F 50 60 relative humidity on HP Matte Film Programming languages supported HP GL 7586B HP GL 2 HP RTL PJL 1 Except for glossy media types on which the resolution is always 300 dpi 2 Addressable dpi depending on the type of image your application software has ...

Page 200: ... to 60 C 40 to 140F 20 90 relative humidity Power Specifications Source 100 240V ac 10 Autoranging Frequency 50 60 Hz Consumption 140 W max 2 0 A max Energy Star rating USA Maximum power in idle state 45 watts Acoustic Specifications Operating sound pressure 42 dB A From a one meter bystander position and with Print Q ality set to Best Idle sound pressure 20 dB A with Print Quality set to Best Dut...

Page 201: ... 24 56 4 05 065 Japan 56 4 55 Korea 46 South Africa 05 USA 4 1 70 6 105 1 55 10 46 55 1 276 0 8 46 Safety Specifications 0 14 6 10 01 1 37 2 06 18 55 I 7 2 056 6 10 6 14 II 1 76 10 4 14 0 114 10641 1 08 410 065 75 Canada 0 0 6 0 4 5 551 6 10 46 1 European Union 19 1 6 4 6 8 1 2 06 65 Mexico DGN NOM019 SCFI 1993 certified Norway 22418 USA 0 494 6 45 14 614 5 56 Reference Plotter Specifications REFE...

Page 202: ... 11 6 11 6 x 16 7 423 x 295 295 x 423 B landscape 17 6 x 10 7 10 7 x 17 6 447 x 271 271 x 447 C portrait 22 7 x 17 6 17 6 x 22 7 576 x 447 447 x 576 C landscape 23 6 x 16 7 16 7 x 23 6 600 x 423 423 x 600 D portrait 34 7 x 23 6 23 6 x 34 7 880 x 600 600 x 880 D landscape 35 6 x 22 7 22 7 x 35 6 904 x 576 576 x 904 E1 portrait 40 7 x 29 6 29 6 x 40 7 1033 x 752 752 x 1033 E portrait 46 7 x 35 6 35 ...

Page 203: ...this table 12 PError plotter meet the specification in this table 13 Select SelectOut plotter 14 AutoFd computer 16 GND 19 30 GND 31 Init computer 32 Fault plotter 36 SelectIn computer Serial RS 232 C Interface Pin Wire Signal Name Source The connector on the plotter is 25 pin 1 Protective Ground The connector on the plotter is 25 pin female 2 Transmitted Data DTE The plotter is configured as DTE ...

Page 204: ...l connectors 24542G 3 0 m 9 8 ft 9 pin female HP Vectra PC with HP 24541A B dual serial interface card using the 25 pin connector 13242G 5 0 m 16 4 ft 25 pin male IBM PC PC XT PC AT PS 1 PS 2 and compatibles C2913A 17255D 1 2 m 3 9 ft 1 2 m 3 9 ft 25 pin female 25 pin female Cables for Macintoshes Interface type Computer HP part number Cable length Connector type at computer end of cable Serial RS...

Page 205: ...stations using 9 pin connectors 24542G 3 0 m 9 8 ft 9 pin female HP Apollo workstation using an SPE Serial Parallel Expansion option and supplied adapter cable 13242G 5 0 m 16 4 ft 25 pin male Sun workstation Note You may need a Sun serial adapter cable to convert the DIN connector found on certain Sun SPARC stations to the 25 pin connector on the HP cable Contact your Sun dealer for part numbers ...

Page 206: ... harmful interference to radio communications However there is no guarantee that interference will not occur in a particular installation If this equipment does cause harmful interference to radio or television reception which can be determined by turning the equipment off and on the user is encouraged to try and correct the interferences by one or more of the following measures Reorient the recei...

Page 207: ...out in the Radio Interference Regulations of the Canadian Department of Communications LpA 70 dB am Arbeitsplatz im Normalbetrieb nach DIN 45635 T 19 Telecommunications Statement The HP DesignJet 700 and the HP DesignJet 750C Plus plotters models C4705A C4706A C4708A and C4709A are approved under Approval Number NS G 1234 5 100003 for indirect connection to public telecommunication systems within ...

Page 208: ...024 4 1992 1KV Power Lines 0 5KV Signal Lines FCC Part 15 Class B DOC B VCCI 2 RRL A Product Accessory HP JetDirect network interface card 2 Supplementary Information The product herewith complies with the requirements of the Low Voltage Directive 73 23 EEC and the EMC Directive 89 336 EEC and carries the CE marking accordingly 1 The product was tested with a Hewlett Packard system consisting of a...

Page 209: ...wanese C4705 60023 Software Application Notes English C4705 90006 Hewlett Packard Support Services Multi 1 HP GL 2 and RTL Programmer s Reference Guide English 5959 9733 2 The Product Comparison Guide for HP GL 2 and HP RTL Peripherals English 5959 9734 2 PJL Technical Reference Manual English 5961 0938 1 This item is updated regularly For details of the latest version available please contact you...

Page 210: ...rosoft Windows 1 Available as options are PostScript Upgrade Kit ROM SIMM and driver C4707A Media Supplies Supplies Source Catalog The latest edition was shipped with this plotter Media Reference Guide The latest edition was shipped with this plotter in Europe and USA only 1 1 Memory Expansion Modules All SIMMs on the right are 72 pin 36 bit 4 8 MB 80 nanoseconds 16 32 MB 70 nanoseconds For up to ...

Page 211: ...ontact your Dealer or Hewlett Packard support services for current HP part numbers suitable for your application Print Cartridges Yellow 51644Y Although other cartridges may appear to fit in the t ll l th t b Cyan 51644C stalls use only these part numbers Magenta 51644M Black 51645A Spindle Assembly E A0 size C3173A D A1 size C3172A Reference Ordering Accessories REFERENCE ...

Page 212: ...ou can can order it through most book stores ISBN 0 201 63325 6 For specific parameter information refer to The Product Comparison Guide for HP GL 2 and HP RTL Peripherals which you can order through your HP Sales office How to Order Supplies and Accessories You can order supplies and accessories in any of the following ways Call your local authorized HP dealer Contact your local HP Sales and Supp...

Page 213: ...12 1 Glossary 12 GLOSSARY 12 ...

Page 214: ...ough polyester media type clipping Losing part of a drawing at the edges CMYK Cyan magenta yellow and black The colors of the plotter s four inks and also a standard color model coated paper Good quality paper coated on one side for inkjet printing dc Direct current default A value or condition that is assumed if no other value or condition is specified device An external item connected to the com...

Page 215: ...added by the plotter to separate one page from another and to avoid printing right to the edge of the media matte Not glossy matte film Opaque polyester media type not glossy media The material usually paper onto which the plotter prints media bin The media catcher situated below the plotter MIO Modular input output Refers to the plotter s network interface nesting Placing two or more plots side b...

Page 216: ...nguages for plotters and printers Produces raster data ROM SIMM A physical module containing read only data to provide plotter upgrades They are installed in the back of the plotter semi gloss photo A semi glossy opaque photographic paper serial interface A type of interface between computer and device Generally slower than a parallel interface spindle The rod which holds the roll of media tracing...

Page 217: ...a type for 11 2 11 3 color problems 9 16 9 21 color vision deficiencies advice for users with 1 20 3 29 Color Mono key 5 10 color monochrome switching 5 10 colors CMYK 5 4 RGB 5 4 communications problems 9 9 compensating for poorly cut media 3 21 components of plotter xvii xix computer connection to 1 27 1 30 configuration changing 1 30 1 34 current front panel 7 3 current overall 7 2 plot current...

Page 218: ...t adjusting 5 8 line quality problems 9 16 9 21 loading media roll 3 10 3 17 sheet 3 18 3 21 Local Area Network 1 27 logical pens settings 5 2 5 5 long axis plots 9 12 M Macintosh cables to connect 11 8 Maintenance advised 8 3 managing plots before printing 6 4 during printing or drying 6 2 manuals 11 13 11 16 D 1 margins 4 6 11 3 and cutting 4 6 and nesting 6 13 margins plotting areas 11 6 maximu...

Page 219: ...lection 5 6 changing settings 5 5 palette plot 5 4 5 5 paper clearing jammed See media parameter values setting 2 8 part numbers 11 13 Pause key 6 3 pausing between plots 6 3 PCs cables to connect 11 8 pen settings seem to have no effect 9 14 pens limiting exposure 3 27 pens logical colors 5 4 current palette settings 5 3 settings 5 2 5 5 pens physical See cartridges physical specifications 11 3 p...

Page 220: ...ecifications 11 7 Size 4 4 size plotter 11 3 sizes of media supported 11 2 skew tolerance 3 21 slow plotting 9 23 smears 9 20 software setting up 1 35 1 38 supplied 1 37 Software Application Notes 11 13 sound levels 11 4 special inkjet paper 11 2 11 3 specifications 11 2 11 7 acoustic 11 4 electromagnetic 11 5 EMC 11 5 environmental 11 4 functional 11 2 interface 11 7 11 8 physical 11 3 power 11 4...

Page 221: ... 0 1 2 2 2 1 0 3 2 1 7 1 1 2 5 00 2 1 0 2 27 2 11 0 02 3 0 30 1 12 2 1 0 0 4 1 2 5 2 2 1 2 30 2 5 00 27 1 2 4 2 2 0 6 31 7 2 7 2 7 3 5 4 0 7 5 00 27 0 2 27 0 2 11 1 2 2 2 7 0 30 2 2 1 50 22 5 00 27 1 5 00 27 4 1 7 3 1 0 21 7 3 7 1 4 2 0 0 21 5 7 4 07 0 12 2 2 12 2 0 0 4 2 0 4 7 30 0 5 0 1 3 30 2 5 00 27 0 0 2 9 0 3 1 2 1 2 2 1 3 2 2 2 7 30 5 22 0 1 3 02 0 32 0 8 01 32 0 0 0 2 0 00 0 1 2 0 0 2 0 3 ...

Page 222: ...Customer re order number C4705 60021 Manual Part Number C4705 90031 Edition 1 September 1996 English Printed in U S A This manual has been printed on chlorine free bleached paper ...

Reviews: