Page 29
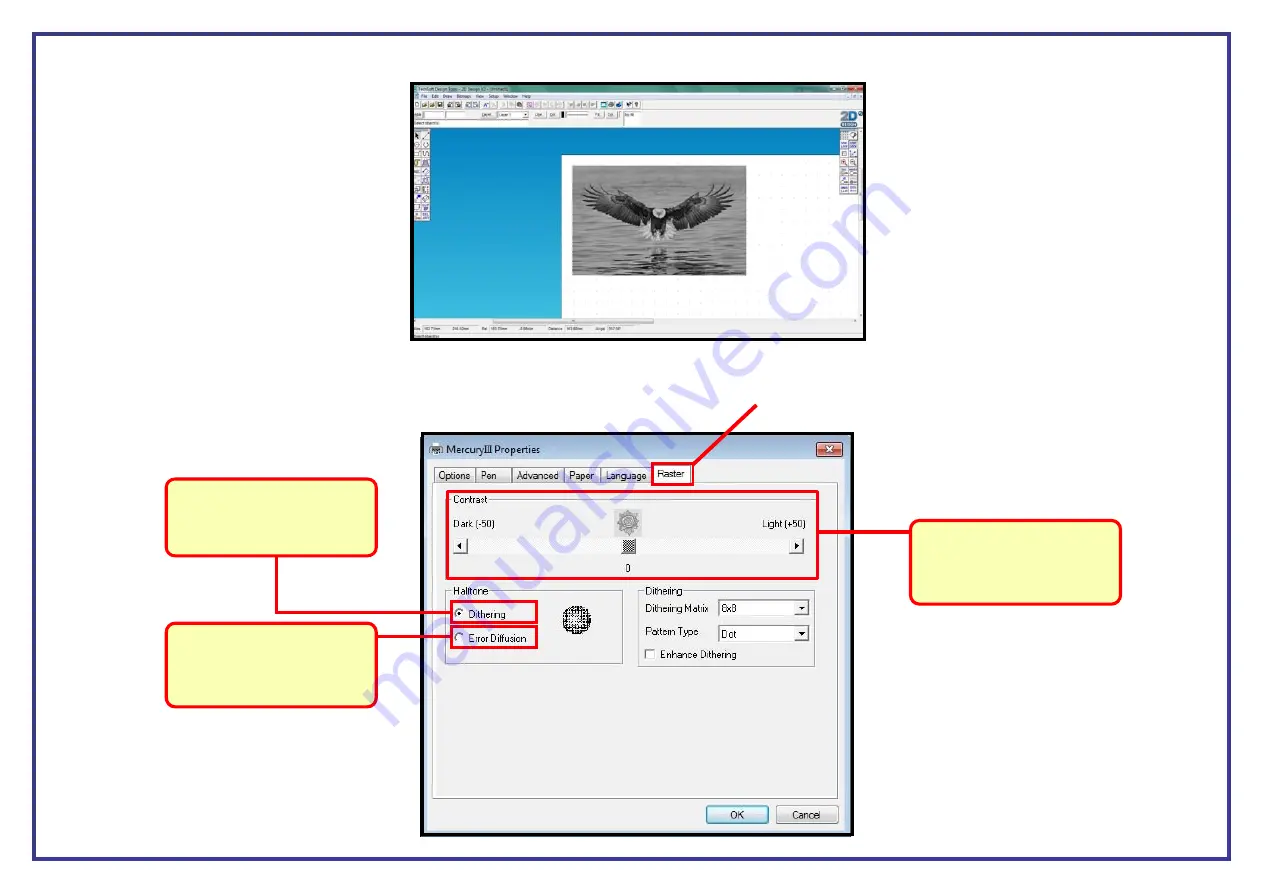
Once you have followed this process your bitmap will now be a greyscale image (see below).
Step 3 .
Follow your normal setup ie. setting the colours and page size in 2D Design. Setup the printer driver the same as you normally would but in the Options tab
when you select the greyscale engrave mode called
Black and White
a new tab called
Raster
will appear in the print properties.
Contrast.
This is where
you can adjust the darkness
and lightness of your image
by using the slider bar.
Error Diffusion.
For best
results when engraving
bitmaps tick on error diffusion.
Dithering.
This engrave mode will
print in a dot matrix style.


