Page 49
Step 1.
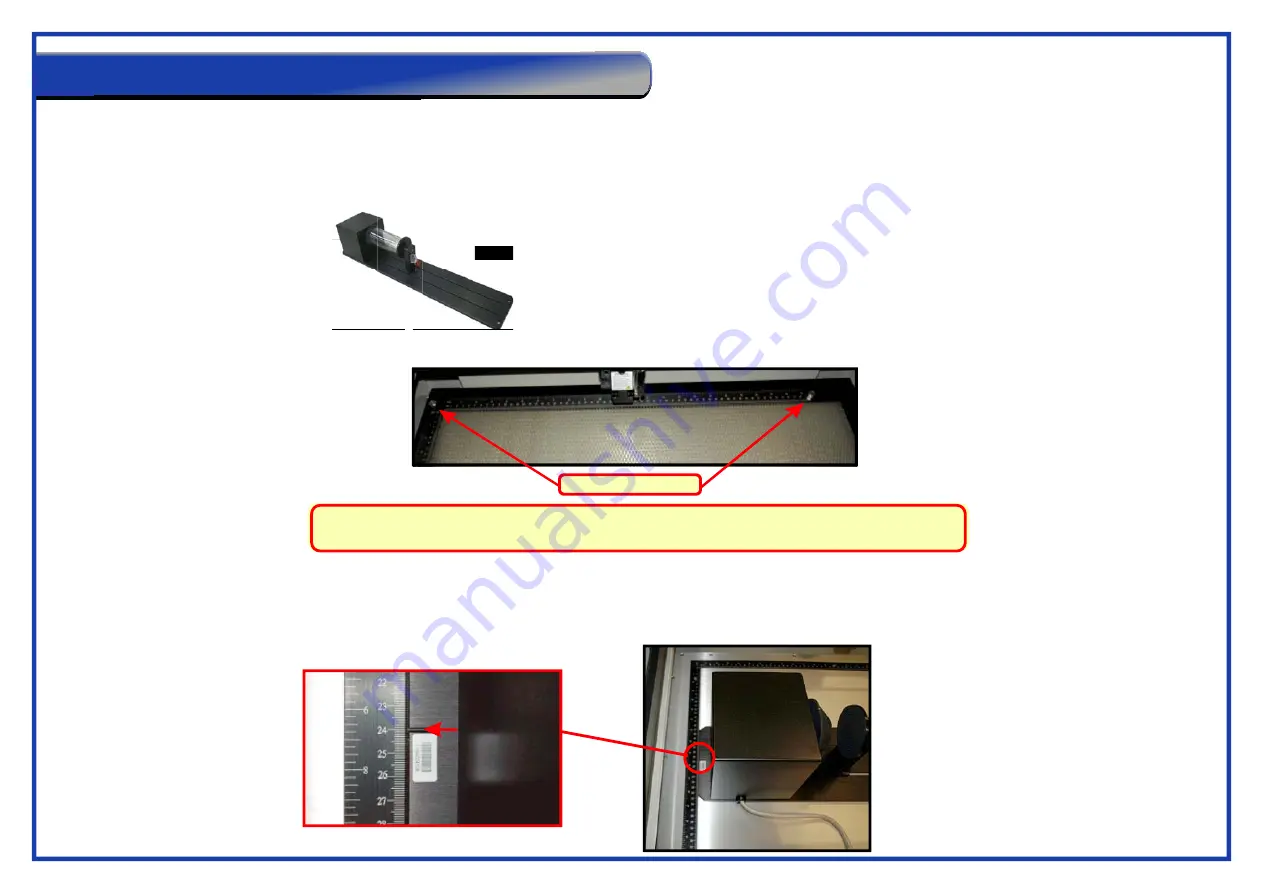
Lower the laser bed down enough to give clear access to the cutting table using the down button on the control panel. Remove the two screws from the
bed before removing the grid bed (as shown in the picture below).
Note:
Store the grid bed in a safe place while it is removed from the machine so that it will not get
kicked or damaged.
Step 3.
groove
Insert the rotary attachment onto the laser table. When inserting the rotary attachment make sure that the
by the bar code of the attachment is
located by the
mark.
24cm
Step 2.
OFF
Turn power to the machine
. This is because the laser needs to run through a different initialisation process.
The rotary attachment is an optional item for the GCC Laser cutters. It adds a 4th axis that provides the capability of engraving onto cylindrical objects
suchs as glasses, vases and tubes.
The unit can handle objects up to the maximum lenght of 450mm and has a padded rubber drive wheel and a clamp for holding and rotating the workpiece.
The wheel has a maximum diameter of 94mm, however the maximum diameter of the loaded object can be up to 180mm with a limited loading weights of 7kg.
This section of the user guide includes instructions to fit, setup and use the rotary table.
Rotary Table
Groove
Remove both screws
Using The Rotary Attachment


