Page 27
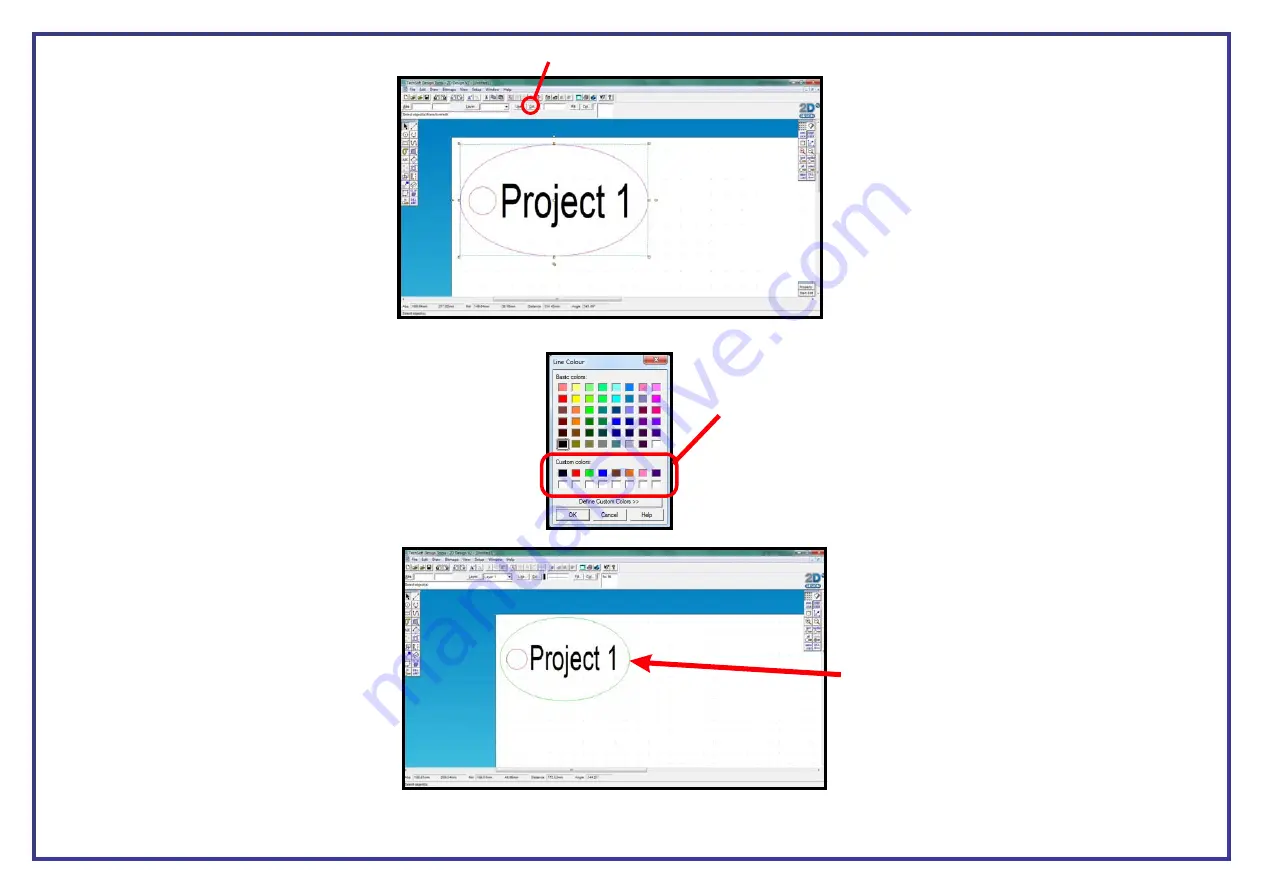
Step 2
Colour
Line
. Go to the
button located directly to the right of the
button in 2D Design and select it with your mouse.
Step 3
. Once selected you will see the below box open up on the screen.
You will see that the first three of the
custom colours
are in the recommended order. Simply click on the colour
you want to assign to the part/parts selected and then
click OK.
Once you deselect the lines you will now
see that they have changed to the assigned
colour.
Simply repeat this process until you have all the colours you need assigned to your project. Once this has been done you will be ready to print.


