6. ROUTES
6-3
13. Press the
MENU
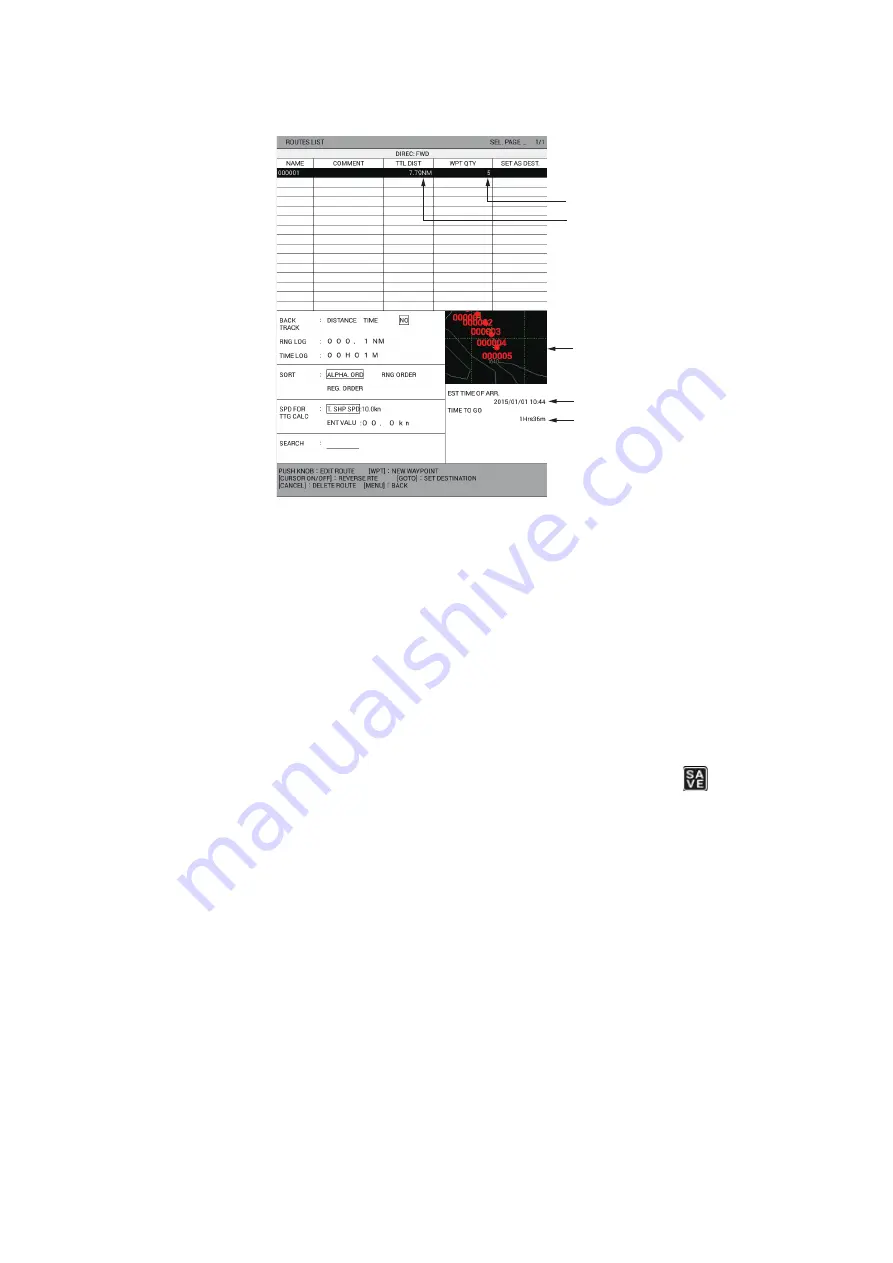
key twice to return to [ROUTES LIST]. The total distance, num-
ber of waypoints, ETA and TTG are shown.
To set the route as your destination, press the
GOTO
key. [DST: FW] is displayed
in [SET AS DEST.]. To follow the route in reverse waypoint order, press the
CUR-
SOR ON/OFF
key. The indication [DIREC: FWD] changes [DIREC: REV] and the
waypoint set as first waypoint is displayed in the preview window as final way-
point.
14. Press the
DISP
key to close the menu.
6.1.2
How to create track-based routes using own ship position
You can create routes based on your ship’s track, by entering waypoints at own ship
position, either manually or automatically. Track-based routes can have a maximum
of 100 points. For automatic entry, you need to set an interval of time or distance. This
feature is useful when you wish to retrace a track. The SAVE icon (
) appears at
the bottom right of the screen when creating a track based route.
1. Press the
MENU
key to open the main menu.
2. Select [1. ROUTES/WAYPOINTS LIST].
3. Select [2. ROUTES LIST].
4. Select [RNG LOG] or [TIME LOG].
5. Press the numeric keys to enter range or time.
6. Select [BACK TRACK].
7. Select [DISTANCE] or [TIME]. Own ship position is automatically saved, at the in-
terval selected, to use in creation of the route. The route name is automatically
created.
8. Press the
DISP
key to close the menu.
9. To create the route manually, do the following:
1) Press the
CURSOR ON/OFF
key to turn off the cursor.
Number of waypoints
Total distance from first
waypoint to final waypoint
Preview for final waypoint
Estimated time of arrival
Time to go


