4. MARKS, LINES
4-9
4.7
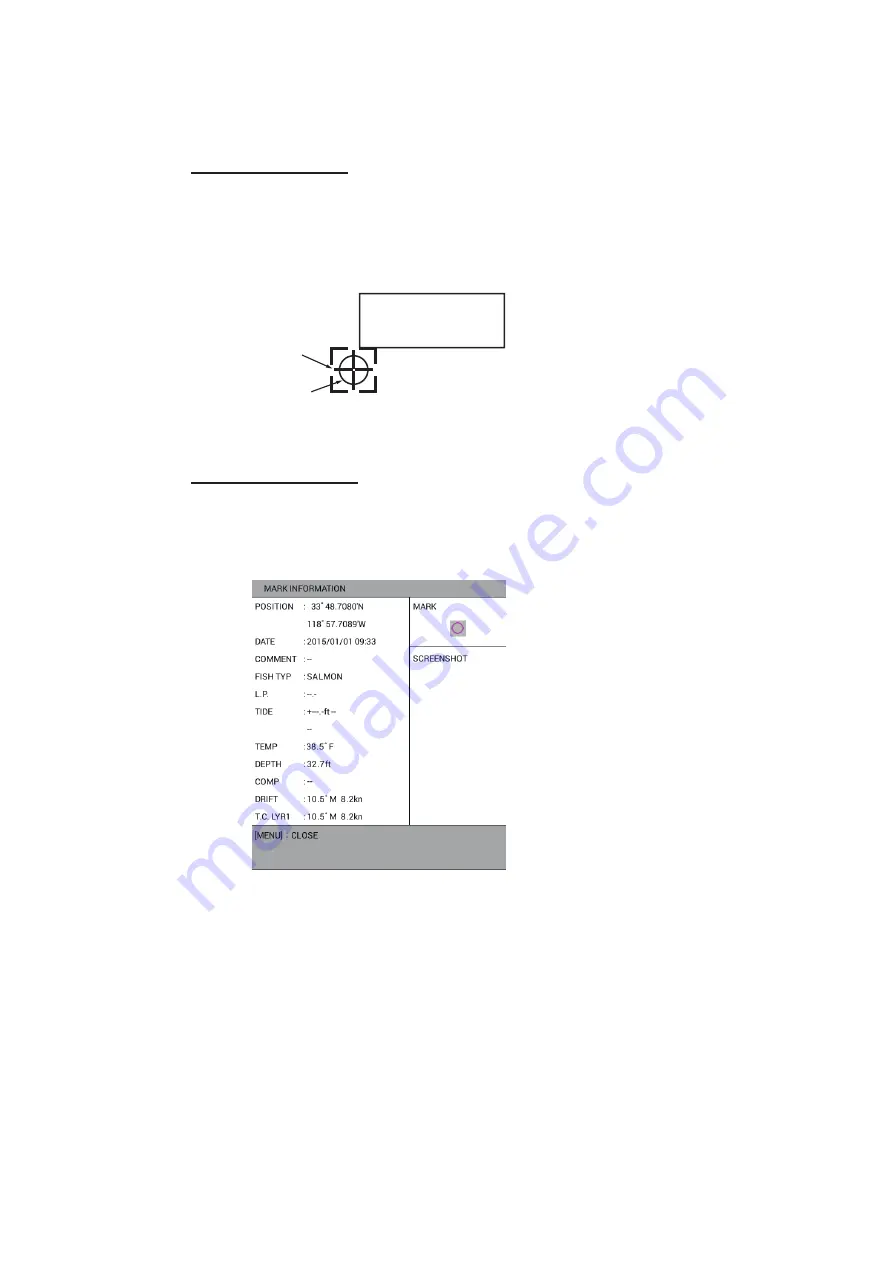
How to Show Mark Information
Mark information can be shown on the screen.
Simple information
1. Press the
CURSOR ON/OFF
key to turn on the cursor.
2. Put the cursor on the mark to find its information. Data (latitude and longitude po-
sition, water temperature, depth) for the mark is shown on the screen. (Requires
water temperature and depth data.)
Note:
If mark information does not appear, turn on [DISPLAY MARK INFO.] on page
3 of the [1. DISPLAY FORMAT] menu in the [0. SYSTEM SETTING] menu.
Detailed information
1. Press the
CURSOR ON/OFF
key to turn on the cursor.
2. Put the cursor on the mark to find its information then push the
ENTER
knob. The
detailed data for the mark is shown on the screen.
Note:
When entering a mark at own ship position (see section 4.2.1), you can take
a screenshot then display it on the mark information window. To take a screen-
shot, do the following:
1) Press the
MENU
key to open the main menu.
2) Select [4. MARK/TRACK SETTING].
3) Select [AUTO RECORD SETTING] on page 1.
4) Select [SCREEN SHOT WHEN MARK INPUT] or [NO].
[SCREEN SHOT WHEN MARK INPUT]: Takes a screenshot when entering a
mark at own ship position (default setting).
[NO]: Turns off the screenshot function.
5) Press the
DISP
key to close the menu.
3. Press the
MENU
or
DISP
key to close the window.
33°18.3085’N
119°30.3529’W
40.5°F 50.7ft
Mark
Cursor
- When the item has no information,
“- -” is displayed.
- Water temperature and depth are
displayed only for the mark
entered at own ship position.
- When the item has no information,
“- -” is displayed.
- Water temperature, depth, drift and
tidal current layer 1 are displayed
only for the mark entered at own
ship position.


