3. TRACK
3-13
• [2. SET RNG]: Select the starting point of the area
to erase. Then select the ending point of the area
to erase. The selected area is framed in a white
triangle with gray border. Go to step 7.
7. Select [COLOR].
8. Press the applicable numeric key to select the color
to erase. Select [8. ALL] to erase tracks of all colors
within the area you set.
9. Select [LINE TYPE].
10. Press the applicable numeric key to select the line type to erase. Select [5. ALL]
to erase tracks of all line types within the area you set. The number of memory
points selected for erasure is displayed in [NO. OF TRK PTS SEL.].
11. Select [RUN] to erase the own ship track you set.
12. Press the
DISP
key to close the menu.
3.7
How to Edit Own Ship Track
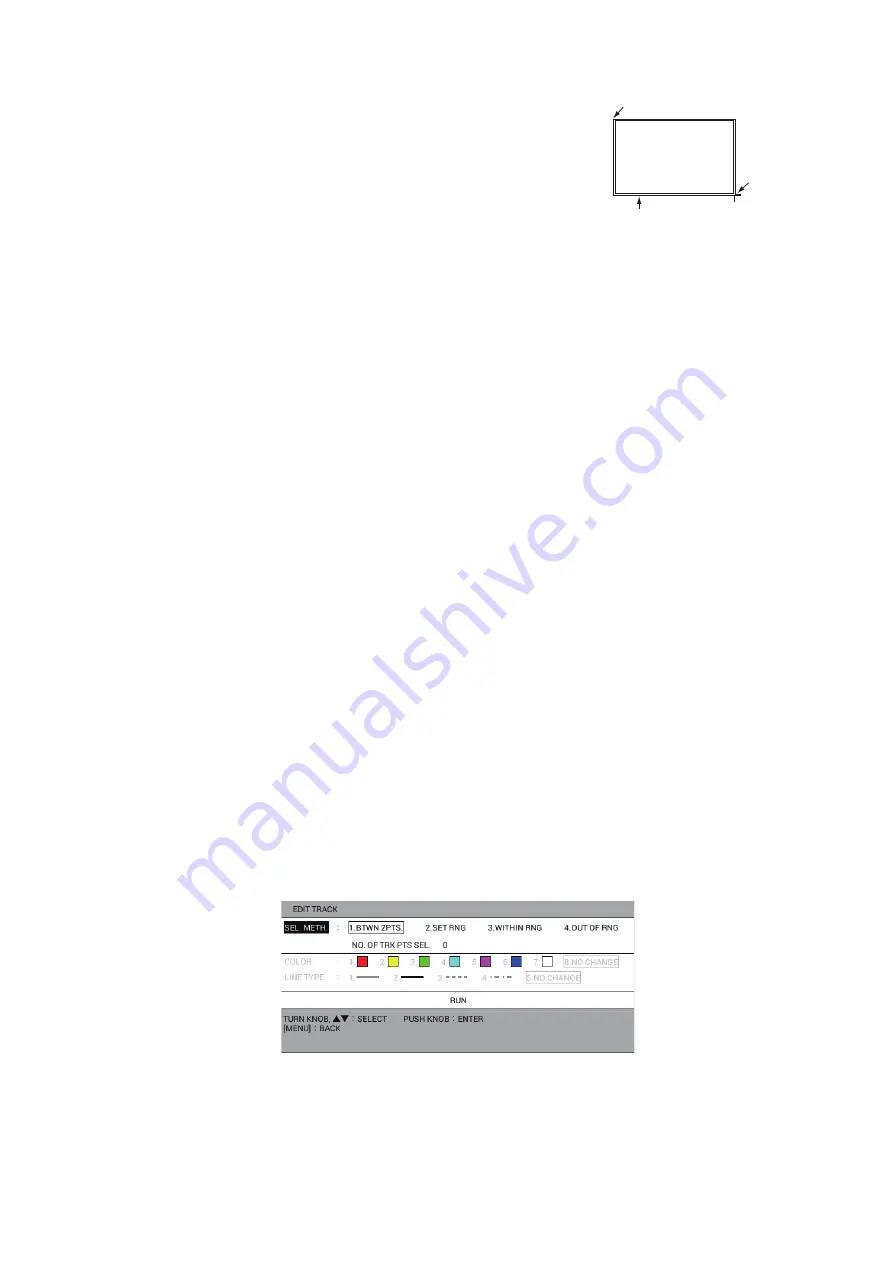
The color and line type of own ship track can be changed. For example, you may want
to change the color and line of the track after returning to port, to distinguish previous
and current track. Four methods of selecting range to edit are available:
• [1. BTWN 2PTS.]: Edits all tracks between two points entered on the plotter display.
Both current track and playback track cannot be edited at the same time.
• [2. SET RNG]: Edits tracks within an area you set.
• [3. WITHIN RNG]: Edits tracks currently shown on the screen.
• [4.OUT OF RNG]: Edits tracks currently not shown on the screen.
Note 1:
The tracks in the internal memory, set to [YES] on [DISPLAY OWN TRACK]
in the [DISPLAY INTERNAL MEMORY] menu, cannot be edited.
Note 2:
If the tracks are being automatically colored according to depth or water tem-
perature, the tracks cannot be edited (see section 3.3.1).
1. Press the
MENU
key to open the main menu.
2. Select [5. MARK/ TRACK EDIT/DELETE].
3. Select [4. EDIT TRACK].
4. Select [SEL. METH.].
5. Press the applicable numeric key to select the method for editing range. For [1.
BTWN 2PTS.] or [2. SET RNG], go to step 6. For [3. WITHIN RNG] or [4. OUT OF
RNG], go to step 7.
Starting point
Cursor
(Ending
point)
White rectangle surrounded
by gray (All tracks in this
area are erased.)


