


511
■
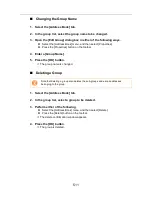
Changing the Group Name
1. Select the [Address Book] tab.
2. In the group list, select the group name to be changed.
3. Open the [Edit Group] dialog box in either of the following ways.
z
Select the [Address Book] menu, and then select [Properties].
z
Press the [Properties] button on the toolbar.
4. Enter a [Group Name].
5. Press the [OK] button.
D
The group name is changed.
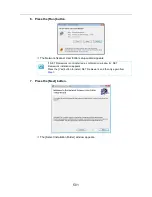
■
Deleting a Group
1. Select the [Address Book] tab.
2. In the group list, select a group to be deleted.
3. Perform either of the following.
z
Select the [Address Book] menu, and then select [Delete].
z
Press the [Delete] button on the toolbar.
D
The delete confirmation window appears.
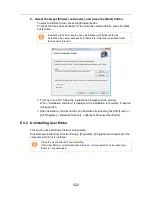
4. Press the [OK] button.
D
The group is deleted.
Note that deleting a group also deletes the sub-groups and e-mail addresses
belonging to the group.
Summary of Contents for ScanSnap N1800
Page 1: ...ScanSnap N1800 Network Scanner Operator s Guide P3PC 3182 01ENZ0 ...
Page 17: ...17 ...
Page 29: ...29 ...
Page 55: ...55 ...
Page 65: ...65 ...
Page 73: ...73 ...
Page 271: ...271 7 Press the Back button D The Central Admin Console main window appears again ...
Page 355: ...355 D The Main Menu window is shown again ...
Page 415: ...415 ...
Page 441: ...441 ...
Page 481: ...481 ...
Page 492: ...492 Appendix D Scanner Specifications This appendix gives specifications for the scanner ...
Page 527: ...527 ...
Page 528: ...528 Appendix G Glossary ...
Page 533: ...533 ...
Page 535: ...535 ...