183
■
Restoring the System Settings
Restore the system settings.
The system settings can be restored in the following ways.
z
Return the system settings backup file to the same scanner
z
Import the system settings backed up from another scanner to the current scanner
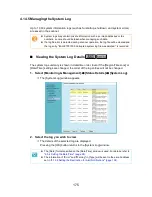
1. Select [Monitoring & Management]
J
[Data Management]
J
[System
Settings File].
D
The [System Settings File] window appears.
2. Select the backup file of the system settings to be restored.
Press the [Browse] button to select a file.
3. Perform either of the following steps.
z
To return the system settings backup file to the same scanner, select [Restore
in the same scanner].
z
To import the system settings backed up from another scanner to the current
scanner, select [Import from another scanner].
4. Press the [Restore] button.
D
A confirmation message appears.
5. Press the [Yes] button.
D
The system settings are restored. After the system settings are restored, the
scanner is restarted.
During system settings restoration, do not press and hold down the power
button for longer than 4 seconds.
It may cause the scanner to function abnormally.
The network interface connection will be lost when the scanner is restarted to
complete the restoration of the system settings. To continue with other
settings, wait a short time for the scanner to restart, then login to the network
interface again.
As the network interface connection to the scanner requires the IP address or
scanner name, if this is changed by the restoration of the system settings (i.e.
if the backed up IP address or scanner name is different to the pre-restoration
IP address or scanner name), the new IP address or scanner name will be
needed. If not known, the current state of these settings can always be
checked by physically logging in to the scanner via the LCD touch panel
interface.
Summary of Contents for ScanSnap N1800
Page 1: ...ScanSnap N1800 Network Scanner Operator s Guide P3PC 3182 01ENZ0 ...
Page 17: ...17 ...
Page 29: ...29 ...
Page 55: ...55 ...
Page 65: ...65 ...
Page 73: ...73 ...
Page 271: ...271 7 Press the Back button D The Central Admin Console main window appears again ...
Page 355: ...355 D The Main Menu window is shown again ...
Page 415: ...415 ...
Page 441: ...441 ...
Page 481: ...481 ...
Page 492: ...492 Appendix D Scanner Specifications This appendix gives specifications for the scanner ...
Page 527: ...527 ...
Page 528: ...528 Appendix G Glossary ...
Page 533: ...533 ...
Page 535: ...535 ...


