309
6.4
Sending the Scanned Data by e-Mail
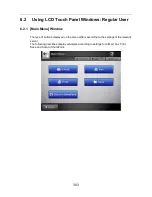
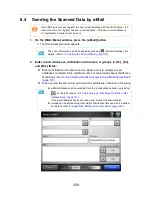
1. On the [Main Menu] window, press the [e-Mail] button.
D
The [Send e-Mail] window appears.
2. Enter e-mail addresses, distribution list names, or groups in [To], [Cc],
and [Bcc] fields.
z
Enter a distribution list name to send a single e-mail to multiple e-mail
addresses contained in the distribution list. For more details about distribution
list settings, refer to
"6.4.2 Adding an e-Mail Target to the e-Mail Address Book"
(page 317)
.
z
Enter a group to send an e-mail to all e-mail addresses contained in the group.
If an LDAP server is set, register the user e-mail address with the LDAP server. If a
local account is set, register the user e-mail address. If the user e-mail address is
not registered, e-mails cannot be sent.
The scan information can be changed by pressing
of [Scan Settings]. For
details, refer to
"6.9 Setting the Scan Options" (page 356)
.
z
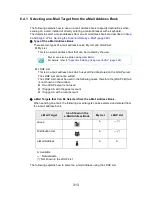
e-Mail addresses can be selected from the e-mail address book by pressing
. For details, refer to
"6.4.1 Selecting an e-Mail Target from the e-Mail
Address Book" (page 313)
.
If the e-mail address book cannot be used, contact the administrator.
z
Groups can be edited using User Editor. Distribution lists can also be edited.
For details, refer to
"Appendix E Editing Using User Editor" (page 496)
.
Summary of Contents for ScanSnap N1800
Page 1: ...ScanSnap N1800 Network Scanner Operator s Guide P3PC 3182 01ENZ0 ...
Page 17: ...17 ...
Page 29: ...29 ...
Page 55: ...55 ...
Page 65: ...65 ...
Page 73: ...73 ...
Page 271: ...271 7 Press the Back button D The Central Admin Console main window appears again ...
Page 355: ...355 D The Main Menu window is shown again ...
Page 415: ...415 ...
Page 441: ...441 ...
Page 481: ...481 ...
Page 492: ...492 Appendix D Scanner Specifications This appendix gives specifications for the scanner ...
Page 527: ...527 ...
Page 528: ...528 Appendix G Glossary ...
Page 533: ...533 ...
Page 535: ...535 ...

