


341
6.6.2 Positioning
Set the print position of the scanned data.
The setting selected here will be used every time the user prints a document.
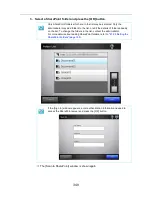
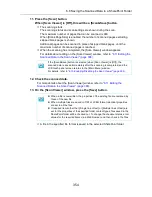
1. On the [Print] window, press the [Positioning] button.
D
The [Positioning] window appears.
2. Select the print positioning of the data.
Printing results will vary as shown below, depending on the scaling setting. For
more details on the scaling setting, refer to
"6.6.1 Scaling" (page 337)
.
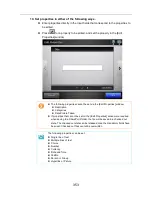
Button
Scaling
Control Point
Center
Shrink to Fit
Uses the center point of the area available for
printing as a control point.
Available Area
for Printing
Control Point
Center
Summary of Contents for ScanSnap N1800
Page 1: ...ScanSnap N1800 Network Scanner Operator s Guide P3PC 3182 01ENZ0 ...
Page 17: ...17 ...
Page 29: ...29 ...
Page 55: ...55 ...
Page 65: ...65 ...
Page 73: ...73 ...
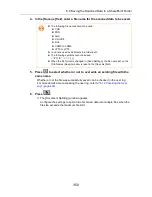
Page 271: ...271 7 Press the Back button D The Central Admin Console main window appears again ...
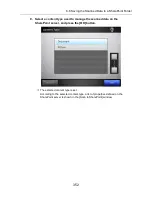
Page 355: ...355 D The Main Menu window is shown again ...
Page 415: ...415 ...
Page 441: ...441 ...
Page 481: ...481 ...
Page 492: ...492 Appendix D Scanner Specifications This appendix gives specifications for the scanner ...
Page 527: ...527 ...
Page 528: ...528 Appendix G Glossary ...
Page 533: ...533 ...
Page 535: ...535 ...