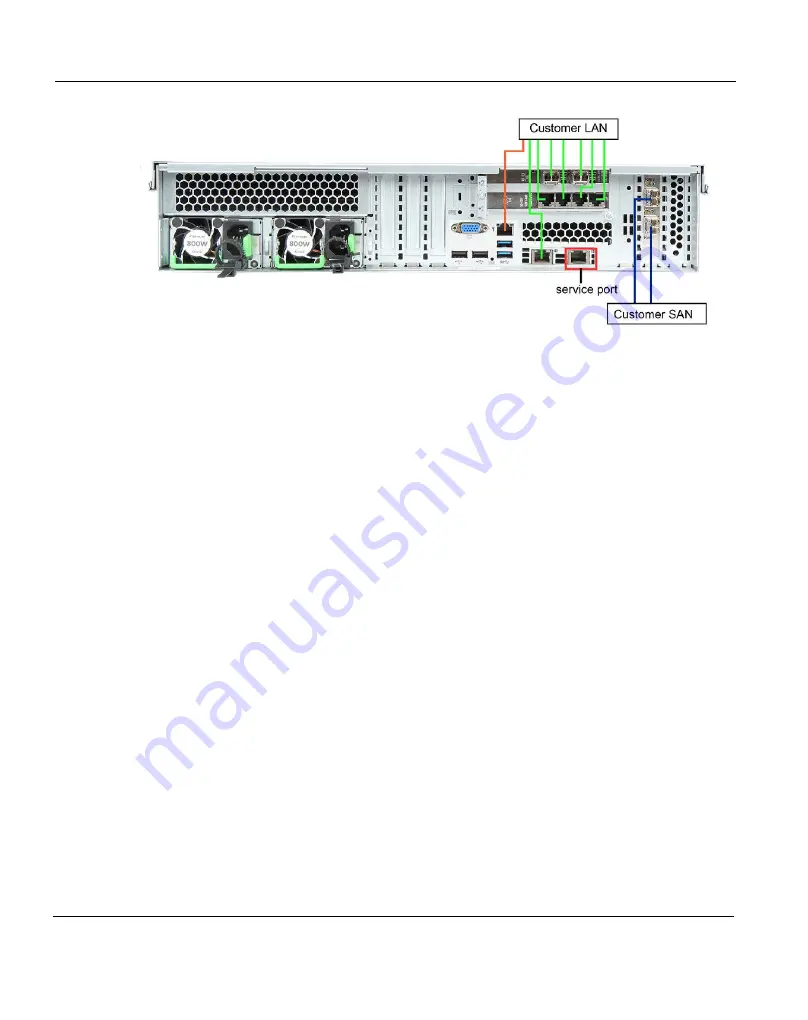
5.3 Cabling the ETERNUS CS800 S6 System
Figure 63: Entry System with 8 Gb/s Fibre Channel and with 10 Gb/s Ethernet
Proceed as follows to connect theETERNUS CS800 S6 Entry:
1. Connect a power cable to each power supply of the server.
2. Connect the LAN ports and optionally the iRMC port to the appropriate networks. At
least one of the LAN ports must be connected.
3. If your CS800 also provides FC ports: Connect them to the SAN or directly to the
appropriate devices.
5.3.2
Entry System with ETERNUS JX40 S2 Option
There are four different versions of the Entry model with the JX40 option, which can be
distinguished by the ports respectively the PCI slots used in the server, see table
PCI Slots - Entry System, with JX40 S2 option" on page 55
Optionally up to three ETERNUS JX40 S2 storage modules can be connected to the server
to provide a disk capacity of more than 24TB (up to 120TB).
Please refer to the pictures below to identify the model and to see which ports can be
connected to the LAN and SAN and how to connect the optionally available JX40 modules.
96
ETERNUS CS800
Summary of Contents for ETERNUS CS800
Page 1: ...ETERNUS CS800 V3 2 User Guide English ...
Page 2: ......
Page 3: ...English ETERNUS CS800 User Guide V3 2 Edition October 2015 ...
Page 26: ...26 ...
Page 42: ...42 ...
Page 78: ...78 ...
Page 132: ...6 3 Running the Getting Started Wizard Figure 91 Confirm Page 132 ETERNUS CS800 ...
Page 143: ...Figure 97 Remote Management Pages Map ETERNUS CS800 143 7 Remote Management ...
Page 144: ...144 ...
Page 184: ...8 7 AIS Connect Figure 128 AISConnect Wizard Confirm 184 ETERNUS CS800 ...
Page 198: ...198 ...
Page 321: ...Figure 206 Network Configuration ETERNUS CS800 321 10 Configuration ...
Page 335: ...Figure 215 Date Time Page To set the system date and time ETERNUS CS800 335 10 Configuration ...
Page 339: ...Figure 216 Access Control Settings Page ETERNUS CS800 339 10 Configuration ...
Page 362: ...362 ...
Page 432: ...432 ...
Page 476: ...476 ...
Page 494: ...494 ...
Page 600: ...600 ...


