61
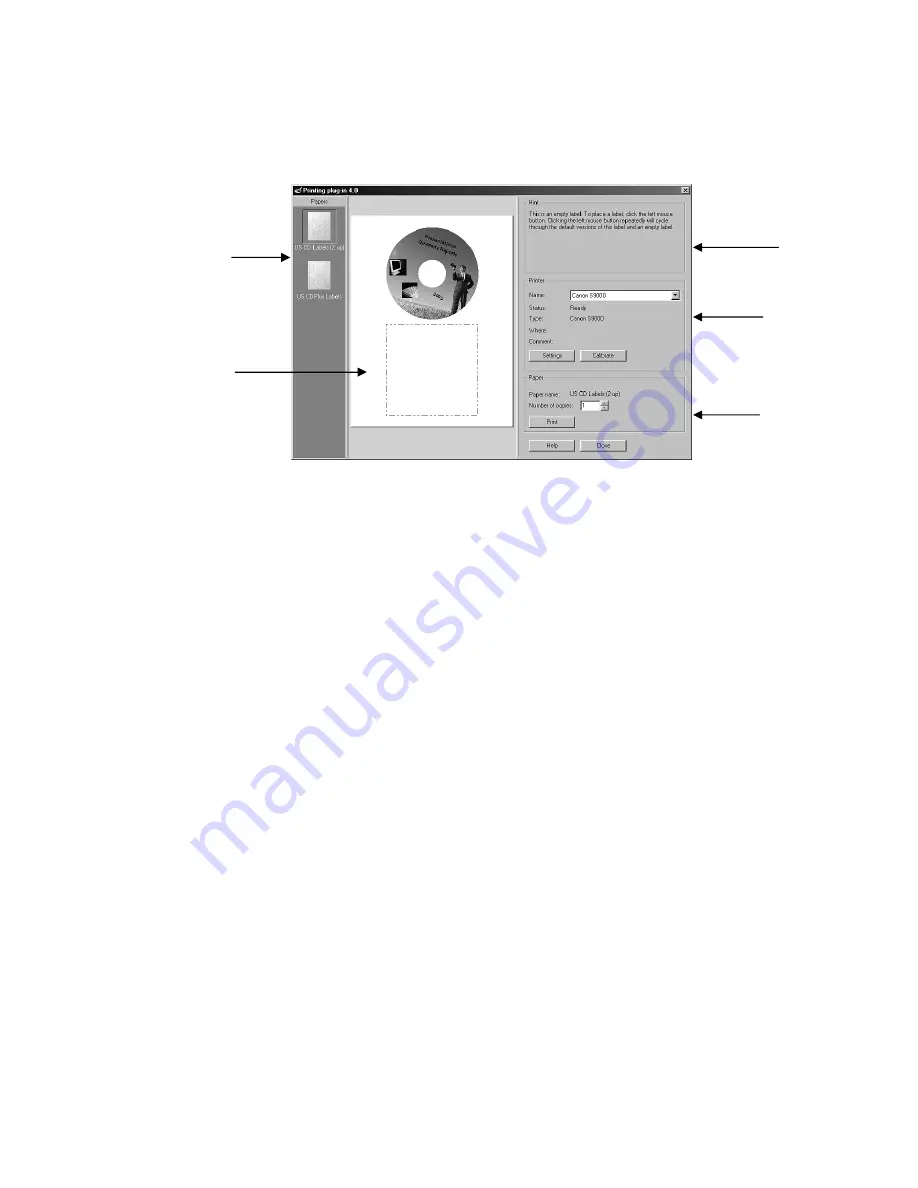
choose which labels on the sheet to print. The main areas of the Printing plug-in screen
are shown in the diagram below and discussed in detail.
Figure 5.13 – Printing plug-in screen
Paper Options Window
– this column is where you view the different paper options.
Each paper type is labeled below its image. Clicking once on a paper type will allow
you to view the placement of the labels in the Label Display Window.
Label Display Window
– this area is where you select which labels on the sheet to print.
Left-clicking once on the top or bottom label will toggle that label on or off. The label
you want to print needs to be toggled on in order for it to print in that location. To
print out both labels on one sheet, then both must be toggled on. Any label that is
toggled off, and is not seen in this window, will not print.
Hint Dialog Box
– this is a box located in the upper right-hand corner of the dialog box
and it does exactly what its name implies. Its sole purpose is to provide you with hints
as to how to proceed if you get stuck. It also provides definitions of buttons and tabs
that appear on that page. The best part about it is that it’s mouse-sensitive, so all you
have to do is drag your mouse over an object to find out more about that object. Think
of it as your own personal cheat sheet.
Printer Settings
– this area is directly below the Hint Dialog Box and it allows you to
view and edit your printer settings. By clicking the Settings button, the individual
properties dialog box for the selected printer is opened. Also located in this area is the
Calibrate button that is used to initialize the Calibration Wizard before printing for
the first time.
Paper Settings
– this area is directly below the Printer Settings area and it displays the
paper type that you selected as well as the number of copies you want to print. Also
located in this area is the Print button that you will select to initialize the printing
process.
Paper
Options
Window
Printer
Settings
Hint Dialog
Box
Paper
Settings
Label
Display
Window


