


H.265 VANGUARD 4x2H / 8x4H / 16x8H
7
2.2
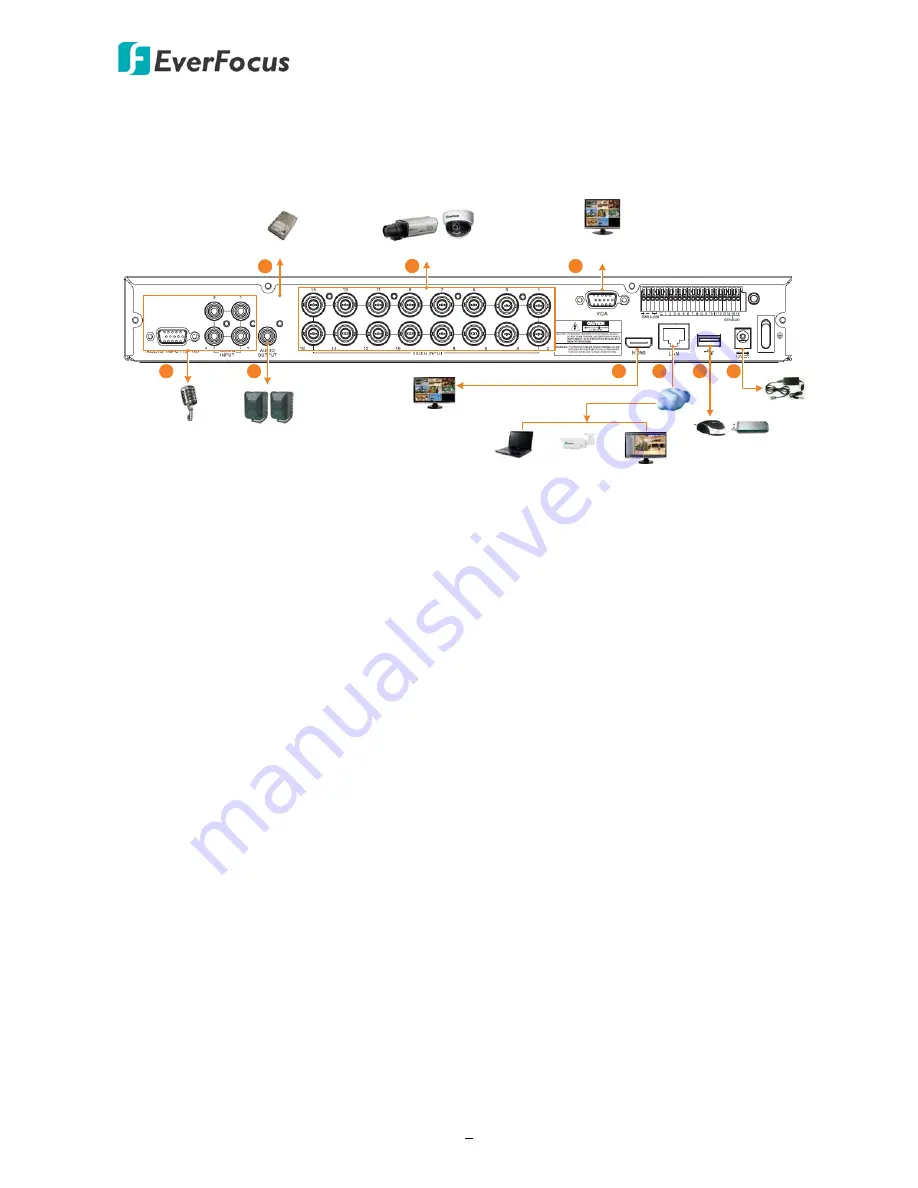
Basic Connection
The instructions below describe the basic connection to the DVR.
The image below uses VANGUARD 16x8H as example.
Line Level
Audio Out
Line Level
Audio Input
TVI/AHD/SD Camera
Main Monitor
(VGA)
Main Monitor
(HDMI)
Power Supply
Mouse / USB Storage
Web Remote Client
IP Cameras
Network
VANGUARD CMS
1
3.5" HDD
2
3
3
4
5
6
7
8
1.
To record videos, install 3.5” HDD(s) to the DVR. Please refer to
2.1 Hard Disk Installation
.
2.
To connect to the TVI/AHD/SD cameras, connect the cameras to the BNC ports.
3.
To view videos at local site, connect a monitor to the HDMI or VGA port using the HDMI or
VGA cable supplied by the monitor manufacturer.
4.
Connect microphones to the audio input ports to transmit audio from the camera to the DVR.
Note that the microphones with a (built-in) amplifier and external power supply are required.
5.
To listen to the audio from device side, connect speakers to the audio output. Note that the
speakers with a (built-in) amplifier and external power supply are required.
6.
Use a standard RJ-45 CAT5 Ethernet cable to connect the DVR to the network and then
optionally connect IP cameras to the DVR.
7.
Optionally connect a mouse to the DVR to control the system. You can also control the
system using the supplied IR Remote Control (
Appendix A. IR Remote Control
).
8.
Use the supplied Power Cord and Adaptor to connect the DVR to the power outlet.


