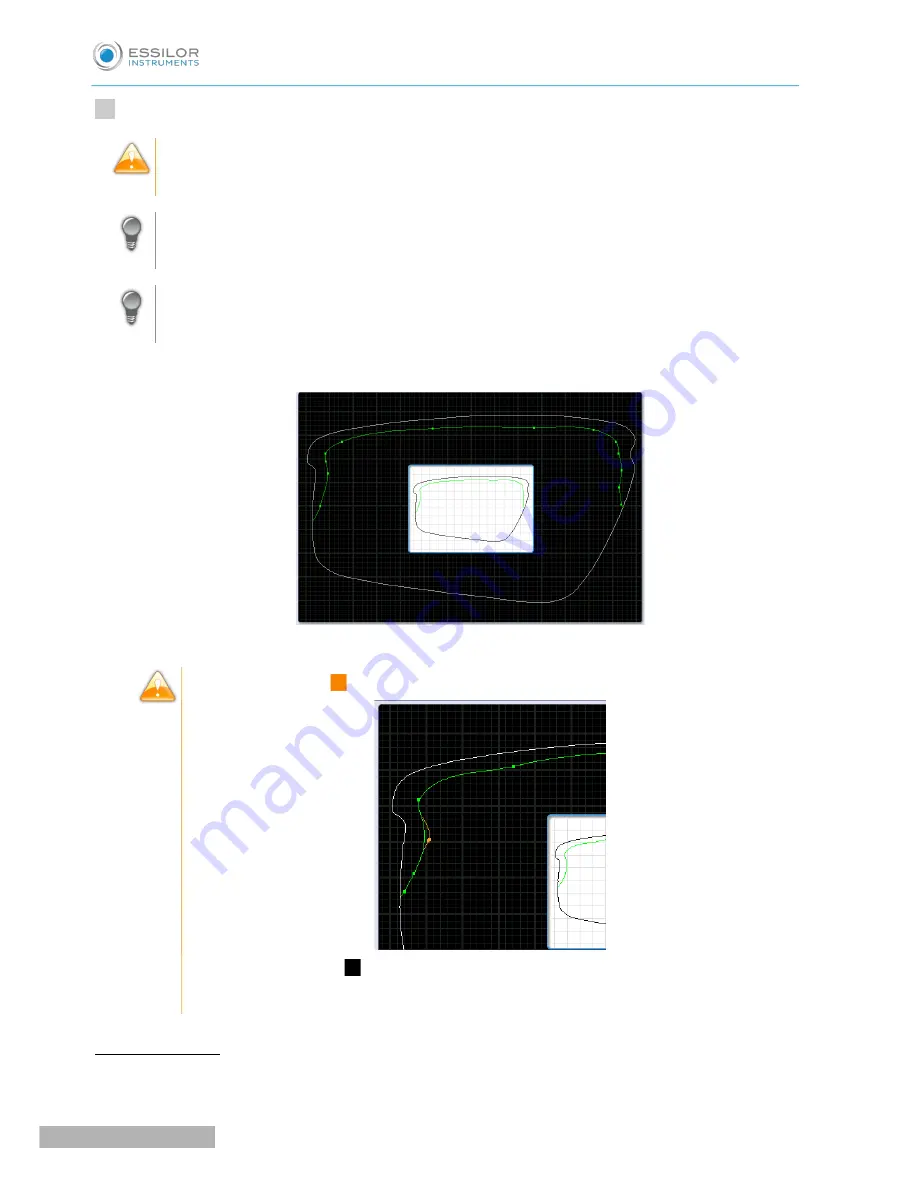
Press and hold with the stylus to set the other points of the step bevel trajectory, one after the other.
With each audible signal, raise the stylus a few seconds before setting a new point by pressing and
holding
It is preferable to create a greater number of points at the angles to gain precision, if you wish to
adjust more precisely the bevel trajectory using the zoom.
Conversely, for easier handling, it is preferable to reduce the number of points on the curves so
the adjustment is more effective.
The step bevel trajectory is set.
The orange trajectory
() cannot be performed, because the tool cannot reach it.
The trajectory in green (
) will be performed (it is not necessary to modify the trajectory).
For more information, consult the Set step bevel section > Adjust the trajectory
(
F
p.91)
Go into zoom mode
You can zoom in on a specific point or outline an area.
>
4
Pro-E 600_Pro-E 700 > v1 -10.18
88
U
SER
M
ANUAL
> II. E
DGING
A
LENS
Summary of Contents for Pro-E 600 edger
Page 1: ...User Manual...
Page 2: ......
Page 6: ......
Page 8: ......
Page 9: ...I FIRST STEPS WITH PRO E...
Page 10: ...Pro E 600_Pro E 700 v1 10 18 10 USER MANUAL I FIRST STEPS WITH PRO E...
Page 17: ...II EDGING A LENS...
Page 18: ...Pro E 600_Pro E 700 v1 10 18 18 USER MANUAL II EDGING A LENS...
Page 127: ...III PREPARING A DRILLED JOB...
Page 128: ...Pro E 600_Pro E 700 v1 10 18 128 USER MANUAL III PREPARING A DRILLED JOB...
Page 136: ......
Page 137: ...IV CONFIGURING THE EDGER...
Page 138: ...Pro E 600_Pro E 700 v1 10 18 138 USER MANUAL IV CONFIGURING THE EDGER...
Page 151: ...V MAINTENANCE SERVICING...
Page 152: ...Pro E 600_Pro E 700 v1 10 18 152 USER MANUAL V MAINTENANCE SERVICING...
Page 181: ...TECHNICAL DATA...
Page 182: ...Pro E 600_Pro E 700 v1 10 18 182 USER MANUAL TECHNICAL DATA...
Page 186: ......
Page 187: ...GENERAL INFORMATION...
Page 188: ...Pro E 600_Pro E 700 v1 10 18 188 USER MANUAL GENERAL INFORMATION...
Page 194: ......
Page 195: ...GLOSSARY...


