EPSON Stylus Pro 4400/4450/4800/4880/4880C
Revision C
Disassembly & Assembly
Disassembly Procedures
269
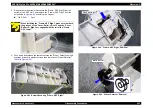
10. Set the "CR SUS PLATE SUPPORT TOOL" on the both sides of the
"Carriage Unit" as shown in
Place the "CR SUS PLATE SUPPORT TOOL" with the left end of its front
tab set on the "Shaft, Front" and the right end of its rear hook set on the
"Shaft, Rear", and then install them in a twisting motion as shown in
.
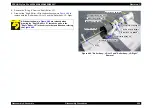
11. Remove the "Carriage Unit" by following steps below.
11-1.
Pull the "Carriage Unit" toward you and compress it to the "Shaft,
Front" (
) to make the bearings that are attached on the rear of
the "Carrigage Unit" apart from the "Shaft, Rear".
11-2.
Lift the rear of the "Carriage Unit" upward to release it from the
"Shaft, Front" (
), lift the front of the "Carriage Unit" so that it is
released from the "Shaft, Front", and then remove the "Carriage
Unit".
Figure 4-82. Carriage Unit Removal
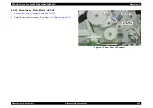
C A U T I O N
Be sure to install the "CR SUS plate" as shown in
or its tab may get bent.
A D J U S T M E N T
R E Q U I R E D
Be sure to refer to Chapter 5
and
perform specified adjustments after replacing or removing
the "Carriage Unit".
1
2
Carriage Unit
Shaft, Front
Shaft, Rear
Shaft, Rear
CR SUS PLATE SUPPORT TOOL
Summary of Contents for Stylus Pro 4800 Portrait Edition
Page 9: ...C H A P T E R 1 PRODUCTDESCRIPTION ...
Page 113: ...C H A P T E R 2 OPERATINGPRINCIPLES ...
Page 156: ...C H A P T E R 3 TROUBLESHOOTING ...
Page 200: ...C H A P T E R 4 DISASSEMBLY ASSEMBLY ...
Page 366: ...C H A P T E R 5 ADJUSTMENT ...
Page 448: ...C H A P T E R 6 MAINTENANCE ...
Page 457: ...C H A P T E R 7 APPENDIX ...


