EPSON Stylus Pro 4400/4450/4800/4880/4880C
Revision C
Disassembly & Assembly
Disassembly Procedures
219
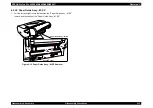
4.2.3.5 Panel, Front/Panel Unit
1.
2.
3.
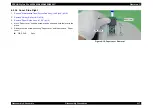
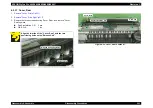
Remove "Harness, Panel" from "Panel Unit".
4.
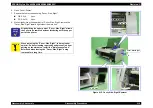
Remove following screws securing "Panel, Front".
C.B.S. 3x6:
1 pc.
C.B.S. (O) 3x6: 8 pcs.
C.B.S. (O) 3x8: 1 pc.
5.
Release "Panel, Front" dowel from positioning hole in frame.
6.
Remove "Panel, Front" toward you.
Figure 4-20. Harness, Panel, Connection Status
Figure 4-21. Panel, Front Removal
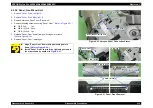
Align "Panel, Front" dowel with positioning hole in
frame.
Install "Panel, Front" to printer by tightening screws in
the order shown by number in
Panel Unit
Harness, Panel
Dowel and Positioning hole
1
2
3
4
5
6
7
8
9
10
Panel, Front
C.B.S. (O) 3x6
C.B.S. 3x6
C.B.S. (O) 3x8
C.B.S. (O) 3x6
Summary of Contents for Stylus Pro 4800 Portrait Edition
Page 9: ...C H A P T E R 1 PRODUCTDESCRIPTION ...
Page 113: ...C H A P T E R 2 OPERATINGPRINCIPLES ...
Page 156: ...C H A P T E R 3 TROUBLESHOOTING ...
Page 200: ...C H A P T E R 4 DISASSEMBLY ASSEMBLY ...
Page 366: ...C H A P T E R 5 ADJUSTMENT ...
Page 448: ...C H A P T E R 6 MAINTENANCE ...
Page 457: ...C H A P T E R 7 APPENDIX ...


