EPSON Stylus Pro 4400/4450/4800/4880/4880C
Revision C
Adjustment
Basic Adjustment
392
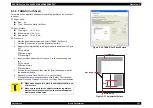
5.3.6 Cutter Pressure Adjustment
Adjusts the pressure to cut papers after replacing the cutter solenoid.
Required Tools
Tension Gauge (10N)
Specifications
500-600g
Pressure: Less than 85%
Procedure
1.
Enter Maintenance Mode2.
Power off
→
Press
"Paper Source(<)" + "Paper Feed(
Δ
)" + "Paper
Feed(
∇
)"
→
Power on
2.
Select "SELF TESTING" to enter Self Testing menu.
"Menu(>)"
3.
Select "SELF TESTING: Adjustment".
"Paper Feed(
∇
)" x1
→
"Menu(>)"
4.
Select "Adj: Cut Adj.".
"Menu(>)"
5.
Press
"Menu(>)"
to change the display from "Pressure: **%" to "Exec.
Adj.?".
6.
Press
"Menu(>)"
again to display the "Please Wait" message.
7.
When the "Carriage Unit" detects its original point, the message
"[Exec] Key Down" is displayed and the "Carriage Unit" is released.
8.
Open the top cover, and press
"Menu(>)"
to display "[Exec] Key Up"
and lower the cutter.
9.
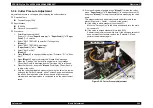
With the cutter kept lowered, measure the value five times in a row as
pulling up the "Holder, Solenoid" of the Tension Gauge, and take down
the results. Average value of the three measured figures except
minimum and maximum values is considered to be the measurement
result.
10. If the result is below standard, press
"Menu(>)"
to raise the cutter,
press
"Paper Feed(
Δ
)" + "Paper Feed(
∇
)"
to change the value (%) ,
and press
"Menu(>)"
to lower the cutter before measuring the value
again.
This measurement and adjustment should be performed in three
places (Right end
→
Center
→
Left end of the printer).
z
If the value is within standard (Less than 85%)
Move the "Carriage Unit" to the home position and turn the main
unit power off.
z
If the value is beyond standard (More than 86%)
Perform the adjustment one more time. If the observed value still
does not meet the standard, replace the "Solenoid, CR" and
perform the adjustment again.
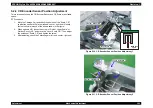
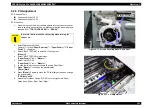
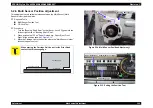
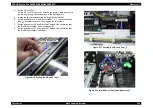
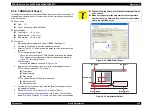
Figure 5-28. Cutter Pressure Adjustment
Holder, Solenoid
Push-pull Gauge
Summary of Contents for Stylus Pro 4800 Portrait Edition
Page 9: ...C H A P T E R 1 PRODUCTDESCRIPTION ...
Page 113: ...C H A P T E R 2 OPERATINGPRINCIPLES ...
Page 156: ...C H A P T E R 3 TROUBLESHOOTING ...
Page 200: ...C H A P T E R 4 DISASSEMBLY ASSEMBLY ...
Page 366: ...C H A P T E R 5 ADJUSTMENT ...
Page 448: ...C H A P T E R 6 MAINTENANCE ...
Page 457: ...C H A P T E R 7 APPENDIX ...


