EPSON AcuLaser C4000/C4100/C3000
Revision F
AcuLaser C4100
Product Descriptions
7-484
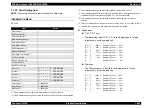
7.1.3 Control Panel
7.1.3.1 Special Operations
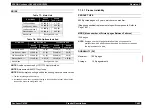
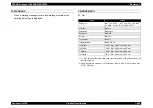
ROM MODULE COPY
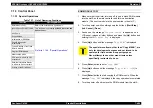
1. Make sure that the printer is turned off. Insert a blank ROM module
into the slot A on the main controller and this is a destination
module. (The source module is the one inserted in the slot P.)
2. Turn the printer on while holding down the buttons; [
Start/Stop
],
[
Job Cancel
], [
Down
].
3. As soon as the message “
Program Device
” is appeared on a
LCD panel, release all other buttons and press the [
Up
] button and
holding it untill “
Complex Exe
” is displayed.
4. Press [
Up
] button until the message “
Copy MENU
” is displayed.
5. Press [
Enter
] button to enter “
Copy MENU
”.
6. Press [
Up
] buttons until the message “
Copy FONT + CODE
] is
displayed.
7. Press [
Enter
] button to start copying the ROM module. When the
message “
Copy END
” is displayed, the copy operation is completed.
8. Turn the printer off and remove the ROM module from the slot A.
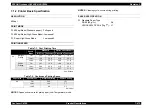
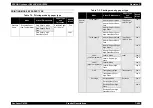
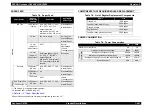
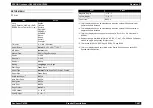
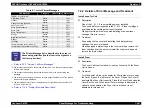
Table 7-11. List of Operating Functions
Function
Operating Method
ROM Module Copy
Refer to the description in right column.
Ignore EpsonNet ASP in HDD Turn the power on pressing the
Back
,
Enter
and
Job
Cancel
buttons.
Hex Dump
Refer to 1.14.4. "Special Operations"
Support Mode
Initialization of EEPROM
Panel Setting Value
Initialization
Forced Deleting of the Flash
ROM A Module
Program ROM Update
Maintenance Mode
CPU reset in a Service Call
occurrence.
Detailed Information Display
in a Service Call occurrence
Printing of the Error Sheet
C A U T I O N
The special menu items; other than “Copy MENU”, are
only for development purpose and not intend to be
operated for field service & support purpose.
Never attempt to use other menu items unless
specifically instructed to do so.
Summary of Contents for AcuLaser C3000 Series
Page 20: ...C H A P T E R 1 PRODUCTDESCRIPTIONS ...
Page 71: ...C H A P T E R 2 OPERATINGPRINCIPLES ...
Page 118: ...C H A P T E R 3 TROUBLESHOOTING ...
Page 318: ...C H A P T E R 4 DISASSEMBLYANDASSEMBLY ...
Page 472: ...C H A P T E R 5 ADJUSTMENT ...
Page 477: ...C H A P T E R 6 MAINTENANCE ...
Page 491: ...C H A P T E R 7 AcuLaserC4100 ...
Page 548: ......
Page 549: ......
Page 550: ......
Page 551: ......
Page 552: ......
Page 553: ......
Page 554: ......
Page 555: ...C H A P T E R 8 AcuLaserC3000 ...
Page 579: ...Model AcuLaser C3000 Board C569MAIN BOARD Sheet 1 of 5 Rev B ...
Page 580: ...Model AcuLaser C3000 Board C569MAIN BOARD Sheet 2 of 5 Rev B ...
Page 581: ...Model AcuLaser C3000 Board C569MAIN BOARD Sheet 3 of 5 Rev B ...
Page 582: ...Model AcuLaser C3000 Board C569MAIN BOARD Sheet 4 of 5 Rev B ...
Page 583: ...Model AcuLaser C3000 Board C569MAIN BOARD Sheet 5 of 5 Rev B ...
Page 584: ...C H A P T E R 9 APPENDIX ...
Page 674: ......
Page 675: ......
Page 676: ......
Page 677: ......
Page 678: ......
Page 679: ......
Page 680: ......


