16
ENGLISH
After setting up the system
1
Press the SYSTEM SETUP button to finish system set up.
This completes the system setup operations. Once the system is set up, there is no need to make the
settings again unless other components or speakers are connected to or the speaker layout is changed.
REMOTE CONTROL UNIT
11
1
3
2
3
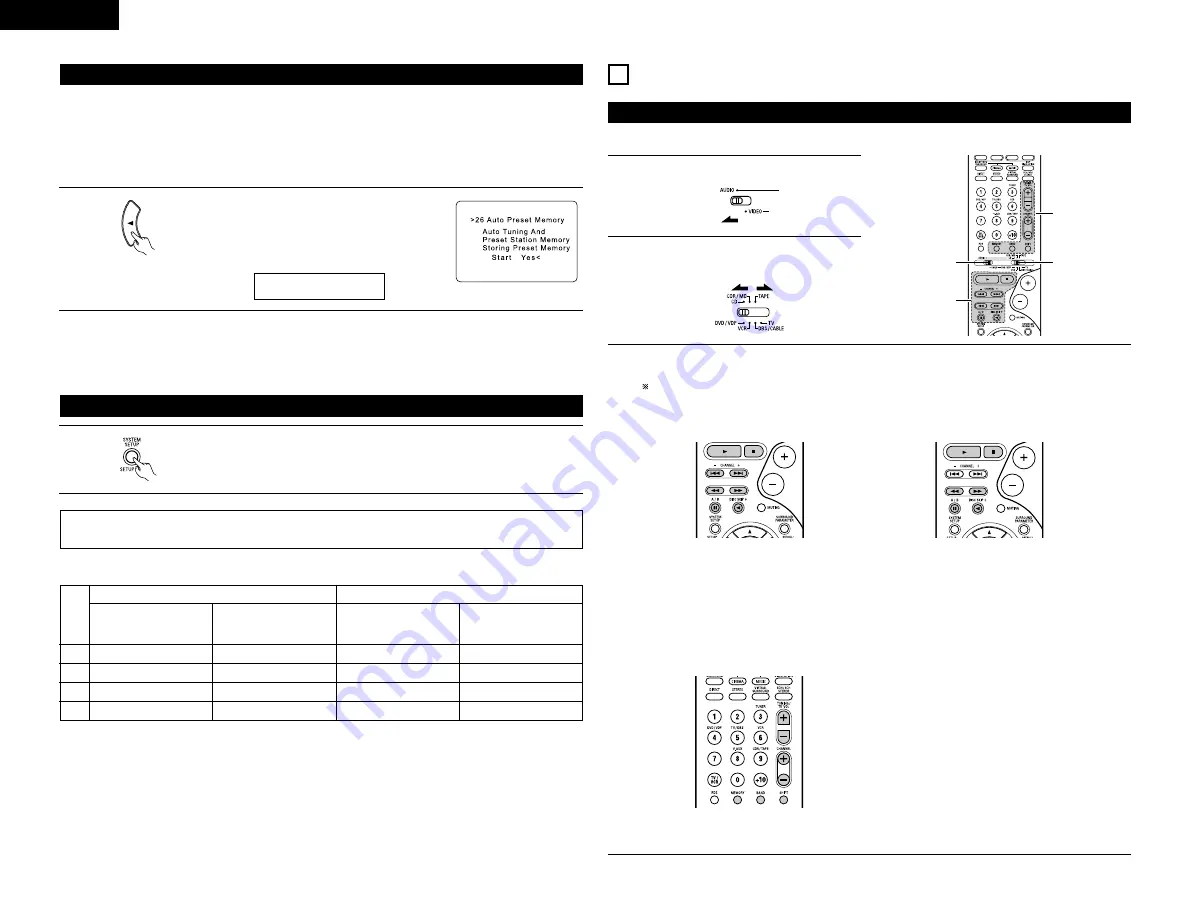
Operating DENON audio components
3
Operate the audio component.
• For details, refer to the component’s operating instructions.
While this remote control is compatible with a wide range of infrared controlled components, some
models of components may not be operated with this remote control.
1. CD player (CD) and CD recorder and MD
recorder (CDR/MD) system buttons
2. Tape deck (TAPE) system buttons
6
,
7
: Manual search
(forward and reverse)
2
: Stop
1
: Play
8
,
9
: Auto search (cue)
3
: Pause
DISC SKIP + : Switch discs
(for CD changers only)
6
: Rewind
7
: Fast-forward
2
: Stop
1
: Forward play
0
: Reverse play
A/B : Switch between decks A and B
• Turn on the power of the different components before operating them.
1
Set mode switch 1 to “AUDIO”.
2
Set mode switch 2 to the position for the
component to be operated. (CD, CDR/MD or
Tape deck)
3. Tuner system buttons
SHIFT
: Switch preset channel range
C, – : Preset channel up/down
, – : Frequency up/down
BAND
: Switch between the AM and FM
bands
MODE
: Switch between auto and mono
MEMORY
: Preset memory
NOTE:
• TUNER can be operated when the switch is at “AUDIO” position.
Auto Tuner Presets
• Use this to automatically search for FM broadcasts and store up to 40 stations at preset channels A1 to 8, B1
to 8, C1 to 8, D1 to 8 and E1 to 8.
NOTE:
• If an FM station cannot be preset automatically due to poor reception, use the “Manual tuning” operation to
tune in the station, then preset it using the manual “Preset memory” operation.
1
Use the CURSOR button to select “Yes”.
“Search” flashes on the screen and searching
begins.
“Completed” appears once searching is completed.
The display automatically switches to screen.
26 PRESET <YES
• On-screen display signals
Signals input to the AVR-770SD
VIDEO signal input jack
(yellow)
E
C
E
C
1
2
3
4
S-video signal input jack
E
E
C
C
Video signal output to
VIDEO MONITOR OUT jack
(yellow)
C
C
C
E
On-screen display signal output
(
C
: Signal
E
: No signal)
(
C
: On-screen signals output
E
: On-screen signals not output)
Video signal output to S-
Video MONITOR OUT jack
C
C
C
C
Summary of Contents for AVR-770SD
Page 286: ...286 MEMO...
Page 287: ......


