PMAC-Pack
Getting Started
21
Serial Port Connection
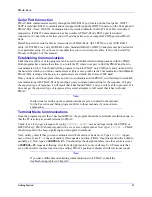
PMAC-Pack communicates serially through the DB9 RS232 port located on the front panel . If OPT-
9LPP is included, RS422 communications is supported through the DB25 Connector on the front panel of
PMAC-Pack. (Note: If RS232 Communication is provided (default), the RS422 Com Port is rendered
inoperative. If RS422 Communication has been ordered, PMAC-Pack's RS232 port is rendered
inoperative.) Connect the cable that you will be using between your computer's COM port and PMAC-
Pack.
Delta Tau provides serial cables as Accessories for PMAC-Pack. ACC3PP232 is a 3m (10ft) RS232
cable. ACC3PP422 is a 3m (10ft) RS422 cable. Standard DB9-25 or DB25-9 adapters may be needed for
your particular setup. If you choose to manufacture your own serial port cables, refer to the Serial Port
Pinouts in Chapter 6 of this manual.
Establishing Communications
Either the Executive or Setup program can be used to establish initial communications with the PMAC.
Both programs have menus that allow you to tell the PC where to expect to find the PMAC and how to
communicate with it. You should tell the program to look for PMAC on a COM port, and you must tell it
the baud rate which you wish to communicate at (this is set up with via the Communication SwitchBank).
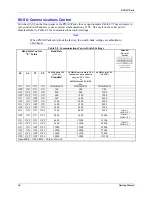
PMAC-Pack is setup at the factory to communicate at a default baud rate of 9600 baud.
Once you have told the program where and how to communicate with PMAC, it will attempt to establish
communications with PMAC-Pack by sending a query command and waiting for the response. If it gets
the expected type of response, it will report that it has found PMAC, and you will be able to proceed. If it
does not get the expected type of response after several attempts, it will report that it has not found
PMAC.
Note:
Instructions for setting up the communications are given in detail in the manuals
for the Executive and Setup programs. Refer to those manuals if you need more
explanation.
Terminal Mode Communications
Once the program reports that it has found PMAC, the program should be in terminal emulation mode, so
that the PC is acting as a dumb terminal to PMAC.
Check to see if you get a response by typing
I10<CR>
(
<CR>
means carriage return, the ENTER or
RETURN key). PMAC should respond with a six or seven digit number. Now type
III<CR>
-- PMAC
should respond with a beep, signifying an unrecognized command.
Next, satisfy yourself that you can communicate with the card at a basic level. Type a
P<CR>
(upper-
case or lower-case P -- it does not matter); this requests a position. PMAC should respond with a number,
probably a 0. Now type a
<CONTROL-F>
. You should get back eight numbers (one for each axis) since
<CONTROL-F>
requests following error from all eight motors; some or all may be 0. Please note that
even with encoder counts as read-out (no scaling) PMAC's position is displayed with fractional counts.
Note:
If you have difficulties establishing communications with PMAC, consult the
troubleshooting tables in Chapter 5.
Summary of Contents for PMAC Pack
Page 10: ...PMAC Pack Table of Contents vii ...
Page 11: ......
Page 16: ...PMAC Pack Overview 5 Figure 1 1 PMAC Pack Dimension ...
Page 27: ...PMAC Pack 16 Overview ...
Page 47: ...PMAC Pack 36 Getting Started ...
Page 51: ...PMAC Pack 40 Complying with European Community EMC Requirements ...
Page 53: ...PMAC Pack 42 PMACPack Custom Configuration Figure 4 1 PMAC Pack Disassembly ...
Page 70: ...PMAC Pack PMACPack Custom Configuration 59 Figure 4 4 PMAC Pack Assembly ...
Page 91: ...PMAC Pack 80 Circuit Diagrams Figure 7 2 Basic PMAC Pack Wiring Diagram ...
Page 92: ...PMAC Pack Circuit Diagrams Figure 7 3 PMAC Pack with Accessory 8D Option 2 Wiring Diagram ...
Page 93: ...PMAC Pack 82 Circuit Diagrams Figure 7 4 PMAC Pack with Accessory 8D Option 4A Wiring Diagram ...
Page 94: ...PMAC Pack Circuit Diagrams Figure 7 5 PMAC Pack with Option 9L Wiring Diagram ...
Page 95: ...PMAC Pack 84 Circuit Diagrams Figure 7 6 PMAC Pack with Accessory 28A Wiring Diagram ...
Page 96: ...PMAC Pack Circuit Diagrams Figure 7 7 PMAC Pack with Accessory 39 Wiring Diagram ...
Page 97: ...PMAC Pack 86 Circuit Diagrams ...
Page 98: ...PMAC Pack Circuit Diagrams 87 ...
Page 99: ...PMAC Pack 88 Circuit Diagrams ...
Page 100: ...PMAC Pack Circuit Diagrams 89 ...
Page 101: ...PMAC Pack 90 Circuit Diagrams ...
Page 103: ...92 Acc 24E Acc 24EXP Expansion XP Pack Figure 8 1 Expansion Pack Installation ...
Page 106: ...PMAC Pack Acc 24E Acc 24EXP Expansion XP Pack 95 Figure 8 3 PMAC Pack Assembly ...
Page 109: ...98 Acc 24E Acc 24EXP Expansion XP Pack ...


