


10. Settings
Operation and Installation Manual for SOLIVIA 2.0/2.5/3.0/3.3/3.6/5.0 EU G4 TR
62
10.14 Standard menu
Menu
800 Standard Menu
Description
A standard menu can be defined, which is automatically displayed
when the display buttons are not used for a certain period of time.
When the standard menu is displayed, pressing the
ESC
button dis-
plays the main menu.
The standard menu is set at the factory to
411 Current Overview
.
This menu shows the current data and current operating messages.
The number must be a valid menu number.
See
“16.2 Overview of Menu Structure”, p. 83
for an overview of
all available menu numbers.
Accessing the Menu
Main Menu > Standard Menu
➔
Production info
Diagnostic&Alarm
Inverter info
Standard menu
-------------------
SOLIVIA ##
1. In the main menu, press
the
buttons to select
Standard Menu
and then
press the button.
→ The menu number of
the current standard
menu is displayed.
➔
411 Current overview
Menu number: 411
800 Standard menu
2. Press the button.
➔
411 Current overview
Menu number: 411
800 Standard menu
800 Standard menu
800 Standard menu
800 Standard menu
800 Standard menu
800 Standard menu
800 Standard menu
800 Standard menu
800 Standard menu
800 Standard menu
800 Standard menu
800 Standard menu
800 Standard menu
800 Standard menu
800 Standard menu
800 Standard menu
800 Standard menu
800 Standard menu
➔
Menu number: 411
Menu number: 411
Menu number: 411
Menu number: 411
Menu number: 411
Menu number: 411
Menu number: 411
Menu number: 411
Menu number: 411
Menu number: 411
Menu number: 411
Menu number: 411
Menu number: 411
Menu number: 411
Menu number: 411
Menu number: 411
Menu number: 411
→ The first number and
the menu name flash.
➔
110 Date and time
Menu number: 110
800 Standard menu
800 Standard menu
800 Standard menu
800 Standard menu
800 Standard menu
800 Standard menu
800 Standard menu
800 Standard menu
800 Standard menu
800 Standard menu
800 Standard menu
800 Standard menu
800 Standard menu
800 Standard menu
800 Standard menu
800 Standard menu
800 Standard menu
800 Standard menu
➔
Menu number: 110
Menu number: 110
Menu number: 110
Menu number: 110
Menu number: 110
Menu number: 110
Menu number: 110
Menu number: 110
Menu number: 110
Menu number: 110
Menu number: 110
Menu number: 110
Menu number: 110
Menu number: 110
Menu number: 110
Menu number: 110
Menu number: 110
3. Press the
buttons
to set the first digit of the
menu number.
→ The menu name is
automatically changed
to match the current
selection.
➔
130 Grid selection
Menu number: 130
800 Standard menu
800 Standard menu
800 Standard menu
800 Standard menu
800 Standard menu
800 Standard menu
800 Standard menu
800 Standard menu
800 Standard menu
800 Standard menu
800 Standard menu
800 Standard menu
800 Standard menu
800 Standard menu
800 Standard menu
800 Standard menu
800 Standard menu
800 Standard menu
➔
Menu number: 130
Menu number: 130
Menu number: 130
Menu number: 130
Menu number: 130
Menu number: 130
Menu number: 130
Menu number: 130
Menu number: 130
Menu number: 130
Menu number: 130
Menu number: 130
Menu number: 130
Menu number: 130
Menu number: 130
Menu number: 130
Menu number: 130
4. Press the button and
then set the second digit of
the menu number with the
buttons.
➔
131 View grid setup
Menu number: 131
800 Standard menu
800 Standard menu
800 Standard menu
800 Standard menu
800 Standard menu
800 Standard menu
800 Standard menu
800 Standard menu
800 Standard menu
800 Standard menu
800 Standard menu
800 Standard menu
800 Standard menu
800 Standard menu
800 Standard menu
800 Standard menu
800 Standard menu
800 Standard menu
➔
Menu number: 131
Menu number: 131
Menu number: 131
Menu number: 131
Menu number: 131
Menu number: 131
Menu number: 131
Menu number: 131
Menu number: 131
Menu number: 131
Menu number: 131
Menu number: 131
Menu number: 131
Menu number: 131
Menu number: 131
Menu number: 131
Menu number: 131
5. Press the button and
then set the third digit of
the menu number with the
buttons.
To
6. Press the button to
finish.
Configurable Parameters
Display Text
Designation
Description
Menu number
Menu number
Any valid menu number.
10.15 Changing Grid
ATTEnTIOn
If the selected grid is changed, a completely new
commissioning process is started, see
“8 Com-
missioning”, p. 34.
► Always contact the Delta Support Team
before
changing the selected grid. You can
find contact information on the back of this
manual.
After completion of initial commissioning, the configured grid can be
changed using a PIN. Each time you wish to select a new grid or
change the protected settings for the current grid, you will need a
new PIN. You can obtain this PIN from Delta Support.
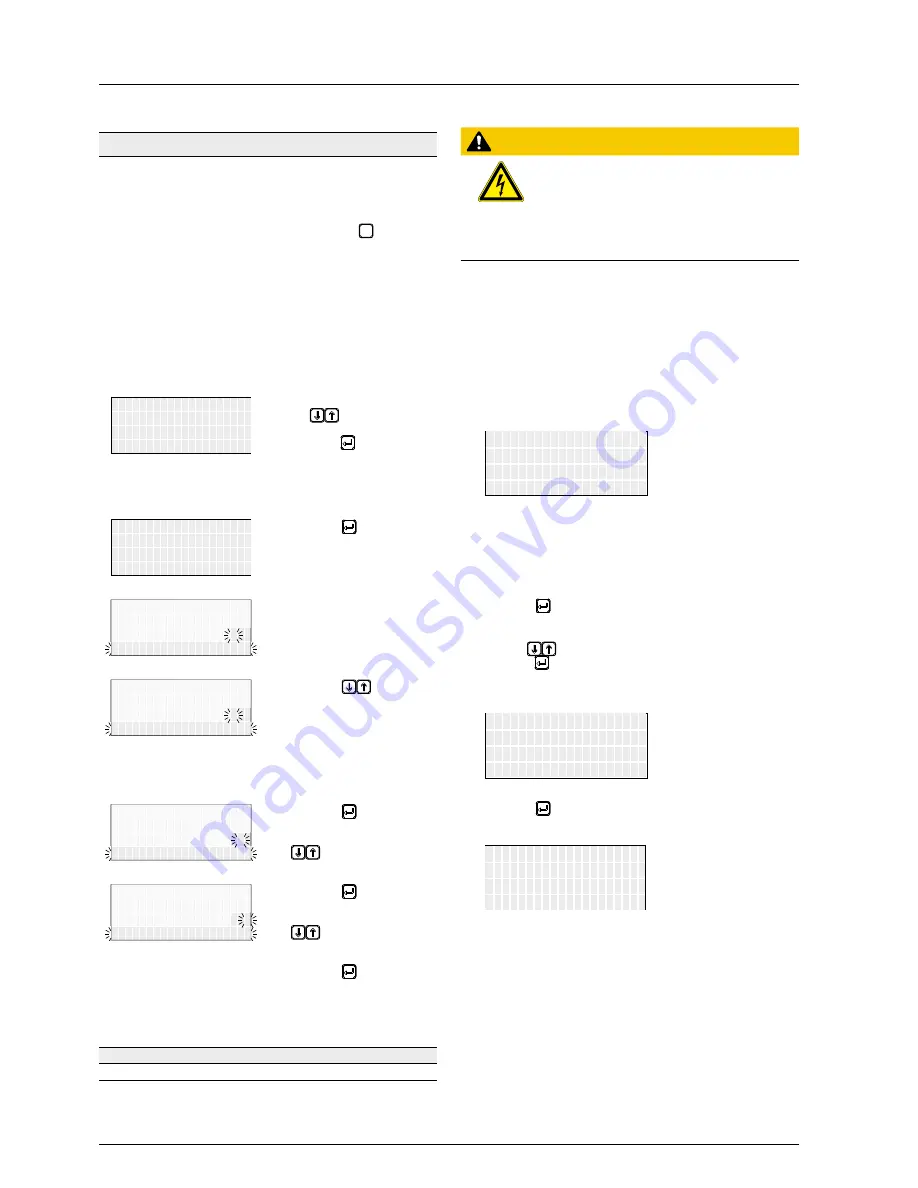
Requesting PIn from Delta Support
You must provide a key in order to receive a PIN. You will find the
key in the
132 Grid Change
menu.
1. To display the key, navigate to
Main Menu > Install Settings
> Grid Selection> Grid Change
.
03
1 3 2 G r i d C h a n g e
K e y :
P I N : _ _ _ _
G r i d :
D E L V D
# # # # # # # # # # #
2. Contact the Delta Support Team with the key to receive the
four-digit PIN.
Entering PIn
1. After receiving the PIN, go back to the
132 Grid Change
menu.
2. Press the button to enter the PIN.
→ The first digit of the PIN will begin flashing.
3. Use the
buttons to set the first digit of the PIN. Next,
press the button to move to the next digit.
→ After entering the full PIN, the word
Confirm will start
flashing.
03
1 3 2 G r i d C h a n g e
G r i d :
K e y :
P I N : 1 2 3 4
# # # # # # # # # #
C o n f i r m
D E L V D
4. Press the button to confirm.
→ The
Installation
menu is displayed.
I n s t a l l a t i o n
- - - - - - - - - - -
L a n g u a g e :
c o n t i n u e
G e r m a n
- - - - - - - -
5. Start commissioning the solar inverter, see
“8 Commissioning”,
p. 34.


