Operation and Installation Manual for
SOLIVIA 2.0 EU G4 TRSOLIVIA 2.5 EU G4 TRSOLIVIA 3.0 EU G4 TRSOLIVIA 3.3 EU G4 TRSOLIVIA 3.6 EU G4 TRSOLIVIA 5.0 EU G4 TR
Page 1: ...Operation and Installation Manual for SOLIVIA 2 0 EU G4 TR SOLIVIA 2 5 EU G4 TR SOLIVIA 3 0 EU G4 TR SOLIVIA 3 3 EU G4 TR SOLIVIA 3 6 EU G4 TR SOLIVIA 5 0 EU G4 TR...
Page 2: ...en Germany Copyright Delta Energy Systems Germany GmbH All rights reserved This manual is included with our solar inverter and is intended for use by the installer and end user The technical instructi...
Page 3: ...nations 15 5 4 7 Navigating the Menu 15 5 4 8 Selecting a Submenu 15 5 4 9 Exiting a Menu 15 5 4 10 Setting Values 16 5 5 Electrical Connections 18 5 5 1 Overview 18 5 5 2 DC connections and DC isolat...
Page 4: ...VDE AR N 4105 Grids 38 8 5 Commissioning in Italy for PV Systems Below 6 kW 41 8 6 Commissioning by Loading Settings from Other Solar Inverter 44 8 7 Commissioning After Replacing Solar Inverter 47 9...
Page 5: ...yzing Failures 71 12 2 1 Procedure for External Events 71 12 2 2 Procedure for Internal Events 72 12 3 Overview of Failure Messages Troubleshooting 73 12 4 Message Logs 75 12 4 1 External events log 7...
Page 6: ...ivities may only be performed by qualified electricians 1 3 Warnings and Symbols The following section explains the warnings and symbols used in this manual DAnGER Indicates an extremely hazardous sit...
Page 7: ...21 2012 06 for PV systems 6 kW x x x x x CEI 0 21 2012 06 for PV systems 6 kW x x x x x Netherlands VDE 0126 EN 50438 x x x x x x Poland EN 50438 Portugal EN 50438 x x x x x Romania VDE 0126 x x x x S...
Page 8: ...2 Intended purpose Operation and Installation Manual for SOLIVIA 2 0 2 5 3 0 3 3 3 6 5 0 EU G4 TR 8...
Page 9: ...ll instructions Installation and commissioning may only be performed by qualified electricians using the installation and commissioning instructions found in this manual The solar inverter must be dis...
Page 10: ...fications p 80 can cause injury if not handled properly The solar inverter must be lifted and carried by at least two people b e c d f Check the scope of delivery for completeness Mounting plate a Ope...
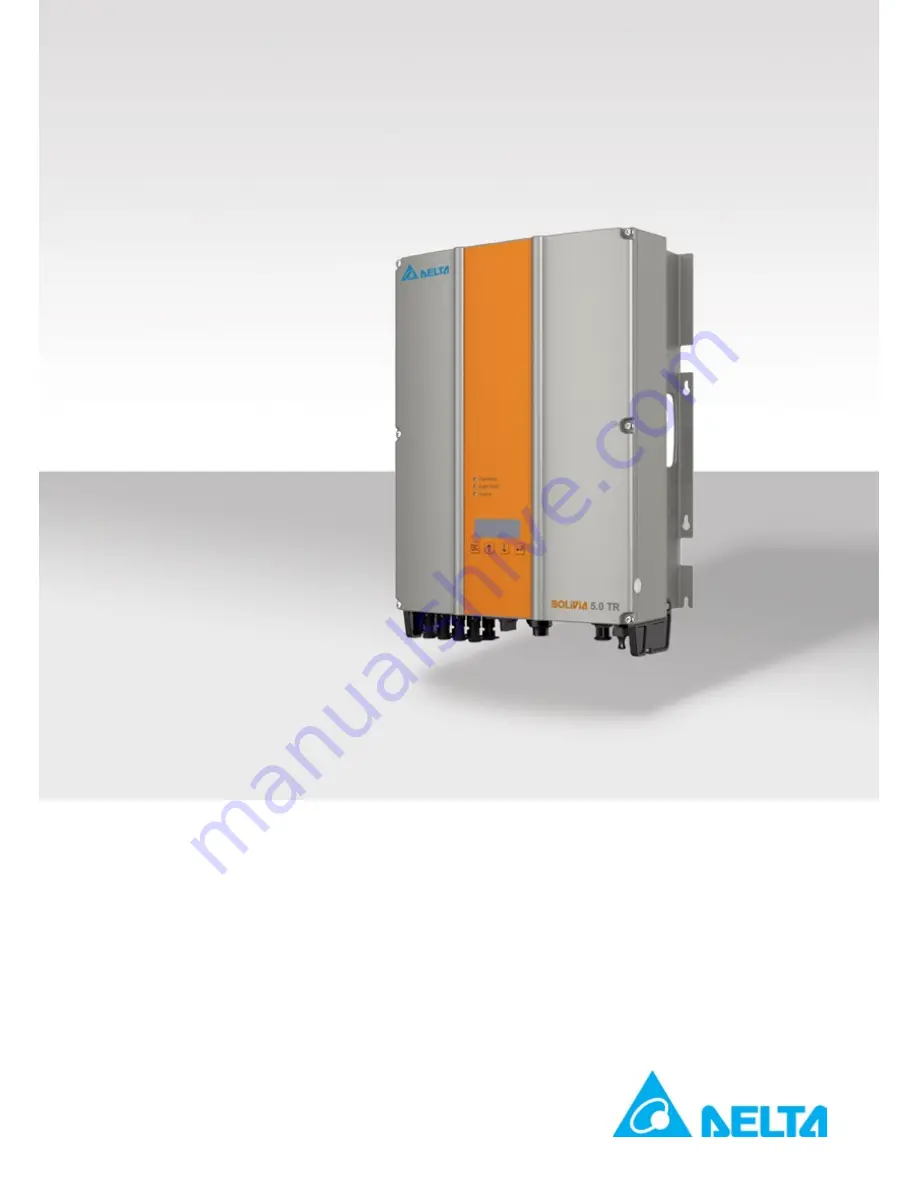
Page 11: ...view of Components and Connections Fig 5 1 Solar Inverter Components and Connections no Component Connection Description Status LEDs See Chapter 5 3 Status LEDs p 14 Display and Buttons See Chapter 5...
Page 12: ...ntry specific standards and settings see manual IP class IP65 Safety class 1 Ambient temp 25 C 70 C derating 55 C 5min Fig 5 3 SOLIVIA 2 5 EU G4 TR type plate AC nom output voltage AC nom output frequ...
Page 13: ...Ambient temp 20 C 70 C derating 55 C 5min Fig 5 7 SOLIVIA 5 0 EU G4 TR type plate Meaning of Information on Type Plate Warning Symbols on Type Plate Meaning of Warning Symbols 5 min Risk of death by...
Page 14: ...s each The first row contains the name and number of the currently dis played menu The second to fourth rows show the menu elements A small arrow in the third row shows the currently selected menu ite...
Page 15: ...is displayed 5 4 6 Button combinations The table lists special button combinations for the display buttons Buttons Action ESC Pressing the ESC and buttons at the same time displays the 100 Install Se...
Page 16: ...e 14 26 51 Time 14 26 51 Time 14 26 51 Time 14 26 51 Time 14 26 51 Time 14 26 51 Time 14 26 51 Time 14 26 51 Time 14 26 51 Time 14 26 51 Time 14 26 51 Time 14 26 51 Time 14 26 51 9 Press the button to...
Page 17: ...and time 110 Date and time Time 14 26 51 Time 14 26 51 Time 14 26 51 Time 14 26 51 Time 14 26 51 Date 12 01 2013 Date 12 01 2013 Date 12 01 2013 Date 12 01 2013 Date 12 01 2013 Date 12 01 2013 Date 1...
Page 18: ...allation Manual for SOLIVIA 2 0 2 5 3 0 3 3 3 6 5 0 EU G4 TR 18 5 5 Electrical Connections 5 5 1 Overview Fig 5 11 Electrical Connections for SOLIVIA 2 0 2 5 EU G4 TR Fig 5 12 Electrical Connections f...
Page 19: ...G4 TR no Designation Description DC connections See Chapter 5 5 2 DC connections and DC isolating switch p 20 DC isolating switch See Chapter 5 5 2 DC connections and DC isolating switch p 20 USB int...
Page 20: ...ore cable L N PE Connection type Wieland RST25i3s plug supplied in the scope of delivery 5 5 4 RS485 interface EIA485 The solar inverter has two RS485 interfaces to which a PC or a monitoring system c...
Page 21: ...of input voltages over which the MPP tracker is activated 6 3 Configuring Permanent Active and Reac tive Power Reduction The settings for reduction of active power and or reactive power can be config...
Page 22: ...ent log or in the internal log depending on the cause of the error The event log is primarily intended for the installer and should make analyzing and resolving problems easier The internal log helps...
Page 23: ...3 0 EU G4 TR SOLIVIA 3 3 EU G4 TR 0 500 1000 2000 1500 2500 3000 150 V 360 V 480 V 96 98 88 90 92 94 86 84 82 80 Efficiency Power W 0 500 1000 3300 2000 1500 2500 3000 150 V 360 V 480 V 98 90 92 94 9...
Page 24: ...eneral Instructions Possible noise emissions can be disruptive when the device is used in living areas Avoid installing the device in living areas Always use the mounting plate supplied with the solar...
Page 25: ...n of Asymmetrical Grid Load The use of a SOLIVIA Gateway M1 G2 is mandatory for some installation types This applies for example to installations where several single phase solar inverters feed into t...
Page 26: ...2 0 2 5 3 0 3 3 3 6 5 0 EU G4 TR 26 SOLIVIA 5 0 TR SOLIVIA 3 6 TR SOLIVIA 3 6 TR SOLIVIA 11 TR L N PE L N PE L N PE L1 L2 L3 N PE kWh kWh kWh L1 L2 L3 N PE SOLIVIA Gateway M1 G2 Termination resistor...
Page 27: ...7 2 Screw the screws tightly into the wall 7 2 Mounting Solar Inverter WARnInG Risk of injury due to weight The solar inverter is very heavy see 15 Techni cal Specifications p 80 Incorrect handling ca...
Page 28: ...E with a conductor cross section from 2 5 to 4 0 mm coefficient k 1 Observe the required grid impedance at the grid connection point cable length conductor cross section Select the cable length and co...
Page 29: ...ied in UTE C15 712 1 16 1 Order numbers p 82 7 3 2 Required Tools and Accessories Included in delivery Round AC plug Wieland RST25i3S Not included in delivery Flexible triple core cable L N PE with a...
Page 30: ...plied to the DC connections of the solar inverter Never disconnect the PV modules when the solar inverter is powered First switch off the grid connection so the solar inverter cannot feed energy into...
Page 31: ...e cross section and thickness of the cable used You can also download the manual from the Multi Contact website This manual will also tell you which tools are required DC Connection of Power Inverter...
Page 32: ...e closed using the covers on the solar inverter Only the cables described below may be used Standard cables are not permitted 7 5 1 General Instructions One or more solar inverters can be connected to...
Page 33: ...IP65 with Harting RJ45 PushPull and RJ12 plugs 3081129500 Termination resistor for RS485 3072438891 If you wish to make the cables yourself then you must use cable managers from Harting IP67 Push Pull...
Page 34: ...oning for EN 50438 and VDE 0126 Grids p 35 FR ISL 60 Hz French islands 60 Hz Greece GR CONTINENT Greece continent 49 5 50 5 Hz GR ISLAND Greece islands 47 5 51 Hz Italy IT BT 21 Italy as per CEI 0 21...
Page 35: ...ill begin After the startup process and the automatic self test the commissioning procedure of the inverter starts and the Installation menu is displayed continue Language English Installation 3 To ch...
Page 36: ...The grid load can only be balanced with a SOLIVIA Gateway M1 G2 If no gateway is connected the Balance option will always be set to Off Otherwise the solar inverter will not feed into the grid continu...
Page 37: ...ter Available IDs 1 254 Available baudrates 2400 4800 9600 19200 38400 continue Baudrate 19200 ID 1 RS485 17 Press the buttons to select continue and then press the button The completion screen will b...
Page 38: ...nian Slovak Slovenian Spanish continue Language English Installation 4 Press the buttons to select continue and then press the button This displays the Load USB Data menu No Yes Load USB data 5 Press...
Page 39: ...and place it next to the type plate nOTE The configured values can only be changed with a PIN after com missioning nOTE The configured values are displayed after commissioning in the 131 View Grid Se...
Page 40: ...ed when saving and loading settings in order to identify the solar inverter Available IDs 1 254 Available baudrates 2400 4800 9600 19200 38400 continue Baudrate 19200 ID 1 RS485 21 Press the buttons t...
Page 41: ...vailable languages Czech Danish Dutch English French German Italian Polish Portuguese Romanian Slovak Slovenian Spanish continue Language English Installation 4 Press the buttons to select continue an...
Page 42: ...The grid load can only be balanced with a SOLIVIA Gateway M1 G2 If no gateway is connected the Balance option will always be set to Off Otherwise the solar inverter will not feed into the grid contin...
Page 43: ...he button to perform the autotest The autotest starts nOTE For PV systems greater than 6 kW an autotest is not required by CEI 0 21 2012 06 For this rea son the menu will not be displayed when the IT...
Page 44: ...r the startup process and the automatic self test the commissioning procedure of the inverter starts and the Installation menu is displayed continue Language English Installation 4 To change the langu...
Page 45: ...ge loaded values 12 Press the buttons to select No and then press the button The Date and Time menu is displayed nOTE If you wish to change the loaded values select Yes Commis sioning then continues w...
Page 46: ...shed nOTE If the solar inverter is configured to the DE LVD oder DK LVD grids you can also con figure active and reactive power control see 10 9 Active Power Control p 56 The solar inverter offers som...
Page 47: ...485 ID of the solar inverter from which the data is to be loaded for example 001 2 Check all connections and cables for damage and correct seating Correct the installation if necessary DC DISCONNECT O...
Page 48: ...the solar inverter from which the data was loaded the following message appears W kVA been limited to of that inverter has The maximum power 11 If the above mentioned messages appear press the button...
Page 49: ...sioning or Press the button to change settings Commissioning is now finished nOTE If the solar inverter is configured to the DE LVD oder DK LVD grids you can also con figure active and reactive power...
Page 50: ...on data is provided in 410 Current Data Access You access the menu by navigating to Main Menu Produc tion Info Current Data This displays the 410 Current Data menu 410 Current Data Current Overview Cu...
Page 51: ...aximum voltage 422 Day Stats DC PV1 Pmax PV1 Imax PV1 Umax _ _A _V _W 423 Day Stats ISO Statistics for maximum minimum insulation resistance 433 Week Stats ISO 443 Month Stats ISO 453 Year Stats ISO 4...
Page 52: ...ge 61 Standard menu Page 62 10 2 Display language Menu 100 Install Settings Description Allows the display language to be configured Accessing the Menu Main Menu Install Settings Options Install setti...
Page 53: ...the value Configurable Parameters Display Text Designation Description Date Date format DD MM YYYY DD MM YYYY DD MM YYYY MM DD YYYY MM DD YYYY MM DD YYYY YYYY MM DD YYYY MM DD YYYY MM DD Time Time for...
Page 54: ...witched on Contrast Display contrast 1 10 10 6 RS485 EIA485 Settings Menu 140 RS485 Description Allows the ID and baudrate of the RS485 interface to be configured Accessing the Menu Main Menu Install...
Page 55: ...Day stats Day statistics Week stats Week statistics Month stats Month statistics Year stats Year statistics Total stats Total statistics History History Statistics for the last seven days the solar in...
Page 56: ...f a power limit was set during commissioning the percent value relates to the maximum active power that was set Example You have a SOLIVIA 5 0 EU G4 TR and the maximum active power Pmax at commissioni...
Page 57: ...top the solar inverter behaves as described in variant 1 However as soon as the grid frequency exceeds fStop the active power feed is stopped Active power feed will resume once the grid frequency fall...
Page 58: ...Setting Ranges for cos P Function p 58 P Pn is the ratio between the current active power and the rated power of the solar inverter Power ratio and cos are assigned to points in pairs The power ratio...
Page 59: ...Point A Point B Point C Point D cos inductive capacitive 5 kW 4 kW 2 5 kW Example SOLIVIA 5 0 EU G4 TR limited to 4 kW Fig 10 5 Effect of active power limitation on the cos P function This active pow...
Page 60: ...Fix cosPhi 520 Reactive PwCtrl 6 Press the buttons to select the parameter Cos Phi Press the button to change the value Configurable Parameters Display Text Designation Description Cos Phi cos Defines...
Page 61: ...ing time cycle 2 hours low Low shadowing time cycle 4 5 hours 10 13 Insulation and grounding monitoring Menu 220 Grounding Description The DC side of the solar inverter has an insulation and grounding...
Page 62: ...u 800 Standard menu 800 Standard menu 800 Standard menu 800 Standard menu 800 Standard menu 800 Standard menu 800 Standard menu 800 Standard menu 800 Standard menu Menu number 130 Menu number 130 Menu...
Page 63: ...tings are saved in a file under STUP_ TXT The stands for the RS485 ID of the solar inverter e g 001 The RS485 ID is a number for identifying the solar inverter The RS485 ID for all solar inverters is...
Page 64: ...s then auto matic nOTE The file containing the firmware data must have the name Image hex and must be located in the main directory of the USB stick Rename the file correctly if necessary You will nee...
Page 65: ...B features and then press the button A note on IP65 protection is then displayed protection will lose the IP65 Without cover you 2 Press the button to confirm The 300 USB features menu is then display...
Page 66: ...yed Save settings Save swap data Create reports Load settings Service 300 USB features 3 Press the buttons to select Load Settings and then press the button The solar inverter searches for available f...
Page 67: ...of first installation USB features Options Install settings Production info SOLIVIA 1 In the main menu press the buttons to select USB features and then press the button A note on IP65 protection is...
Page 68: ...yed protection will lose the IP65 Without cover you 2 Press the button to confirm The 300 USB features menu is then displayed Save settings Save swap data Firmware update Create reports Load settings...
Page 69: ...Failure No Insulation and grounding failure There is one or more problems with the insu lation or grounding Insulation and grounding problems are con sidered external events However these mes sages ar...
Page 70: ...re Normal operation When the green OperatiOn LED is solid the solar inverter is feeding power into the grid Limited operation Operation Earth Fault Failure e g self test synchronization When the green...
Page 71: ...r Support first before attempting to resolve the failure If events from both categories occur simultaneously those in the internal events category take priority In this instance therefore Delta Solar...
Page 72: ...u This displays the 620 Internal Log menu The message is displayed in the 411 Current Overview menu as Warning or Failure 202 222 16 04 2012 17 25 36 620 Internal log 2 You can view the whole list by...
Page 73: ...ntenance technician if the failure persists L1 Islanding Frequency shift failure on phase L Ask your electricity supply company about the actual state of the grid Check the installation Restart the so...
Page 74: ...DC DC not correctly grounded Check the GND connection PV1 Voltage too low The DC voltage is too low Check the PV cell voltage shown on the display 416 Current Data PV menu L1 power reduction Power red...
Page 75: ...view the whole list by pressing the buttons Message Structure Each message consists of three lines defined as follows Begin 1014V Voltage too high 16 04 2012 17 25 36 481 External events 1st Line Date...
Page 76: ...ows Max power 90 Max power 100 16 04 12 17 25 36 S 482 Change events 1st Line Date and time when the external event occurred Source of the change D Display E External RS485 U USB interface S System 3r...
Page 77: ...s been set to IT BT 21 6 kW In accordance with the CEI 0 21 2012 06 standard an autotest is required for PV systems equal to or less than 6 kW The autotest is performed during commissioning when the g...
Page 78: ...g the buttons IT Grid 00 01 00 12 08 2012 09 23 35 Result Pass 612 AT Report 1 Overvoltage Massima tensione 59 S1 Test 229V 3 000s Set 264V 3 000s L1 OVT Pass 612 AT Report 1 Overvoltage Massima tensi...
Page 79: ...rst disconnect the solar inverter from power so it can no lon ger feed energy Then open the DC switch Make sure the DC connections cannot be accidentally touched WARnInG Risk of injury due to weight T...
Page 80: ...e current 3 5 mA 3 5 mA Overvoltage category III 1 When cos 1 VA W 2 Rated voltage range and frequency range are set according to the particular country requirements 3 Cos 0 8 capacitive 0 8 inductive...
Page 81: ...Operating temperature at full power without throttling 25 55 C Storage temperature range 25 80 C Humidity 0 95 Max operating height 2 000 m above sea level General Specifications SOLIVIA 3 3 SOLIVIA...
Page 82: ...naling sticker The UTE kit allows you to conform to the DC protection and signal requirements specified in UTE C 15 712 1 Multi contact UTE kit Delta part number Multi contact UTE kit for SOLIVIA EU S...
Page 83: ...ion press the ESC button for at least three seconds Go to Menu opens 411 Current data Menu 411 Go to menu 2 Press the button to enter the menu number The first digit flashes 3 Use the buttons to enter...
Page 84: ...features Updating firmware Save swap data Save settings Creating reports Load settings Service 310 Service Status Monitoring 511 Power Reduction Max P 510 Active PwCtrl Power reduction Power vs freq...
Page 85: ...Stats AC 441 Month Stats AC 451 Year Stats AC 461 Total Stats AC 420 Day Statistics Day Stats AC Day Stats PV Day Stats ISO 430 Week Statistics 440 Month Statistics 450 Year Statistics 460 Total Stati...
Page 86: ......
Page 87: ......
Page 88: ...r com 0800 800 9323 Free Call Greece support greece solar inverter com 49 7641 455 549 Israel support israel solar inverter com 49 7641 455 549 Italy supporto italia solar inverter com 800 787 920 Fre...