


120
Installing System Components
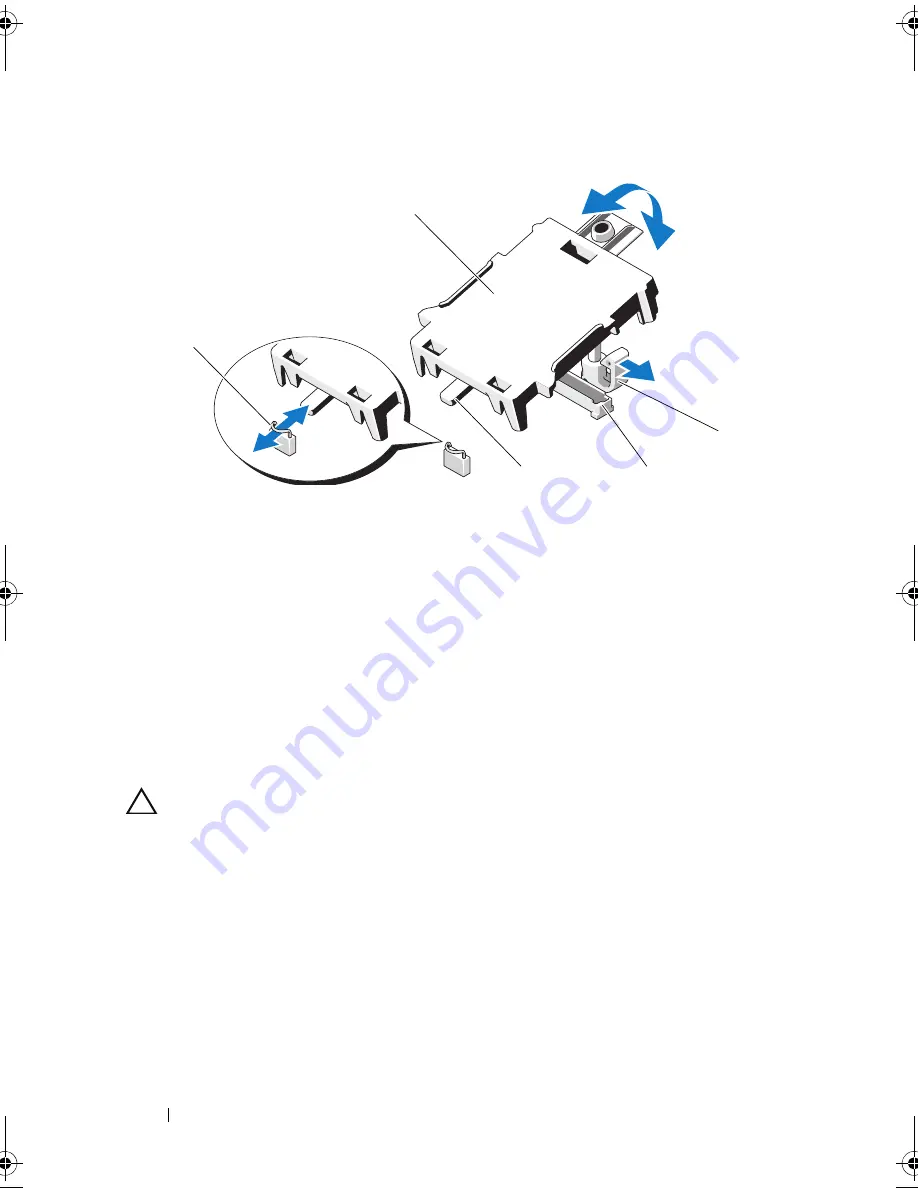
Figure 3-19.
Installing or Removing an iDRAC6 Express Card (Optional)
6
Close the system. See "Closing the System" on page 86.
7
Place the system upright on a flat, stable surface.
8
Reattach any peripherals and connect the system to an electrical outlet.
9
Turn on the system and attached peripherals.
Removing an iDRAC6 Express Card (Optional)
CAUTION:
Many repairs may only be done by a certified service technician.
You should only perform troubleshooting and simple repairs as authorized in
your product documentation, or as directed by the online or telephone service
and support team. Damage due to servicing that is not authorized by Dell is not
covered by your warranty. Read and follow the safety instructions that came
with the product.
1
Turn off the system, including any attached peripherals, and disconnect
the system from the electrical outlet.
2
Open the system. See "Opening the System" on page 85.
1
clip
2
iDRAC6 Express card
3
retention standoff tab clip
4
iDRAC6 Express card connector
5
notch
2
3
4
5
1
book.book Page 120 Wednesday, August 19, 2009 4:40 PM
Summary of Contents for PowerEdge T310
Page 1: ...Dell PowerEdge T310 Systems Hardware Owners Manual ...
Page 56: ...56 About Your System ...
Page 78: ...78 Using the System Setup Program and UEFI Boot Manager ...
Page 146: ...146 Installing System Components ...
Page 176: ...176 Jumpers and Connectors ...
Page 178: ...178 Getting Help ...
Page 188: ...188 Glossary ...
Page 194: ...194 Index ...


