background image

Troubleshooting

99

S

EEK


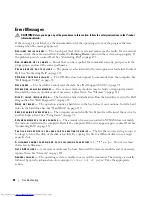
ERROR

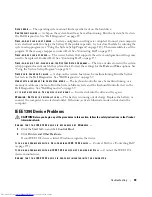
The operating system cannot find a specific track on the hard drive. 

S

HUTDOWN


FAILURE

A chip on the system board may be malfunctioning. Run the System Set tests in 

the Dell Diagnostics. See "Dell Diagnostics" on page 89.

T

IME

-

OF

-

DAY


CLOCK


LOST


POWER

System configuration settings are corrupted. Connect your computer 

to an electrical outlet to charge the battery. If the problem persists, try to restore the data by entering the 
system setup program (see "Using the System Setup Program" on page 149). Then immediately exit the 
program. If the message reappears, contact Dell. See "Contacting Dell" on page 155.

T

IME

-

OF

-

DAY


CLOCK


STOPPED

The reserve battery that supports the system configuration settings may 

need to be replaced. Contact Dell. See "Contacting Dell" on page 155.

T

IME

-

OF

-

DAY


NOT


SET

-

PLEASE


RUN


THE

  S

YSTEM

  S

ETUP


PROGRAM

The time or date stored in the system 

setup program does not match the system clock. Correct the settings for the 

Date

 and 

Time

 options. See 

"Using the System Setup Program" on page 149.

T

IMER


CHIP


COUNTER

  2  

FAILED

A chip on the system board may be malfunctioning. Run the System 

Set tests in the Dell Diagnostics. See "Dell Diagnostics" on page 89.

U

NEXPECTED


INTERRUPT


IN


PROTECTED


MODE

The keyboard controller may be malfunctioning, or a 

memory module may be loose. Run the System Memory tests and the Keyboard Controller test in the 
Dell Diagnostics. See "Dell Diagnostics" on page 89.

X

: \  

IS


NOT


ACCESSIBLE

.   T

HE


DEVICE


IS


NOT


READY

Insert a disk into the drive and try again.

W

ARNING

:   B

ATTERY


IS


CRITICALLY


LOW

The battery is running out of charge. Replace the battery, or 

connect the computer to an electrical outlet. Otherwise, activate hibernate mode or shut down the 
computer.

IEEE 1394 Device Problems


CAUTION: 

Before you begin any of the procedures in this section, follow the safety instructions in the 

Product 

Information Guide

.

E

NSURE


THAT


THE

  I E E E   1 3 9 4  

DEVICE


IS


RECOGNIZED


BY

  W

INDOWS

1

Click the 

Start

 button and click 

Control Panel

.

2

Click 

Printers and Other Hardware

.

If your IEEE 1394 device is listed, Windows recognizes the device.

I

F


YOU


HAVE


PROBLEMS


WITH


A

  D

ELL

-

PROVIDED

  I E E E   1 3 9 4  

DEVICE

Contact Dell (

see "Contacting Dell" 

on page 155)

.

I

F


YOU


HAVE


PROBLEMS


WITH


AN

  I E E E   1 3 9 4  

DEVICE


NOT


PROVIDED


BY

  D

ELL

Contact the IEEE 1394 

device manufacturer.

E

NSURE


THAT


THE

  I E E E   1 3 9 4  

DEVICE


IS


PROPERLY


INSERTED


INTO


THE


CONNECTOR

Summary of Contents for INSPIRON PP05XB

Page 1: ...w w w d e l l c o m s u p p o r t d e l l c o m Dell XPS M1710 Owner s Manual Model PP05XB ...

Page 2: ...arks used in this text Dell the DELL logo Inspiron Dell Precision Dimension OptiPlex Latitude PowerEdge PowerConnect PowerVault PowerApp Dell TravelLite ExpressCharge Dell MediaDirect Strike Zone Wi Fi Catcher and XPS are trademarks of Dell Inc Intel is a registered trademarks and Core is a trademark of Intel Corporation Microsoft Outlook and Windows are registered trademarks of Microsoft Corporat...

Page 3: ... to the Internet 29 Setting Up Your Internet Connection 29 Transferring Information to a New Computer 30 Running the Files and Settings Transfer Wizard With the Operating System CD 30 Running the Files and Settings Transfer Wizard Without the Operating System CD 31 Setting Up a Printer 33 Printer Cable 33 Connecting a USB Printer 33 Power Protection Devices 34 Surge Protectors 34 Line Conditioners...

Page 4: ...g and Bluetooth Wireless Technology Function 40 Power Management 41 Speaker Functions 41 Microsoft Windows Logo Key Functions 41 Touch Pad 42 Customizing the Touch Pad 42 5 Using a Battery 43 Battery Performance 43 Checking the Battery Charge 44 Dell QuickSet Battery Meter 44 Microsoft Windows Power Meter 44 Charge Gauge 44 Low Battery Warning 45 Conserving Battery Power 45 Power Management Modes ...

Page 5: ...omputer Is Off or in Hibernate Mode 56 Dell MediaDirect and Dell Media Experience Help 57 Connecting Your Computer to a TV or Audio Device 57 S Video and Standard Audio 59 S Video and S PDIF Digital Audio 60 Composite Video and Standard Audio 62 Composite Video and S PDIF Digital Audio 63 Component Video and Standard Audio 65 Component Video and S PDIF Digital Audio 67 Setting Up the Cyberlink CL ...

Page 6: ... to a Wireless Local Area Network 82 Determining the Wireless Network Device Manager 83 Completing the Connection to the WLAN 83 Enabling Disabling the Wireless Network Card 84 Monitoring the Status of the Wireless Network Card Through Dell QuickSet 84 Mobile Broadband or Wireless Wide Area Network 84 What You Need to Establish a Mobile Broadband Network Connection 84 Checking Your Dell Mobile Bro...

Page 7: ...ems 93 If You Cannot Eject the CD CD RW DVD or DVD RW Drive Tray 94 If You Hear an Unfamiliar Scraping or Grinding Sound 94 Hard Drive Problems 94 E Mail Modem and Internet Problems 94 Error Messages 96 IEEE 1394 Device Problems 99 Keyboard Problems 100 External Keyboard Problems 100 Unexpected Characters 100 Lockups and Software Problems 101 The Computer Does Not Start Up 101 The Computer Stops R...

Page 8: ...Pad or Mouse Problems 108 Video and Display Problems 109 If the Display Is Blank 109 If the Display Is Difficult to Read 109 If Only Part of the Display is Readable 110 Drivers 110 What Is a Driver 110 Identifying Drivers 110 Reinstalling Drivers and Utilities 111 Resolving Software and Hardware Incompatibilities 112 Restoring Your Operating System 113 Using Microsoft Windows XP System Restore 113...

Page 9: ...33 13 Traveling With Your Computer 135 Identifying Your Computer 135 Packing the Computer 135 Travel Tips 136 Traveling by Air 136 14 Specifications 137 15 Getting Help 145 Obtaining Assistance 145 Online Services 145 AutoTech Service 146 Automated Order Status Service 146 Support Service 146 Problems With Your Order 147 Product Information 147 Returning Items for Warranty Repair or Credit 147 Bef...

Page 10: ...g Your Computer 151 Computer Keyboard and Display 151 Touch Pad 151 CDs and DVDs 151 FCC Notices U S Only 152 FCC Class B 152 Macrovision Product Notice 153 Dell Technical Support Policy U S Only 153 Definition of Dell Installed Software and Peripherals 153 Definition of Third Party Software and Peripherals 154 17 Contacting Dell 155 Glossary 173 Index 185 ...

Page 11: ...Documentation and drivers are already installed on your computer You can use the CD to install drivers see Manually Reinstalling Drivers on page 112 or to run the Dell Diagnostics see Dell Diagnostics on page 89 Readme files may be included on your CD to provide last minute updates about technical changes to your computer or advanced technical reference material for technicians or experienced user...

Page 12: ...bel Service Tag and Microsoft Windows License These labels are located on the bottom of your computer Use the Service Tag to identify your computer when you use support dell com or contact technical support Enter the Express Service Code to direct your call when contacting technical support What Are You Looking For Find It Here ...

Page 13: ...ts your computer and operating system and installs the updates appropriate for your configuration To download Notebook System Software 1 Go to support dell com and click Downloads 2 Enter your Service Tag or product model 3 In the Download Category drop down menu click All 4 Select the operating system and operating system language for your computer and click Submit 5 Under Select a Device scroll ...

Page 14: ...er operating state without affecting data files Operating System CD If you received an Operating System CD with your computer you can use it to restore your operating system For more information see Restoring Your Operating System on page 113 After you reinstall your operating system use the Drivers and Utilities CD ResourceCD to reinstall drivers for the devices that came with your computer NOTE ...

Page 15: ... computer s video controller configuration 1 Access the Windows Help and Support Center For instructions see Windows Help and Support Center on page 13 2 Under Pick a Task click Use Tools to view your computer information and diagnose problems 3 Under My Computer Information select Hardware From the My Computer Information Hardware screen you can view the type of video controller installed in your...

Page 16: ...37 POWER BUTTON Press to turn on the computer or to enter or exit a power management mode For more information on power management modes see Power Management Modes on page 45 1 display latches 2 5 device status lights 9 touch pad buttons 2 display latch release 6 touch pad 10 keyboard 3 display 7 media control buttons 11 Dell MediaDirect button 4 power button 8 speakers 12 keyboard and wireless st...

Page 17: ...perates as follows Off The battery is adequately charged or the computer is turned off Flashing orange The battery charge is low Solid orange The battery charge is critically low Turns on when you turn on the computer and blinks when the computer is in a power management mode Turns on when the computer reads or writes data NOTICE To avoid loss of data never turn off the computer while the light is...

Page 18: ...o adjust the volume of the integrated speakers press the media control buttons or speaker volume keyboard shortcuts For more information see Speaker Functions on page 41 TOUCH PAD BUTTONS Touch pad buttons provide the same functionality as mouse buttons KEYBOARD The keyboard includes a numeric keypad as well as the Microsoft Windows logo key For information on supported keyboard shortcuts see Key ...

Page 19: ...ction is enabled Turns on when wireless networking is enabled To quickly enable or disable wireless networking press Fn F2 Turns on when a card with Bluetooth wireless technology is enabled NOTE The card with Bluetooth wireless technology is an optional feature so the light turns on only if you ordered the card with your computer For more information see the documentation that came with your card ...

Page 20: ...w airflow environment such as a closed briefcase while it is running Restricting the airflow can damage the computer or cause a fire USB CONNECTORS Connect USB devices such as a mouse keyboard or printer You can also connect the optional floppy drive directly to a USB connector using the optional floppy drive cable OPTICAL DRIVE You can install devices such as a DVD drive or other optical drive in...

Page 21: ...ee Smart Cards on page 76 NOTE The smart card slot is optional and may not ship with your computer HARD DRIVE Stores software and data 1 smart card slot 4 IEEE 1394 connector 7 air vent 2 hard drive 5 5 in 1 media memory card reader 3 ExpressCard slot 6 audio connectors 2 2 3 4 5 6 7 1 ...

Page 22: ...sic and videos stored on a media memory card The 5 in 1 media memory card reader reads the following digital media memory cards Secure Digital SD card SDIO MultiMediaCard MMC Memory Stick Memory Stick PRO xD Picture Card AUDIO CONNECTORS AIR VENT The computer uses fan s to create airflow through the vent s which prevents the computer from overheating CAUTION Do not block push objects into or allow...

Page 23: ...uch as a closed briefcase while it is running Restricting the airflow can damage the computer or cause a fire S VIDEO TV OUT CONNECTOR 1 air vent 5 USB connectors 2 9 AC adapter connector 2 S video TV out connector 6 USB connectors 2 10 air vent 3 network RJ 45 connector 7 Digital Video Interface DVI connector 4 modem RJ 11 connector 8 video VGA connector Connects your computer to a TV Also connec...

Page 24: ...g yellow light on the connector indicates wired network activity For information on using the network adapter see the network adapter documentation supplied with your computer under the Windows Help and Support Center To access the Help and Support Center see Windows Help and Support Center on page 13 To use the internal modem connect the telephone line to the modem connector For additional inform...

Page 25: ...ompatible cable or improperly connecting the cable to the power strip or electrical outlet may cause fire or equipment damage NOTICE When you disconnect the AC adapter cable from the computer grasp the connector not the cable itself and pull firmly but gently to avoid damaging the cable NOTE For optimum system performance you should always use the 130 W AC adapter that came with your computer Usin...

Page 26: ... page 43 COVER FOR OPTIONAL INTERNAL CARD WITH BLUETOOTH WIRELESS TECHNOLOGY For more information see the documentation that came with your card To quickly enable or disable all wireless devices press Fn F2 HARD DRIVE Stores software and data For more information see Hard Drive on page 119 The size displayed for your hard drive in Windows Explorer is the capacity of the drive before any operating ...

Page 27: ...r or cause a fire MINI CARD MODEM COVER Covers the compartment that contains the Mini Card and the modem For more information see Mini Card on page 126 and Modem on page 124 MEMORY MODULE COVER Covers the compartment that contains the memory modules For more information see Memory on page 121 OPTICAL DRIVE LOCKING SCREW Secures the optical drive in the optical drive bay For more information see Op...

Page 28: ...28 A Tour of Your Computer ...

Page 29: ...peed Internet access through your local cable TV line If you are using a dial up connection connect a telephone line to the modem connector on your computer and to the telephone wall jack before you set up your Internet connection If you are using a DSL or cable modem connection contact your ISP for setup instructions Setting Up Your Internet Connection To set up an Internet connection with a prov...

Page 30: ...e 94 If you cannot connect to the Internet but have successfully connected in the past the ISP might have a service outage Contact your ISP to check the service status or try connecting again later Transferring Information to a New Computer The Microsoft Windows XP operating system provides a Files and Settings Transfer Wizard to move data from a source computer to a new computer You can transfer ...

Page 31: ... screen click Old Computer and click Next 6 On the Select a transfer method screen click the transfer method you prefer 7 On the What do you want to transfer screen select the items you want to transfer and click Next After the information has been copied the Completing the Collection Phase screen appears 8 Click Finish Transfer Data to the New Computer 1 On the Now go to your old computer screen ...

Page 32: ...nd click Run 3 In the Open field on the Run window browse to the path for fastwiz on the appropriate removable media and click OK 4 On the Files and Settings Transfer Wizard welcome screen click Next 5 On the Which computer is this screen click Old Computer and click Next 6 On the Select a transfer method screen click the transfer method you prefer 7 On the What do you want to transfer screen sele...

Page 33: ...information including how to Obtain and install updated drivers Connect the printer to the computer Load paper and install the toner or ink cartridge For technical assistance refer to the printer owner s manual or contact the printer manufacturer Printer Cable Your printer connects to your computer with either a USB cable or a parallel cable Your printer may not come with a printer cable so if you...

Page 34: ...supplies UPS Surge Protectors Surge protectors and power strips equipped with surge protection help prevent damage to your computer from voltage spikes that can occur during electrical storms or after power interruptions Some surge protector manufacturers include warranty coverage for certain types of damage Carefully read the device warranty when choosing a surge protector A device with a higher ...

Page 35: ...onditioners do not protect against power interruptions Line conditioners are designed to maintain AC voltage at a fairly constant level Uninterruptible Power Supplies NOTICE Loss of power while data is being saved to the hard drive may result in data loss or file damage NOTE To ensure maximum battery operating time connect only your computer to a UPS Connect other devices such as a printer to a se...

Page 36: ...36 Setting Up Your Computer ...

Page 37: ...ectors that you attach to your portable computer or docking device If your computer is connected to an external monitor and you try to change the brightness level the Brightness Meter appears but the brightness level on the monitor does not change You can press the following keys to adjust display brightness Press Fn and the up arrow key to increase brightness on the integrated display only not on...

Page 38: ...ay settings make a note of the current settings for future reference If you choose a resolution or color palette that is higher than the display supports the settings adjust automatically to the closest supported values 1 Click the Start button and click Control Panel 2 Under Pick a category click Appearance and Themes 3 Under Pick a task click the area you want to change or under or pick a Contro...

Page 39: ...ernal keyboard Each key on the keypad has multiple functions The keypad numbers and symbols are marked in blue on the right of the keypad keys To type a number or symbol press Fn and the desired key after enabling the keypad To enable the keypad press Num Lk The light indicates that the keypad is active To disable the keypad press Num Lk again 9 ...

Page 40: ...led For more information about Dell QuickSet see Dell QuickSet Features on page 49 Fn F8 Displays a list of icons representing all currently available display options for example display only external monitor or projector only both display and projector and so on Highlight the icon that represents the desired state to switch to that option Fn and up arrow key Increases brightness on the integrated...

Page 41: ...led For more information see Dell QuickSet Features on page 49 Fn Page Up Increases the volume of the integrated speakers and external speakers if attached Fn Page Dn Decreases the volume of the integrated speakers and external speakers if attached Fn End Enables and disables the integrated speakers and external speakers if attached Windows logo key and m Minimizes all open windows Windows logo ke...

Page 42: ...ouch pad or use your thumb to press the left touch pad button twice The touch pad has silk screening on the right side and the bottom to indicate scrolling abilities Scrolling is enabled by default To disable this feature modify the mouse properties within the Control Panel NOTE The scroll zones may not work with all applications For the scroll zones to function properly the application being used...

Page 43: ...varies depending on operating conditions Operating time is significantly reduced when you perform operations including but not limited to the following Using optical drives Using wireless communications devices ExpressCards media memory cards or USB devices Using high brightness display settings 3D screen savers or other power intensive programs such as complex 3D graphics applications Running the...

Page 44: ...g device does not power the docking device or computer Microsoft Windows Power Meter The Windows Power Meter indicates the remaining battery charge To check the Power Meter double click the icon on the taskbar If the computer is connected to an electrical outlet a icon appears Charge Gauge By pressing once or pressing and holding the status button on the charge gauge on the battery you can check B...

Page 45: ...e the settings for the battery alarms in QuickSet or the Power Options Properties window See Configuring Power Management Settings on page 47 for information about accessing QuickSet or the Power Options Properties window Conserving Battery Power Perform the following actions to conserve battery power Connect the computer to an electrical outlet when possible because battery life is largely determ...

Page 46: ...ot remove devices while your computer is in hibernate mode Your computer enters hibernate mode if the battery charge level becomes critically low To manually enter hibernate mode Click the Start button click Turn off computer press and hold Shift and then click Hibernate or Depending on how you set the power management options in the Power Options Properties window or the QuickSet Power Management...

Page 47: ...ter then charges the battery and maintains the battery charge If the battery is hot from being used in your computer or being in a hot environment the battery may not charge when you connect the computer to an electrical outlet The battery is too hot to start charging if the light flashes alternately orange and green Disconnect the computer from the electrical outlet and allow the computer and the...

Page 48: ...the bay and press down until the battery bay latch release clicks Storing a Battery Remove the battery when you store your computer for an extended period of time A battery discharges during prolonged storage After a long storage period recharge the battery fully before you use it For more information see Charging the Battery on page 47 1 battery bay latch release 2 battery 1 2 ...

Page 49: ...f settings Network connectivity Power management Display System information Depending on what you want to do in Dell QuickSet you can start it by either clicking double clicking or right clicking the QuickSet icon in the Microsoft Windows taskbar The taskbar is located in the lower right corner of your screen For more information about QuickSet right click the QuickSet icon and select Help ...

Page 50: ...50 Dell QuickSet Features ...

Page 51: ...ton on the front of the drive 2 Pull out the tray 3 Place the disc label side up in the center of the tray and snap the disc onto the spindle NOTE If you use a CD DVD drive that shipped with another computer you need to install the drivers and software necessary to play CDs or DVDs or write data For more information see the Drivers and Utilities CD the Drivers and Utilities CD is optional and may ...

Page 52: ...you follow all copyright laws when you create CDs Adjusting the Volume NOTE When the speakers are muted you do not hear the CD or DVD playing To adjust the speaker volume when playing a CD or DVD use the media control buttons on the front of the computer Mute the sound Turn the volume down Turn the volume up Play or pause Play the previous track Play the next track Stop ...

Page 53: ...ttons to enable or disable the Volume Meter on the screen When the Volume Meter is enabled adjust the volume with the volume control buttons or by pressing the following key combinations Press Fn PageUp to increase the volume Press Fn PageDn to decrease the volume Press Fn End to mute the volume For more information about QuickSet right click the icon in the taskbar and click Help Adjusting the Pi...

Page 54: ...e DVD writable drives installed in Dell computers can write to and read DVD R DVD RW and DVD R DL dual layer media but cannot write to and may not read DVD RAM or DVD R DL media NOTE Most commercial DVDs have copyright protection and cannot be copied using Sonic DigitalMedia 1 Click the Start button point to All Programs Sonic DigitalMedia Projects and then click Copy 2 Under the Copy tab click Di...

Page 55: ...lorer to drag and drop files to a CD R or CD RW only after you start Sonic DigitalMedia and open a DigitalMedia project Use CD Rs to burn music CDs that you want to play in regular stereos CD RWs do not play in most home or car stereos You cannot create audio DVDs with Sonic DigitalMedia Music MP3 files can be played only on MP3 players or on computers that have MP3 software installed Commercially...

Page 56: ...lt settings can limit Dell MediaDirect s functionality For more information about Dell QuickSet see Dell QuickSet Features on page 49 Press the Dell MediaDirect button located on the hinge cover to launch either Dell Media Experience or Dell MediaDirect If the Computer Is On or in Standby Mode If you press the Dell MediaDirect button while the computer is on or in standby mode either Windows XP Me...

Page 57: ...les and TV digital audio adapter cables are available for purchase from Dell Your computer has an S video TV out connector that together with a standard S video cable available from Dell enables you to connect the computer to a TV Your TV has either an S video input connector a composite video input connector or a component video input connector Depending on what type of connector is available on ...

Page 58: ... your computer and your TV you must enable your computer to work with the TV See Enabling the Display Settings for a TV in Microsoft Windows XP on page 70 to ensure that the computer recognizes and works properly with the TV Additionally if you are using S PDIF digital audio see Enabling S PDIF Digital Audio on page 69 1 S video TV out connector 2 composite video adapter 3 S PDIF digital audio con...

Page 59: ... other end of the S video cable into the S video input connector on your TV 4 Plug the single connector end of the audio cable into the headphone connector on your computer 5 Plug the two RCA connectors on the other end of the audio cable into the audio input connectors on your TV or other audio device 6 Turn on the TV and any audio device that you connected if applicable and then turn on the comp...

Page 60: ...u want to connect 2 Connect the composite video adapter to the S video TV out connector on your computer 3 Plug one end of the S video cable into the S video output connector on the composite video adapter 1 S video TV out connector 2 composite video adapter 1 composite video adapter 2 S video cable 3 S PDIF digital audio cable 1 2 1 2 3 ...

Page 61: ...er end of the S PDIF digital audio cable into the audio input connector on your TV or audio device 7 Turn on the TV turn on any audio device that you connected if applicable and then turn on the computer 8 See Enabling the Display Settings for a TV in Microsoft Windows XP on page 70 to ensure that the computer recognizes and works properly with the TV 1 composite video adapter 2 S video cable 1 co...

Page 62: ...nect the composite video adapter to the S video TV out connector on your computer 3 Plug one end of the composite video cable into the composite video output connector on the composite video adapter 1 audio input connector 2 S video TV out connector 3 composite video adapter 1 composite video adapter 2 composite video cable 3 standard audio cable 2 1 3 1 2 3 ...

Page 63: ...the audio cable in to the audio input connectors on your TV or other audio device 7 Turn on the TV turn on any audio device that you connected if applicable and then turn on the computer 8 See Enabling the Display Settings for a TV in Microsoft Windows XP on page 70 to ensure that the computer recognizes and works properly with the TV Composite Video and S PDIF Digital Audio 1 composite video adap...

Page 64: ...te video input connector on the composite video adapter 4 Plug the other end of the composite video cable into the composite video input connector on the TV 5 Plug one end of the S PDIF digital audio cable in to the S PDIF audio connector on the composite video adapter 1 composite video adapter 2 composite video cable 3 SPDIF digital audio cable 1 composite video adapter 2 composite video cable 1 ...

Page 65: ...vice that you connected if applicable and then turn on the computer 8 See Enabling the Display Settings for a TV in Microsoft Windows XP on page 70 to ensure that the computer recognizes and works properly with the TV Component Video and Standard Audio 1 S video TV out connector 2 component video adapter 1 component video adapter 2 component video cable 3 standard audio cable 3 2 1 1 2 3 ...

Page 66: ...ideo cable into the component video input connectors on the TV Make sure that the red green and blue colors of the cable match the colors of the TV input connectors 5 Plug the single connector end of the audio cable into the headphone connector on the computer 6 Plug the two RCA connectors on the other end of the audio cable into the audio input connectors on your TV or audio device 7 Turn on the ...

Page 67: ...he computer and the TV and or audio device that you want to connect 2 Connect the component video adapter to the S video TV out connector on the computer 1 S video TV out connector 2 component video adapter 1 component video adapter 2 component video cable 3 SPDIF digital audio cable 1 2 1 2 3 ...

Page 68: ...ors of the TV input connectors 5 Plug one end of the S PDIF digital audio cable into the S PDIF audio connector on the component video adapter 6 Plug the other end of the digital audio cable into the S PDIF input connector on your TV or other audio device 7 Turn on the TV turn on any audio device that you connected if applicable and then turn on the computer 8 See Enabling the Display Settings for...

Page 69: ... screen Enabling S PDIF in the Windows Audio Driver 1 Double click the speaker icon in the Windows notification area 2 Click the Options menu and then click Advanced Controls 3 Click Advanced 4 Click S PDIF Interface 5 Click Close 6 Click OK Setting Up the Cyberlink CL Headphones NOTE The CL headphone feature is available only if your computer has a DVD drive If your computer has a DVD drive you c...

Page 70: ...computer before you enable the display settings 1 Click the Start button point to Settings and then click Control Panel 2 Double click Display and click the Settings tab 3 Click Advanced 4 Click the tab for your video card NOTE To determine the type of video card installed in your computer see the Windows Help and Support Center To access the Help and Support Center click Start Help and Support Un...

Page 71: ...other particles Save the blank for use when no ExpressCard is installed in the slot blanks from other computers may not fit your computer To remove the blank see Removing an ExpressCard or Blank on page 73 Installing an ExpressCard You can install an ExpressCard in the computer while the computer is running The computer automatically detects the card ExpressCards are generally marked with a symbol...

Page 72: ... you begin any of the procedures in this section follow the safety instructions in the Product Information Guide To install an ExpressCard 1 Hold the card with the top side of the card facing up The latch may need to be in the in position before you insert the card 2 Slide the card into the slot until the card is completely seated in its connector 1 supported cards 2 unsupported cards 2 1 ...

Page 73: ... utility click the icon in the taskbar to select a card and stop it from functioning before you remove it from the computer If you do not stop the card in the configuration utility you could lose data CAUTION Before you begin any of the procedures in this section follow the safety instructions in the Product Information Guide Press the latch and remove the card or blank Press the latch twice once ...

Page 74: ... SDIO MultiMediaCard MMC Memory Stick Memory Stick PRO xD Picture Card Installing a Media Memory Card You can install a media memory card in the computer while the computer is running The computer automatically detects the card Media memory cards are generally marked with a symbol such as a triangle or an arrow or a label to indicate which end to insert into the slot The cards are keyed to prevent...

Page 75: ...loads the appropriate device driver If the configuration program tells you to load the manufacturer s drivers use the CD that came with the media memory card if applicable Removing a Media Memory Card NOTICE Use the media memory card configuration utility click the icon in the taskbar to select a card and stop it from functioning before you remove it from the computer If you do not stop the card i...

Page 76: ...improve system security by combining something a user has the smart card with something only the user should know a PIN to provide more secure user authentication than passwords alone Installing a Smart Card You can install a smart card in the computer while the computer is running The computer automatically detects the card To install a smart card 1 Hold the card so that the gold contact pad is f...

Page 77: ...Using Cards 77 1 smart card slot 2 smart card 3 ExpressCard slot 1 2 3 ...

Page 78: ...78 Using Cards ...

Page 79: ...ork cable connected to it To connect a network cable 1 Connect the network cable to the network adapter connector on the back of your computer NOTE Insert the cable connector until it clicks into place and then gently pull the cable to ensure that it is securely attached 2 Connect the other end of the network cable to a network connection device or a network wall connector NOTE Do not use a networ...

Page 80: ...her than through a network cable connected to each computer In a WLAN a radio communications device called an access point or wireless router connects network computers and provides Internet or network access The access point or wireless router and the wireless network card in the computer communicate by broadcasting data from their antennas over the air waves What You Need to Establish a WLAN Con...

Page 81: ...uter Setting Up a New WLAN Connecting a Wireless Router and a Broadband Modem 1 Contact your Internet service provider ISP to obtain specific information about the connection requirements for your broadband modem 2 Ensure that you have wired Internet access through your broadband modem before you attempt to set up a wireless Internet connection See Physically Connecting to a Network or Broadband M...

Page 82: ... broadcast name is Service Set Identifier SSID or network name 15 If necessary configure your wireless network card to connect to the wireless network See Connecting to a Wireless Local Area Network on page 82 Connecting to a Wireless Local Area Network NOTE Before you connect to a WLAN ensure that you have followed the instructions in Wireless Local Area Network WLAN on page 80 NOTE The following...

Page 83: ...talled on your computer see your wireless network documentation in the Windows Help and Support Center To access the Help and Support Center 1 Click the Start button and click Help and Support 2 Under Pick a Help topic click Dell User and System Guides 3 Under Device Guides select the documentation for your wireless network card Completing the Connection to the WLAN When you turn on your computer ...

Page 84: ...wireless networking function on or off the wireless activity indicator changes to display the status For more information about the wireless activity indicator see the Dell QuickSet Help file For information about QuickSet and how to access the Dell QuickSet Help file see Dell QuickSet Features on page 49 Mobile Broadband or Wireless Wide Area Network Much like a WLAN a Mobile Broadband network al...

Page 85: ...rdware installed on this computer On the My Computer Information Hardware screen you can view the type of Mobile Broadband card installed in your computer as well as other hardware components NOTE The Mobile Broadband card is listed under Modems Connecting to a Mobile Broadband Network NOTE These instructions only apply to Mobile Broadband ExpressCards They do not apply to internal cards with wire...

Page 86: ...he instructions on the screen Internet Connection Firewall The Internet Connection Firewall provides basic protection from unauthorized access to the computer while the computer is connected to the Internet The firewall is automatically enabled when you run the Network Setup Wizard When the firewall is enabled for a network connection the firewall icon appears with a red background in the Network ...

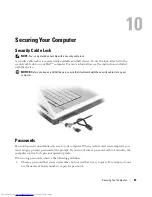
Page 87: ...e you buy an antitheft device ensure that it will work with the security cable slot on your computer Passwords Passwords prevent unauthorized access to your computer When you first start your computer you must assign a primary password at the prompt If you do not enter a password within 2 minutes the computer returns to its previous operating state When using passwords observe the following guidel...

Page 88: ...er is lost or stolen you must contact the company that provides the tracking service to report the missing computer If Your Computer Is Lost or Stolen Call a law enforcement agency to report the lost or stolen computer Include the Service Tag in your description of the computer Ask that a case number be assigned and write down the number along with the name address and phone number of the law enfo...

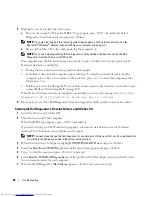
Page 89: ...he Dell Diagnostics before you contact Dell for technical assistance NOTICE The Dell Diagnostics works only on Dell computers NOTE The Drivers and Utilities CD is optional and may not ship with your computer Start the Dell Diagnostics from either your hard drive or from the Drivers and Utilities CD also known as the ResourceCD Starting the Dell Diagnostics From Your Hard Drive The Dell Diagnostics...

Page 90: ... contact Dell see Contacting Dell on page 155 If the Pre boot System Assessment completes successfully you receive the message Booting Dell Diagnostic Utility Partition Press any key to continue 5 Press any key to start the Dell Diagnostics from the diagnostics utility partition on your hard drive Starting the Dell Diagnostics From the Drivers and Utilities CD 1 Insert the Drivers and Utilities CD...

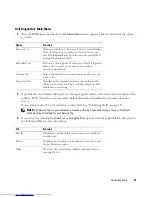
Page 91: ...cribed in the following table for more information Option Function Express Test Performs a quick test of devices This test typically takes 10 to 20 minutes and requires no interaction on your part Run Express Test first to increase the possibility of tracing the problem quickly Extended Test Performs a thorough check of devices This test typically takes 1 hour or more and requires you to answer qu...

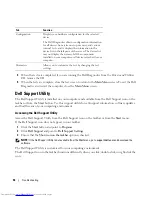
Page 92: ...bar 1 Click the Start button and point to Programs 2 Click Dell Support and point to Dell Support Settings 3 Ensure that the Show icon on the taskbar option is checked NOTE If the Dell Support Utility is not available from the Start menu go to support dell com and download the software The Dell Support Utility is customized for your computing environment The Dell Support icon in the taskbar functi...

Page 93: ...AT MICROSOFT WINDOWS RECOGNIZES THE DRIVE Click the Start button and click My Computer If the floppy CD or DVD drive is not listed perform a full scan with your antivirus software to check for and remove viruses Viruses can sometimes prevent Windows from recognizing the drive TEST THE DRIVE Insert another floppy disk CD or DVD to eliminate the possibility that the original one is defective Insert ...

Page 94: ... is partially ejected 3 Gently pull out the tray until it stops If You Hear an Unfamiliar Scraping or Grinding Sound Ensure that the sound is not caused by the program that is running Ensure that the disk or disc is inserted properly Hard Drive Problems ALLOW THE COMPUTER TO COOL BEFORE TURNING IT ON A hot hard drive may prevent the operating system from starting Try allowing the computer to retur...

Page 95: ...r Follow the instructions on the screen to identify and resolve modem problems Modem Helper is not available on certain computers VERIFY THAT THE MODEM IS COMMUNICATING WITH WINDOWS 1 Click the Start button and click Control Panel 2 Click Printers and Other Hardware 3 Click Phone and Modem Options 4 Click the Modems tab 5 Click the COM port for your modem 6 Click Properties click the Diagnostics t...

Page 96: ... and if necessary replace them See Memory on page 121 DISK C FAILED INITIALIZATION The hard drive failed initialization Run the hard drive tests in the Dell Diagnostics See Dell Diagnostics on page 89 DRIVE NOT READY The operation requires a hard drive in the bay before it can continue Install a hard drive in the hard drive bay See Hard Drive on page 119 ERROR READING EXPRESSCARD The computer cann...

Page 97: ...s See Dell Diagnostics on page 89 INSERT BOOTABLE MEDIA The operating system is trying to boot to a nonbootable CD Insert a bootable CD INVALID CONFIGURATION INFORMATION PLEASE RUN SYSTEM SETUP PROGRAM The system configuration information does not match the hardware configuration The message is most likely to occur after a memory module is installed Correct the appropriate options in the system se...

Page 98: ...ed as a boot device NO BOOT SECTOR ON HARD DRIVE The operating system may be corrupted Contact Dell See Contacting Dell on page 155 NO TIMER TICK INTERRUPT A chip on the system board may be malfunctioning Run the System Set tests in the Dell Diagnostics See Dell Diagnostics on page 89 NOT ENOUGH MEMORY OR RESOURCES EXIT SOME PROGRAMS AND TRY AGAIN You have too many programs open Close all windows ...

Page 99: ...oard may be malfunctioning Run the System Set tests in the Dell Diagnostics See Dell Diagnostics on page 89 UNEXPECTED INTERRUPT IN PROTECTED MODE The keyboard controller may be malfunctioning or a memory module may be loose Run the System Memory tests and the Keyboard Controller test in the Dell Diagnostics See Dell Diagnostics on page 89 X IS NOT ACCESSIBLE THE DEVICE IS NOT READY Insert a disk ...

Page 100: ... to Programs point to Accessories and click Notepad 4 Type some characters on the external keyboard and verify that they appear on the display If you cannot verify these steps you may have a defective external keyboard TO VERIFY THAT THE PROBLEM IS WITH THE EXTERNAL KEYBOARD CHECK THE INTEGRATED KEYBOARD 1 Shut down the computer 2 Disconnect the external keyboard 3 Turn on the computer 4 From the ...

Page 101: ...its documentation or on a floppy disk or CD END THE PROGRAM 1 Press Ctrl Shift Esc simultaneously 2 Click Applications 3 Click the program that is no longer responding 4 Click End Task CHECK THE SOFTWARE DOCUMENTATION If necessary uninstall and then reinstall the program A Program Is Designed for an Earlier Microsoft Windows Operating System RUN THE PROGRAM COMPATIBILITY WIZARD The Program Compati...

Page 102: ...nt technology that detects video content and dynamically adjusts the brightness contrast saturation ratios NOTICE You cannot reinstall the Dell MediaDirect feature if you reformat the hard drive Contact Dell for assistance See Contacting Dell on page 155 Other Software Problems CHECK THE SOFTWARE DOCUMENTATION OR CONTACT THE SOFTWARE MANUFACTURER FOR TROUBLESHOOTING INFORMATION Ensure that the pro...

Page 103: ...our computer is successfully communicating with the memory Ensure that you are following the memory installation guidelines See Memory on page 121 Run the Dell Diagnostics See Dell Diagnostics on page 89 Network Problems CAUTION Before you begin any of the procedures in this section follow the safety instructions in the Product Information Guide General CHECK THE NETWORK CABLE CONNECTOR Ensure tha...

Page 104: ...dband Card Utility has not yet located a Mobile Broadband network If the searching state persists ensure that the signal strength is adequate No service The Dell Mobile Broadband Card Utility did not locate a Mobile Broadband network Ensure that the signal strength is adequate Restart the Dell wireless utility or contact your Mobile Broadband network provider Check your WWAN service Contact your M...

Page 105: ...range or is a steady orange the battery charge is low or depleted Connect the computer to an electrical outlet If the battery status light flashes green and orange the battery is too hot to charge Shut down the computer disconnect the computer from the electrical outlet and then let the battery and computer cool to room temperature If the battery status light rapidly flashes orange the battery may...

Page 106: ...iately goes into low performance mode Printer Problems CAUTION Before you begin any of the procedures in this section follow the safety instructions in the Product Information Guide NOTE If you need technical assistance for your printer contact the printer s manufacturer ENSURE THAT THE PRINTER IS TURNED ON CHECK THE PRINTER CABLE CONNECTIONS See the printer documentation for cable connection info...

Page 107: ...EINSTALL THE SCANNER DRIVER See the scanner documentation for instructions Sound and Speaker Problems CAUTION Before you begin any of the procedures in this section follow the safety instructions in the Product Information Guide No Sound From Integrated Speakers ADJUST THE WINDOWS VOLUME CONTROL Double click the speaker icon in the lower right corner of your screen Ensure that the volume is turned...

Page 108: ...dphone cable is securely inserted into the headphone connector ADJUST THE WINDOWS VOLUME CONTROL Click or double click the speaker icon in the lower right corner of your screen Ensure that the volume is turned up and that the sound is not muted Touch Pad or Mouse Problems CHECK THE TOUCH PAD SETTINGS 1 Click the Start button click Control Panel and then click Printers and Other Hardware 2 Click Mo...

Page 109: ... cable to verify that the computer turns on ADJUST THE POWER PROPERTIES Search for the keyword standby in the Windows Help and Support Center SWITCH THE VIDEO IMAGE If your computer is attached to an external monitor press Fn F8 to switch the video image to the display If the Display Is Difficult to Read ADJUST THE BRIGHTNESS Press Fn and the up or down arrow key MOVE THE EXTERNAL SUBWOOFER AWAY F...

Page 110: ...ICE The Drivers and Utilities CD may contain drivers for operating systems that are not on your computer Ensure that you are installing software appropriate for your operating system Many drivers such as the keyboard driver come with your Microsoft Windows operating system You may need to install drivers if you Upgrade your operating system Reinstall your operating system Connect or install a new ...

Page 111: ... not resolve the problem then use System Restore see Using Microsoft Windows XP System Restore on page 113 to return your computer to the operating state that existed before you installed the new driver Using the Drivers and Utilities CD NOTE The Drivers and Utilities CD is optional and may not ship with your computer If using Device Driver Rollback or System Restore does not resolve the problem t...

Page 112: ...lly Reinstalling Drivers 1 After extracting the driver files to your hard drive as described in the previous section click the Start button and right click My Computer 2 Click Properties 3 Click the Hardware tab and click Device Manager 4 Double click the type of device for which you are installing the driver for example Modems or Infrared devices 5 Double click the name of the device for which yo...

Page 113: ...tem settings have left the computer in an undesirable operating state See the Windows Help and Support Center for additional information on using System Restore To access help see Windows Help and Support Center on page 13 NOTICE Make regular backups of your data files System Restore does not monitor your data files or recover them NOTE The procedures in this document were written for the Windows ...

Page 114: ...not alter open or delete any files or programs until the system restoration is complete 1 Click the Start button point to Programs Accessories System Tools and then click System Restore 2 Click Undo my last restoration and click Next Enabling System Restore If you reinstall Windows XP with less than 200 MB of free hard disk space available System Restore is automatically disabled To see if System ...

Page 115: ...e do not reinstall Windows XP unless a Dell technical support representative instructs you to do so NOTICE To prevent conflicts with Windows XP disable any virus protection software installed on your computer before you reinstall Windows XP See the documentation that came with the software for instructions 1 Save and close any open files and exit any open programs 2 Insert the Operating System CD ...

Page 116: ...116 Troubleshooting ...

Page 117: ... this document may require the following tools Small flat blade screwdriver Phillips screwdriver Small plastic scribe Flash BIOS update program see the Dell Support website at support dell com Turning Off Your Computer NOTICE To avoid losing data save and close any open files and exit any open programs before you turn off your computer 1 Shut down the operating system a Save and close any open fil...

Page 118: ...y aligned to avoid bending any connector pins Also before you connect a cable ensure that both connectors are correctly oriented and aligned NOTICE To avoid electrostatic discharge ground yourself by using a wrist grounding strap or by periodically touching an unpainted metal surface such as a connector on the back of the computer NOTICE To avoid damaging the computer perform the following steps b...

Page 119: ...de NOTICE Hard drives are extremely fragile even a slight bump can damage the drive NOTICE To avoid electrostatic discharge ground yourself by using a wrist grounding strap or by periodically touching an unpainted metal surface such as a connector on the back of the computer NOTICE To avoid damaging the system board you must remove the battery before you begin working inside the computer NOTE Dell...

Page 120: ... computer 4 Remove the new drive from its packaging Save the original packaging for storing or shipping the hard drive NOTICE Use firm and even pressure to slide the drive into place If you use excessive force you may damage the connector 5 Slide the hard drive into the bay until it is fully seated 6 Replace and tighten the screws 7 If the new hard drive is not already pre imaged install the opera...

Page 121: ... NOTE Memory modules purchased from Dell are covered under your computer warranty CAUTION Before you begin any of the procedures in this section follow the safety instructions in the Product Information Guide NOTICE To avoid electrostatic discharge ground yourself by using a wrist grounding strap or by periodically touching an unpainted metal surface such as a connector on the back of the computer...

Page 122: ...ector do not use tools to spread the memory module securing clips 4 If you are replacing a memory module remove the existing module a Use your fingertips to carefully spread apart the securing clips on each end of the memory module connector until the module pops up b Remove the module from the connector 1 memory module 2 securing clips 2 per connector 3 memory module connector 1 2 3 ...

Page 123: ...e click remove the module and reinstall it 6 Replace the memory module cover NOTICE If the cover is difficult to close remove the module and reinstall it Forcing the cover to close may damage your computer 7 Insert the battery into the battery bay or connect the AC adapter to your computer and an electrical outlet 8 Turn on the computer As the computer boots it detects the additional memory and au...

Page 124: ...void damaging the system board you must remove the battery before you begin working inside the computer 1 Follow the procedures in Before You Begin on page 117 2 Turn the computer over and loosen the captive screws from the Mini Card modem cover 3 Place your finger under the cover at the indentation and lift the cover to remove it 4 Remove the existing modem a Remove the screw securing the modem t...

Page 125: ...on If you feel resistance check the connectors and realign the card b Align the modem with the screw holes and press the modem into the connector on the system board c Replace the screw that secures the modem to the system board 6 Replace the Mini Card modem cover 1 modem 2 modem pull tab 3 modem cable 4 modem screw 5 modem connector on system board 1 5 2 4 3 ...

Page 126: ...ed metal surface such as a connector on the back of the computer NOTICE To avoid damaging the system board you must remove the battery before you begin working inside the computer 1 Follow the procedures in Before You Begin on page 117 2 Turn the computer over and loosen the captive screws from the Mini Card modem cover 3 Place your finger under the cover at the indentation and lift the cover to r...

Page 127: ...e Mini Card by pushing the metal securing clips toward the back of the computer until the card pops up slightly c Lift the Mini Card out of its connector 1 antenna cables 2 2 Mini Card 3 Mini Card connector 1 securing clips 2 Mini Card 1 3 2 2 1 ...

Page 128: ...e Mini Card never place cables under the card b Connect the antenna cables to the antenna connectors on the Mini Card by matching the color of the cable to the color of the triangle above the connector Connect the main antenna cable white to the antenna connector with the white triangle Connect the auxiliary antenna cable black to the antenna connector with the black triangle NOTE If your computer...

Page 129: ...a connector on the back of the computer NOTICE To avoid damaging the system board you must remove the battery before you begin working inside the computer 1 Follow the procedures in Before You Begin on page 117 2 Remove the hinge cover a Open the display all the way 180 degrees so that it lies flat against your work surface NOTICE To avoid damaging the hinge cover do not lift the cover on both sid...

Page 130: ... the battery before you begin working inside the computer 1 Follow the procedures in Before You Begin on page 117 2 Open the display and remove the hinge cover See Hinge Cover on page 129 3 Remove the keyboard a Remove the two screws at the top of the keyboard NOTICE The key caps on the keyboard are fragile easily dislodged and time consuming to replace Be careful when removing and handling the ke...

Page 131: ...uching an unpainted metal surface such as a connector on the back of the computer NOTICE To avoid damaging the system board you must remove the battery before you begin working inside the computer 1 Follow the procedures in Before You Begin on page 117 2 Remove the hinge cover See Hinge Cover on page 129 3 Remove the keyboard See Keyboard on page 130 4 Remove the existing coin cell battery a Pull ...

Page 132: ...lace the keyboard 7 Replace the hinge cover Optical Drive CAUTION Before you begin any of the procedures in this section follow the safety instructions in the Product Information Guide 1 Follow the procedures in Before You Begin on page 117 2 Turn the computer over 3 Remove the optical drive security screw 4 Insert a scribe into the notch and push it to the side to release the drive from the bay 1...

Page 133: ...odically touching an unpainted metal surface such as a connector on the back of the computer NOTICE To avoid damaging the system board you must remove the battery before you begin working inside the computer If you ordered a card with Bluetooth wireless technology with your computer it is already installed 1 Follow the procedures in Before You Begin on page 117 2 Remove the battery See Replacing t...

Page 134: ...ng Parts 5 To replace the card connect the card to the cable and then carefully insert it into the compartment 6 Replace the card cover and tighten the screw 7 Replace the battery 1 cable connector 2 card 3 card cover 3 2 1 ...

Page 135: ...ace any devices installed in the module bay with the Dell TravelLite module Fully charge the main battery and any spare batteries that you plan to carry with you Shut down the computer Disconnect the AC adapter NOTICE When the display is closed extraneous items on the keyboard or palm rest could damage the display Remove any extraneous items such as paper clips pens and paper from the keyboard and...

Page 136: ... countries you plan to visit and consider acquiring an international carnet also known as a merchandise passport from your government Find out what type of electrical outlets are used in the countries you will visit and have appropriate power adapters Check with your credit card company for information about the kinds of emergency travel assistance it offers to users of portable computers Travelin...

Page 137: ...ont side bus 533 MHz or 667 MHz System Information System chip set Mobile Intel 945PM Express Data bus width 64 bits DRAM bus width dual channel bus Processor address bus width 32 bits Flash EPROM 1 MB PCI bus PCI Express used for video controllers 32 bits x16 ExpressCard NOTE The ExpressCard slot is designed only for ExpressCards It does NOT support PC Cards ExpressCard connector one ExpressCard ...

Page 138: ...dia Memory card Reader 5 in 1 media memory card controller Ricoh R5C832 5 in 1 media memory card connector 5 in 1 combo card connector Cards supported MS MS Pro SD SDIO MMC xD CD Type I II IBM Microdrive through ExpressCard adapter Ports and Connectors Audio microphone in connector stereo headphones speakers connector IEEE 1394a 4 pin mini nonpowered connector Modem RJ 11 port Network adapter RJ 4...

Page 139: ...figuration of your computer see Determining Your Computer s Configuration on page 15 Video controller NVIDIA GeForce Go 7900 GS Video type 256 bit hardware accelerated Data bus PCI Express Video memory 256 MB LCD interface LVDS TV support NTSC or PAL in S video component and composite modes Video controller NVIDIA GeForce Go 7900 GTX Video type 256 bit hardware accelerated Data bus PCI Express Vid...

Page 140: ...roller Sigmatel STAC92XX codec Display Type active matrix TFT WUXGA Dimensions Height 245 0 mm 9 64 inches Width 383 0 mm 15 inches Diagonal 431 8 mm 17 inches Maximum resolution 1920 x 1200 at 16 7 million colors Refresh rate 60 Hz Operating angle 0 closed to 180 Viewing angle typical Horizontal 60 Vertical 45 Pixel pitch 0 191 mm 17 inch display Power consumption panel with backlight typical 7 5...

Page 141: ... kg 0 88 lb 9 cell Voltage 10 8 VDC Charge time approximate Computer off 2 hours at 100 in 2 hours 1 hour at 80 in 1 hour Operating time Battery operating time varies depending on operating conditions and can be significantly reduced under certain power intensive conditions See Power Problems on page 105 See Using a Battery on page 43 for more information on battery life Life span approximate 300 ...

Page 142: ... 7 A continuous Output power 130 W Rated output voltage 19 5 VDC Dimensions Height 36 mm 1 35 inches Width 65 mm 2 39 inches Depth 169 5 mm 6 04 inches Weight with cables 0 76 kg 1 68 lb Temperature range Operating 0 to 35 C 32 to 95 F Storage 40 to 65 C 40 to 149 F Physical Height 42 4 mm 1 7 inches Width 394 mm 15 5 inches Depth 287 mm 11 3 inches Weight with 9 cell battery and optical drive 3 9...

Page 143: ...that simulates user environment Operating 0 66 GRMS Storage 1 3 GRMS Maximum shock measured with a 2 ms half sine pulse Operating 143 G Storage 163 G Altitude maximum Operating 15 2 to 3048 m 50 to 10 000 ft Storage 15 2 to 10 668 m 50 to 35 000 ft Environmental continued ...

Page 144: ...144 Specifications ...

Page 145: ...ll s Express Service Code system may not be available in all countries When prompted by Dell s automated telephone system enter your Express Service Code to route the call directly to the proper support personnel If you do not have an Express Service Code open the Dell Accessories folder double click the Express Service Code icon and follow the directions For instructions on using the support serv...

Page 146: ...lephone to select the subjects that correspond to your questions The AutoTech service is available 24 hours a day 7 days a week You can also access this service through the support service For the telephone number to call see the contact numbers for your region Automated Order Status Service To check on the status of any Dell products that you have ordered you can go to support dell com or you can...

Page 147: ... run and any error messages reported by the Dell Diagnostics 4 Include any accessories that belong with the item s being returned power cables software floppy disks guides and so on if the return is for credit 5 Pack the equipment to be returned in the original or equivalent packing materials You are responsible for insuring any product returned and you assume the risk of loss during shipment to D...

Page 148: ...evices Expansion cards Are you connected to a network Yes No Network version and network adapter Programs and versions See your operating system documentation to determine the contents of the system s start up files If the computer is connected to a printer print each file Otherwise record the contents of each file before calling Dell Error message beep code or diagnostic code Description of probl...

Page 149: ...settings NOTICE Unless you are an expert computer user or are directed to do so by Dell technical support do not change the system setup settings Certain changes might make your computer work incorrectly Viewing the System Setup Screens 1 Turn on or restart your computer 2 When the DELL logo appears press F2 immediately If you wait too long and the Windows logo appears continue to wait until you s...

Page 150: ...files it stops searching and starts the operating system To control the boot devices select highlight a device by pressing the down arrow or up arrow key and then enable or disable the device or change its order in the list To enable or disable a device highlight the item and press the space bar Enabled items are preceded by a number disabled items are not preceded by a number To reorder a device ...

Page 151: ...igned for cleaning displays and follow the instructions that are included with the product Moisten a soft lint free cloth with either water or a display cleaner Do not use alcohol or an ammonia based cleaner Wipe the display gently working from the center to the edges until it is clean and any fingerprints are removed Do not use excessive pressure Moisten a soft lint free cloth with water and wipe...

Page 152: ...rsuant to Part 15 of the FCC Rules This device complies with Part 15 of the FCC Rules Operation is subject to the following two conditions 1 This device may not cause harmful interference 2 This device must accept any interference received including interference that may cause undesired operation NOTICE The FCC regulations provide that changes or modifications not expressly approved by Dell Inc co...

Page 153: ...r and all Dell installed hardware In addition to this technician assisted technical support online technical support is available at support dell com Additional technical support options may be available for purchase Dell provides limited technical support for the computer and any Dell installed software and peripherals1 Support for third party software and peripherals is provided by the original ...

Page 154: ...ms docking stations port replicators networking products and all associated cabling are included Definition of Third Party Software and Peripherals Third party software and peripherals include any peripheral accessory or software program sold by Dell not under the Dell brand printers scanners cameras games and so on Support for all third party software and peripherals is provided by the original m...

Page 155: ...ic addresses telephone numbers and codes provided in the following table If you need assistance in determining which codes to use contact a local or an international operator Country City International Access Code Country Code City Code Department Name or Service Area Website and E Mail Address Area Codes Local Numbers and Toll Free Numbers Anguilla General Support toll free 800 335 0031 Antigua a...

Page 156: ...ort for all other Dell computers 0820 240 530 14 Preferred Accounts Corporate Support 0660 8779 Switchboard 0820 240 530 00 Bahamas General Support toll free 1 866 278 6818 Barbados General Support 1 800 534 3066 Belgium Brussels International Access Code 00 Country Code 32 City Code 2 Website support euro dell com Tech Support for XPS portable computers only 02 481 92 96 Tech Support for all othe...

Page 157: ...ice med large business government toll free 1 800 326 9463 Customer Service printers projectors televisions handhelds digital jukebox and wireless toll free 1 800 847 4096 Hardware Warranty Support Home Sales Small Business toll free 1 800 906 3355 Hardware Warranty Support med large bus government toll free 1 800 387 5757 Hardware Warranty Support printers projectors televisions handhelds digital...

Page 158: ...red Accounts Division toll free 800 858 2557 Large Corporate Accounts GCP toll free 800 858 2055 Large Corporate Accounts Key Accounts toll free 800 858 2628 Large Corporate Accounts North toll free 800 858 2999 Large Corporate Accounts North Government and Education toll free 800 858 2955 Large Corporate Accounts East toll free 800 858 2020 Large Corporate Accounts East Government and Education t...

Page 159: ... Care 3287 5505 Switchboard Relational 3287 1200 Switchboard Fax Relational 3287 1201 Switchboard Home Small Business 3287 5000 Switchboard Fax Home Small Business 3287 5001 Dominica General Support toll free 1 866 278 6821 Dominican Republic General Support 1 800 148 0530 Ecuador General Support toll free 999 119 El Salvador General Support 01 899 753 0777 Finland Helsinki International Access Co...

Page 160: ... 01 55 94 71 00 Sales 01 55 94 71 00 Fax 01 55 94 71 01 Germany Langen International Access Code 00 Country Code 49 City Code 6103 Website support euro dell com E mail tech_support_central_europe dell com Technical Support for XPS portable computers only 06103 766 7222 Technical Support for all other Dell computers 06103 766 7200 Home Small Business Customer Care 0180 5 224400 Global Segment Custo...

Page 161: ...Support Dimension and Inspiron 2969 3188 Technical Support OptiPlex Latitude and Dell Precision 2969 3191 Technical Support PowerApp PowerEdge PowerConnect and PowerVault 2969 3196 Customer Care 3416 0910 Large Corporate Accounts 3416 0907 Global Customer Programs 3416 0908 Medium Business Division 3416 0912 Home and Small Business Division 2969 3105 India E mail india_support_desktop dell com ind...

Page 162: ...e dial within U K only 0870 907 4499 Ireland Sales 01 204 4444 U K Sales dial within U K only 0870 907 4000 Fax Sales Fax 01 204 0103 Switchboard 01 204 4444 Italy Milan International Access Code 00 Country Code 39 City Code 02 Website support euro dell com Home and Small Business Technical Support 02 577 826 90 Customer Care 02 696 821 14 Fax 02 696 821 13 Switchboard 02 696 821 12 Corporate Tech...

Page 163: ...Service 044 556 3490 24 Hour Automated Order Service 044 556 3801 Customer Care 044 556 4240 Business Sales Division up to 400 employees 044 556 1465 Preferred Accounts Division Sales over 400 employees 044 556 3433 Large Corporate Accounts Sales over 3500 employees 044 556 3430 Public Sales government agencies educational institutions and medical institutions 044 556 1469 Global Segment Japan 044...

Page 164: ...cal Support toll free 0800 105 Customer Service Xiamen China 34 160 910 Transaction Sales Xiamen China 29 693 115 Malaysia Penang International Access Code 00 Country Code 60 City Code 4 Website support ap dell com Technical Support Dell Precision OptiPlex and Latitude toll free 1 800 880 193 Technical Support Dimension Inspiron and Electronics and Accessories toll free 1 800 881 306 Technical Sup...

Page 165: ...nical Support for all other Dell computers 020 674 45 00 Technical Support Fax 020 674 47 66 Home Small Business Customer Care 020 674 42 00 Relational Customer Care 020 674 4325 Home Small Business Sales 020 674 55 00 Relational Sales 020 674 50 00 Home Small Business Sales Fax 020 674 47 75 Relational Sales Fax 020 674 47 50 Switchboard 020 674 50 00 Switchboard Fax 020 674 47 50 New Zealand Int...

Page 166: ...om Customer Service Phone 57 95 700 Customer Care 57 95 999 Sales 57 95 999 Customer Service Fax 57 95 806 Reception Desk Fax 57 95 998 Switchboard 57 95 999 Portugal International Access Code 00 Country Code 351 Website support euro dell com Technical Support 707200149 Customer Care 800 300 413 Sales 800 300 410 or 800 300 411 or 800 300 412 or 21 422 07 10 Fax 21 424 01 12 Puerto Rico General Su...

Page 167: ...e 421 Website support euro dell com E mail czech_dell dell com Technical Support 02 5441 5727 Customer Care 420 22537 2707 Fax 02 5441 8328 Tech Fax 02 5441 8328 Switchboard Sales 02 5441 7585 South Africa Johannesburg International Access Code 09 091 Country Code 27 City Code 11 Website support euro dell com E mail dell_za_support dell com Gold Queue 011 709 7713 Technical Support 011 709 7710 Cu...

Page 168: ...mer Care 08 590 05 642 Home Small Business Customer Care 08 587 70 527 Employee Purchase Program EPP Support 20 140 14 44 Technical Support Fax 08 590 05 594 Sales 08 590 05 185 Switzerland Geneva International Access Code 00 Country Code 41 City Code 22 Website support euro dell com E mail Tech_support_central_Europe dell com Technical Support for XPS portable computers only 0848 33 88 57 Technic...

Page 169: ...7 Thailand International Access Code 001 Country Code 66 Website support ap dell com Technical Support OptiPlex Latitude and Dell Precision toll free 1800 0060 07 Technical Support PowerApp PowerEdge PowerConnect and PowerVault toll free 1800 0600 09 Customer Care toll free 1800 006 007 option 7 Corporate Sales toll free 1800 006 009 Transaction Sales toll free 1800 006 006 Trinidad Tobago General...

Page 170: ...stomer Care 01344 373 186 Home and Small Business Customer Care 0870 906 0010 Corporate Customer Care 01344 373 185 Preferred Accounts 500 5000 employees Customer Care 0870 906 0010 Central Government Customer Care 01344 373 193 Local Government Education Customer Care 01344 373 199 Health Customer Care 01344 373 194 Home and Small Business Sales 0870 907 4000 Corporate Public Sector Sales 01344 8...

Page 171: ...55 Employee Purchase Program EPP Customers toll free 1 800 695 8133 Printers and Projectors Support toll free 1 877 459 7298 Public government education and healthcare Customer Service and Support toll free 1 800 456 3355 Employee Purchase Program EPP Customers toll free 1 800 695 8133 Dell Sales toll free 1 800 289 3355 or toll free 1 800 879 3355 Dell Outlet Store Dell refurbished computers toll...

Page 172: ...172 Contacting Dell ...

Page 173: ...f a program or data file on a floppy CD DVD or hard drive As a precaution back up the data files from your hard drive regularly battery A rechargeable internal power source used to operate portable computers when not connected to an AC adapter and an electrical outlet battery life span The length of time years during which a portable computer battery is able to be depleted and recharged battery op...

Page 174: ...ten to a CD RW disc and then erased and written over rewritten CD RW drive A drive that can read CDs and write to CD RW rewritable CDs and CD R recordable CDs discs You can write to CD RW discs multiple times but you can write to CD R discs only once CD RW DVD drive A drive sometimes referred to as a combo drive that can read CDs and DVDs and write to CD RW rewritable CDs and CD R recordable CDs d...

Page 175: ... digital versatile disc A high capacity disc usually used to store movies DVD drives read most CD media as well DVD drive A drive that uses optical technology to read data from DVDs and CDs DVD player The software used to watch DVD movies The DVD player displays a window with buttons that you use to watch a movie DVD R DVD recordable A recordable version of a DVD Data can be recorded only once ont...

Page 176: ...rious ways such as alphabetically by date and by size format The process that prepares a drive or disk for file storage When a drive or disk is formatted the existing information on it is lost FSB front side bus The data path and physical interface between the processor and RAM FTP file transfer protocol A standard Internet protocol used to exchange files between computers connected to the Interne...

Page 177: ...ociated with a specific device such as a serial connector parallel connector or expansion slot and allows the processor to communicate with that device IrDA Infrared Data Association The organization that creates international standards for infrared communications IRQ interrupt request An electronic pathway assigned to a specific device so that the device can communicate with the processor Each de...

Page 178: ...evice that allows your computer to communicate with other computers over analog telephone lines Three types of modems include external PC Card and internal You typically use your modem to connect to the Internet and exchange e mail module bay A bay that supports devices such as optical drives a second battery or a Dell TravelLite module monitor The high resolution TV like device that displays comp...

Page 179: ...ug and Play provides automatic installation configuration and compatibility with existing hardware if the BIOS operating system and all devices are Plug and Play compliant POST power on self test Diagnostics programs loaded automatically by the BIOS that perform basic tests on the major computer components such as memory hard drives and video If no problems are detected during POST the computer co...

Page 180: ... your computer when you access Dell Support at support dell com or when you call Dell for customer service or technical support setup program A program that is used to install and configure hardware and software The setup exe or install exe program comes with most Windows software packages Setup program differs from system setup shortcut An icon that provides quick access to frequently used progra...

Page 181: ...ing voice data fax and video text editor A program used to create and edit files that contain only text for example Windows Notepad uses a text editor Text editors do not usually provide word wrap or formatting functionality the option to underline change fonts and so on travel module A plastic device designed to fit inside the module bay of a portable computer to reduce the weight of the computer...

Page 182: ...motive force One V appears across a resistance of 1 ohm when a current of 1 ampere flows through that resistance W W watt The measurement of electrical power One W is 1 ampere of current flowing at 1 volt WHr watt hour A unit of measure commonly used to indicate the approximate capacity of a battery For example a 66 WHr battery can supply 66 W of power for 1 hour or 33 W for 2 hours wallpaper The ...

Page 183: ...ve A high capacity floppy drive developed by Iomega Corporation that uses 3 5 inch removable disks called Zip disks Zip disks are slightly larger than regular floppy disks about twice as thick and hold up to 100 MB of data ...

Page 184: ...184 Glossary ...

Page 185: ...s 93 CD RW drive problems 94 CDs about 54 operating system 14 playing 51 Check Disk 94 cleaning touch pad 151 coin cell battery replacing 131 computer crashes 101 restore to previous operating state 113 slow performance 95 102 specifications 137 stops responding 101 conflicts software and hardware incompatibilities 112 connecting audio device 57 Mobile Broadband network 84 TV 57 copying CDs genera...

Page 186: ...installing 111 Drivers and Utilities CD 111 drives problems 93 See hard drive DVD drive problems 93 DVDs about 54 playing 51 DVI monitor connector description 24 E End User License Agreement 11 ergonomics information 11 error messages 96 ExpressCards blanks 71 73 installing 71 removing 73 slot 22 F fan description 20 22 23 27 Files and Settings Transfer Wizard 30 firewall Windows XP 86 floppy driv...

Page 187: ... messages error 96 Microsoft Windows label 12 Mini Card installing 126 Mini Card cover description 27 Mobile Broadband WWAN network connections 84 modem installing 124 modem connector description 24 monitor problems 109 switching the video image 37 N network firewall 86 problems 103 network connector description 24 numeric keypad 39 O operating system CD 14 reinstalling 14 reinstalling Windows XP ...

Page 188: ... 113 scanner 107 slow computer performance 95 102 software 101 102 sound and speakers 107 speaker 107 spyware 95 102 video and monitor 109 Product Information Guide 11 Q QuickSet 40 41 49 56 R RAM See memory regulatory information 11 reinstalling Windows XP 113 resolution setting 38 ResourceCD Dell Diagnostics 89 S S PDIF digital audio enabling 69 safety instructions 11 scanner problems 107 screen...

Page 189: ...te 113 turning off your computer 117 TV connecting 57 enabling display settings 70 U uninterruptible power supply See UPS UPS 34 USB connectors description 24 V video problems 109 video connector description 25 volume adjusting 107 W warranty information 11 Windows XP Device Driver Rollback 111 enabling display settings for a TV 70 Files and Settings Transfer Wizard 30 Hardware Troubleshooter 112 ...

Page 190: ...90 Index 190 Index ...

Reviews: