Profiler User Guide
4-50
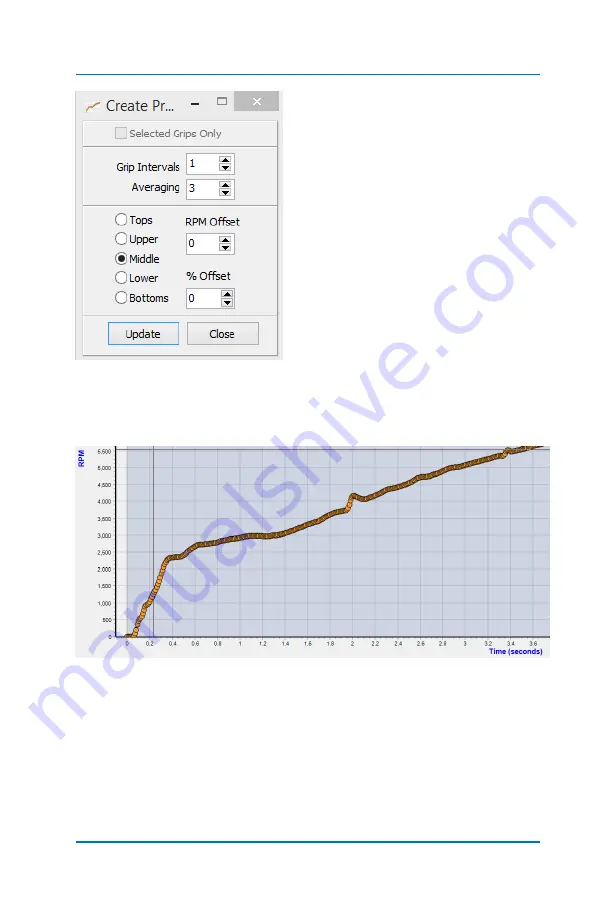
The “Create Profile” window has
some options to choose from. The
settings shown are a good starting
point. The location options (Tops,
Upper, etc.) are typically used if you
have several runs open and you
want the Profile to be created at the
upper or lower range of those files
as it averages them. You can try
changing the settings to get a feel of
how it works.
RPM
Offset
will offset
in 10 RPM increments. If you want
to move more than 10, select
“Cancel” on the Warning popup
menu until you get where you want, then select “
Ok
” and the
adjusted Profile will be displayed. You can also
Offset
by a
%
value if
you choose.
You can see there’s a dip in driveshaft speed
in this example at .5
seconds. You might want to smooth that out a bit to have a
smoother driveshaft RPM.
To do this, there are a couple of methods you can use. The first step
is to
select the “grips” in th
e range of the dip. Start at .3 seconds,
Summary of Contents for Profiler
Page 1: ......
Page 76: ...Profiler User Guide 4 30...
Page 124: ...Profiler User Guide Appendix 15 6 Click Advanced Options 7 Click Windows Startup Settings...
Page 138: ...Profiler User Guide Appendix 29...
Page 139: ...Profiler User Guide Appendix 30...
Page 140: ...Profiler User Guide Appendix 31...
Page 141: ...Profiler User Guide Appendix 32...
Page 142: ...Profiler User Guide Appendix 33...
Page 144: ...Profiler User Guide Appendix 35...
Page 145: ...Profiler User Guide Appendix 36...
Page 146: ...Profiler User Guide Appendix 37...
Page 147: ...Profiler User Guide Appendix 38...
Page 148: ...Profiler User Guide Appendix 39...
Page 149: ...Profiler User Guide Appendix 40...
Page 150: ...Profiler User Guide Appendix 41...
Page 151: ...Profiler User Guide Appendix 42...
Page 152: ...Profiler User Guide Appendix 43...


